

BombMaster Complete Guide — Controls, 25 Bombs, 25 Monsters, 10 Worlds and Items Explained

Drop the bomb, smash the bricks,
and escape before the Reaper
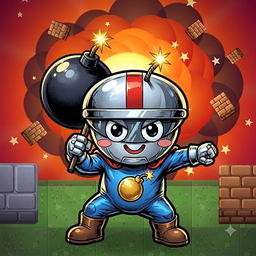
A little bomb soldier named Bombi, with a lit fuse sparking on top of his helmet, stands in the middle of a huge maze. Bricks block the way, so you blast them. Monsters rush in, so you blast them too. Reach the blinking red EXIT and the stage is over. Hesitate, and a Reaper comes through the walls after you.

This is the complete BombMaster guide. It covers the controls and the screen, the rules of a stage (time limit, exit, Reaper), 25 bombs and 25 monsters, the walls, floors and hazards along the way, five random incidents, ten worlds and their weather, items and H-Items, score, stars and rewards, the bonus game and the Daily Challenge — everything inside the game, in order. Every name and number was checked against the game’s source, and on-screen wording is quoted exactly as the English version shows it. It is long, so take your time. If you are new, you can jump straight to eight tips for first-time bombers and the FAQ at the bottom.
- At a glance — what kind of game is BombMaster?
- The screen — where to look
- Controls — the joystick and the red button
- The rules of a stage — exit, time limit, Reaper
- Maps — ten shapes and a fair path
- Life and damage — what hurts, and how much
- 25 bombs
- 25 monsters, plus the Reaper, bosses and the Treasure Goblin
- Along the way — walls, floors, hazards, zones
- Five random incidents
- Ten worlds, weather, day and night
- Items — good and bad
- H-Coins, the shop, 8 H-Items, skins
- Score, stars and rewards
- When you fall — continue and mercy
- Bonus bomb rush, Daily Challenge, bottom bar
- Endless difficulty — unlimited levels
- Settings and language
- Eight tips for first-time bombers, and the FAQ
At a glance — what kind of game is BombMaster?
BombMaster is a top-down bomb action game in portrait view. It takes the flavor of the classic bomb games and rebuilds it for phones: instead of running in one direction, you roam a big map that opens out in all four directions. One stage (called a zone in the game) is one map. Walk from the start to the exit that lies farthest away on foot and you clear it and move on to the next level.
- Goal — touch the blinking red dot (the exit) on the minimap. When you do, you are sucked into a vortex for 0.9 seconds and the stage ends.
- Weapon — bombs. The Basic Bomb is free and unlimited; the other 24 types are bought with H-Coins.
- Enemies — 25 monsters, plus the Reaper that shows up if you linger. Bricks and stone pillars block the way.
- The end — there isn’t one. Every 10 levels a boss (the Ogre King) appears, and past level 45 the stages keep getting harder.


The hero is Bombi. The store description reads “Guide Bombi through huge mazes”, and a note in the source describes him as “big helmet, big eyes, red scarf, blue overalls, with the fuse spark on top of the helmet as his trademark”. The default outfit is blue overalls with a white helmet, red stripe and scarf, and the shop sells 6 outfits and 6 blast colors (Chapter 13).
The screen — where to look
The screen is tall. The top shows status, the middle is the map, and the bottom is where your thumbs live. When a stage opens, a short line at the top introduces the free bomb you get for this zone and then fades (for example: NEW · Gravity Bomb — Slows and pulls enemies, then a round blast. Double damage.).

- Level — top left, the number of the current stage.
- Clock — top center. The time you have left counts down in seconds:hundredths. When it runs out you fall (Out of time).
- Score — top right.
- Distance to the exit — the big number is the distance left to the exit (m), the small line below is your total and best distance, and the right edge shows the zone number and world name, such as Zone 5 · Forest.
- Life gauge — starts at 100% and drops every time you are hit (Chapter 6).
- H-Coins — your wallet. Coins you pick up fly in and pile up here.
- Minimap — the whole stage. The yellow dot is you, the blinking red dot is the exit (EXIT), and hearts show as pink dots.
- Exit arrow — when the exit is off-screen, an arrow and a distance readout appear at the screen edge.
- Bomb picker — the bomb you have selected and how many are left (∞ for the Basic Bomb). Tap it to open the picker.
- Joystick — bottom left. The red button in the middle is the bomb.
- Settings — the gear button.
- Item — opens the H-Item window (the shield with an H on it).
- Hearts on the map — a glowing red heart refills your life.
The bottom bar (HOME · MISSION · ACHIEVE · ITEM · SETUP · MORE) is a home-screen menu and is hidden during a stage (Chapter 16).
Controls — the joystick and the red button
The controls are built to be played with one hand. Your finger only ever does two things: walk and drop a bomb.
On the faint idle joystick at the bottom left, tap an arrow to take one step and hold it to keep walking. When you let go, you finish the walk to the middle of the tile you were heading for, which gives a crisp tile-by-tile feel. You can also drag on any empty part of the screen and a joystick appears right there — your finger never covers the hero. There are four directions (up, down, left, right), the dead zone is 0.22, and you walk 3.6 tiles per second. The top 16% of the screen (the status bar) is not a touch area.
Tap the red button in the middle of the joystick (the button radius is 33% of the joystick), or tap the hero. You can walk with one finger and tap the hero with another to drop a bomb. Tapping empty screen does nothing — that is deliberate, so you never drop a bomb or take a step by accident.


On levels 1 to 3 these three tutorial bubbles appear in order. They advance only when you really walk (movement) and really drop a bomb (bomb), and each one is shown just once (you can bring them back with Replay tutorial in the settings). When you drop your first bomb you see Drop a bomb next to the bricks!, and the first time a new monster appears, a NEW MONSTER card shows up with a one-line tip.
The basic rules of a bomb
- Fuse 2.4 s (Basic Bomb). During the last 0.9 s the tiles that are about to blow turn orange — just step out of them.
- Up to 5 at once, raised to 9 by the Bomb Up item. At the limit you see Bomb limit reached.
- Blast range is 2 tiles (a cross), up to 6 with Fire Up.
- Your own blast hurts you. Drop it, then get out of the line — Drop it, then get out of the line! At 3.6 tiles a second you can run a bit over 8 tiles during the basic fuse, and maps are built so that “for every brick on the path, you can drop a bomb and reach cover within 6 steps”.
- Bombs can be kicked. Walk into a dropped bomb and you kick it (Walk into a bomb to kick it).
- Other people’s blasts hurt too. A Goblin Bomber’s bomb, Bomb Rain, Bomb carpet — whatever the name, a blast is a blast (30 damage).


The bottom-left and bottom-right windows
If you own several bombs, tap the bomb picker button at the bottom left to open a window. It shows the free bombs for this zone, the Basic Bomb, the bombs you own, and the ones you have not bought yet (with price and unlock level) on one screen. The Item button at the bottom right opens the H-Item window. The game is paused while a window is open — take your time.


Depending on the situation, one more button appears by your right thumb — BOOM! when a Remote Bomb is on the ground (tap to detonate), or DASH when you hold a Dash item (2.3 tiles in 0.18 s, invincible while you dash, 3 uses per item).
The rules of a stage — exit, time limit, Reaper
Touch the exit and you are done
The exit is the blinking red dot on the minimap, and it sits farthest from the start on foot. Step within 0.45 tiles of the center of the exit tile and you clear the stage. A vortex plays, the star lines pop up one by one (Chapter 14), and then the result window opens.


Time limit
Every stage has a time limit, set to fit the length of that map.
“Path steps” is the number of steps on the shortest route from the start to the exit, and “bricks to smash” is the number of bricks blocking that route. Level 1 has a 36-step route with 1 brick, so it gets 61 s. On top of that, every time you cut the distance to the exit by another 20%, you get +15 s (at 20, 40, 60 and 80% — 60 s in total), like an arcade time extend. Stand still and the clock only shrinks; head for the exit and it grows.
The Reaper
After a certain time into the stage, THE REAPER IS COMING! flashes and the Reaper appears behind you. It arrives at 30 + steps × 0.9 + bricks × 3.5 seconds (between 40 and 120 s, 20% earlier late in the unlimited levels, +10 s per mercy step). On level 1 that was 66 s, on level 28 it was 93 s.


- It passes through walls and cannot be killed by bombs.
- Touching it does not hurt. It will not come within 1.5 tiles and just hovers at that distance, following you — the closer it gets, the redder the screen and the stronger the heartbeat shake and vibration. The screen does the threatening; what it really costs you is time.
- Its speed starts at 1.4 tiles per second and rises by 0.025 every second up to a cap of 2.6. That is always slower than your 3.6.
- One more appears every 25 seconds, up to three.
- Ice Bomb, Flash Bomb and the Ice Wave (item) stop it.
So the rule is simple: open the path with bombs, but never stop to sightsee.
Maps — ten shapes and a fair path
A BombMaster stage is one big map. It is not a strip that runs sideways but opens in every direction: you start at one end and the exit is the farthest point on foot. There are ten map shapes — Wide, Tall, Square, Circle, Diamond, Cross, Ring, Cave, L-shape and Rooms.
| Level | Shape | Note |
|---|---|---|
| 1 | Wide | A learning stage — a familiar direction (for example a 33×17 box) |
| 2 | Tall | |
| 3 | Circle | |
| 4 | Cross | For example a 31×31 box |
| 5 | Rooms | |
| 6 | Ring | |
| 7 | Diamond | |
| 8 | Cave | |
| 9 | L-shape | |
| Multiples of 10 | Square · Circle · Cross | Boss stages — only shapes with a wide yard |
| Everything else | Picked by the level seed | Never the same shape as the stage right before |
- Size — the number of tiles inside the shape is 420 + 40 × (level − 1), capped at 1,020 tiles from level 16. Boss stages get +100 tiles.
- Distance (m) — the length of a stage is 36 + 3 × (level − 1), capped at 72 m from level 13 (+14 for bosses). The distance you cover toward the exit piles up as your “total distance”.
- Same map — the same (level, mercy step) always gives the same map. Losing does not change the map, so memorize the route you saw last time and you will win.
- Fairness check — every map must pass a check when it is generated: (1) there is a path to the exit, (2) for every brick on the path you can drop a bomb and reach cover within 6 steps, (3) the 5×5 around the start and the 3×3 around the exit are open ground. That is why there are no dead-end maps and no maps where you get hit right at the start.
Life and damage — what hurts, and how much
Instead of three hearts you have a life gauge of 100. To make “I only got hit a little” visible, each cause hits with a different weight. After a hit you are invincible for 1.6 s (0.8 s for fire and steam), so the same flame cannot hit you twice in a row.
| Cause | Damage | Message shown when you fall |
|---|---|---|
| Touching an enemy | 20 (boss and Titan Ogre ×1.5, Ogre ×1.25) | Touched an enemy |
| Someone else’s blast / your own blast | 30 | Caught in a blast · Caught in your own blast |
| Fire Imp’s self-destruct | 30 | A kamikaze exploded |
| Ogre King’s stomp | 30 | Stomped by the Ogre King |
| Shot, spikes, car, saw | 25 | Hit by a shot · Spikes! · Hit by a car · Cut by a saw |
| Lightning | 35 (the biggest, because the warning is long enough to dodge) | Struck by lightning |
| Steam (vent) | 10 (ticks while you stand in it) | Burned by a vent |
| Stepping in fire | 8 (tick) | Stepped into fire |
| Time up | 100 | Out of time |
| The Reaper | 0 | It cannot hurt you |


- Recovery — a big heart gives +50, a small heart +33. Each stage places 1–2 hearts in fixed spots (away from the main path), glowing red. When you are revived, your life is refilled to 50.
- Shield — a Shield item blocks one hit, stacks up to 3 layers and takes hits before your life does. The H-Shield blocks three hits per zone.
- When you fall — with an H-Revive you come back on the spot after 0.9 s; without one, the result window opens (Chapter 15).
25 bombs
Bombs are not just recolored skins. Each of the 25 differs from the others in at least two or three of: shape, distance, piercing, movement, element, lingering effect and fuse. The Basic Bomb (2.4 s, 2-tile cross, 1 damage) is the baseline, and the rest are all read against that row.

| Bomb | Unlock | Price | Fuse | One-line description shown in game |
|---|---|---|---|---|
| Basic Bomb | Lv1 | Free | 2.4 s | Free and unlimited. Cross blast, 2 tiles. |
| Mini Bomb | Lv1 | 20 | 1.3 s | Fast fuse, 1 tile. Doesn’t count toward your bomb limit. |
| Big Bomb | Lv2 | 45 | 3.0 s | Slow but huge: 4 tiles plus a 3×3 core. Double damage. |
| Long Bomb | Lv2 | 35 | 2.4 s | Left and right only, 6 tiles. Pierces one brick. |
| Cross Bomb | Lv3 | 40 | 2.4 s | All four ways, 4 tiles. Pierces one brick. |
| Line Bomb | Lv3 | 40 | 2.4 s | 9 tiles in the way you face. Drills through all bricks. |
| Circle Bomb | Lv4 | 45 | 2.6 s | Round blast, diagonals too. Walls block it. |
| Fire Bomb | Lv4 | 50 | 2.4 s | Leaves fire for 3.5 s. Enemies walking in burn. |
| Ice Bomb | Lv5 | 50 | 2.4 s | Freezes enemies for 3.5 s. Frozen ones can’t hurt you. |
| Shock Bomb | Lv5 | 55 | 2.4 s | Lightning jumps to 4 more enemies nearby. |
| Chain Bomb | Lv6 | 55 | 2.0 s | Sets off every bomb within 6 tiles at once. |
| Sticky Bomb | Lv6 | 55 | 1.8 s | Thrown 4 tiles. Sticks to the first enemy it hits. |
| Remote Bomb | Lv7 | 60 | None (goes off by itself after 10 s) | No fuse. Tap DETONATE when the time is right. |
| Bounce Bomb | Lv7 | 55 | 3.0 s | Hops forward a tile every 0.35 s, turning at walls. |
| Rolling Bomb | Lv8 | 55 | 3.0 s | Rolls ahead until it hits something. Blows up on enemies. |
| Drill Bomb | Lv8 | 75 | 2.4 s | 6 tiles ahead and breaks even stone pillars. |
| Magnet Bomb | Lv9 | 70 | 2.6 s | Pulls enemies within 4 tiles in before it blows. |
| Gravity Bomb | Lv10 | 80 | 2.8 s | Slows and pulls enemies, then a round blast. Double damage. |
| Split Bomb | Lv11 | 75 | 2.4 s | After the blast, 4 mini bombs pop out diagonally. |
| Cluster Bomb | Lv12 | 85 | 2.4 s | Scatters 6 bomblets within 3 tiles. |
| Flash Bomb | Lv13 | 50 | 1.6 s | Weak blast, but stuns every enemy within 6 tiles for 3 s. |
| Meteor Bomb | Lv14 | 100 | 2.0 s | A marker 3 tiles ahead — a meteor falls 2 s later. Breaks stone. |
| Poison Bomb | Lv15 | 55 | 2.4 s | Leaves gas for 4 s: enemies slow down and take damage. |
| Laser Bomb | Lv16 | 95 | 2.0 s | Beams all four ways until stone. Double damage. |
| Black Hole | Lv18 | 130 | 3.2 s | Sucks in everything within 5 tiles, then a massive blast. |
“Price” is the base price in H-Coins. As the stages get deeper, the same bomb gets more expensive (up to 1.8× depending on level). Coin income, on the other hand, grows with level up to 2.5×, so what the same coins can buy grows gently.
How to get bombs
- Free bombs per zone — every stage gives you 3 bombs (4 on boss stages) picked by the stage generator, free of charge. They are chosen to work well on the first new monster you meet in that stage, so you can learn by using them. Pick up a Bomb Crate item and you get one more free bomb for this zone.
- Buy in the shop — the 24 bombs other than the Basic Bomb cost H-Coins. You can hold up to 9 of each type, and one is used up each time you drop it. Bombs that are not unlocked yet can be bought early at three times the price (Lv18 ×3), and from the unlock level on they cost the normal price.
- Ads — if you are short of coins, Watch an ad to buy this item? appears, and if you watch to the end you get it without paying coins.


Elements and weak points
Bombs have elements (fire, ice, shock, poison, flash, gravity, laser, drill, meteor, and force for the Big Bomb), and each monster takes ×2 damage from a weakness and ×0.5 from a resistance. It is a choice, not a forced answer — the Golem is weak to Drill, Big and Meteor and strong against fire, while the Mummy is weak to fire. The last column of the monster table (Chapter 8) carries the source’s matchup list.


Catch several at once and you see 3 AT ONCE!; a bomb chain shows CHAIN ×2!; and if you keep killing within 2.6 seconds the count stacks up, like COMBO ×3 (Chapter 14).
25 monsters, plus the Reaper, bosses and the Treasure Goblin
The monster book lists 25 monsters (the Mini Slime that a Slime splits into, and the Reaper, are outside the book). HP is simply how many hits it takes — the Basic Bomb does 1 damage. Chasing enemies are always made slower than you (at most 2.8 < 3.6), so there is no stage you cannot flee from just because something is fast. Difficulty rises through kinds and numbers, not speed.

| Monster | HP | Speed (tiles/s) | First seen | Score | One-line tip (shown in game) | Bombs that work well |
|---|---|---|---|---|---|---|
| Slime | 1 | 1.4 | 1 | 100 | Walks straight, turns at walls. | Cross · Rolling · Mini |
| Zombie | 1 | 1.3 | 1 | 120 | Patrols corridors, turning at crossings. | (weak to fire) |
| Rat | 1 | 3.0 | 2 | 150 | Very fast but fragile. Ice slows it. | Ice · Circle · Gravity |
| Skeleton | 1 | 1.6 (chasing 2.5) | 2 | 200 | Follows you once it sees you — but it’s slower than you. | Sticky · Fire · Rolling |
| Beetle | 1 | 2.1 | 4 | 150 | Moves in zigzags. Predict its next step. | Ice · Circle · Gravity |
| Ogre | 3 | 1.1 (chasing 1.5) | 3 | 450 | Big and tough — 3 hits to bring down. Slow, but don’t let it corner you. | Big · Black Hole · Meteor |
| Spiders | 1 | 2.2 | 4 | 60 | A pack of four. Round blasts catch them all. | Circle · Cluster · Shock |
| Goblin Bomber | 2 | 1.5 | 5 | 300 | Drops its own bombs, then runs. Keep your distance. | Remote · Long |
| Toad | 1 | 1.5 | 5 | 250 | Leaps two tiles — even over walls. | Circle · Gravity |
| Bat | 1 | 1.8 | 6 | 250 | Flies over bricks and bombs. Shock and Meteor work best. | Meteor · Shock |
| Mummy | 2 | 1.0 (chasing 1.4) | 6 | 300 | 2 HP. Spots you from far away and never gives up. Fire works well. | Fire · Cross |
| Golem | 3 | 1.0 | 7 | 300 | 3 HP and pushes bombs away. Big or Drill bombs hit hard. | Big · Drill · Cluster |
| Skeleton Archer | 2 | 1.1 | 7 | 300 | Glows, then fires along its row or column. Step aside. | Laser · Bounce |
| Big Slime | 2 | 1.4 | 8 | 250 | Splits into two small ones when it falls. | Cluster · Split · Poison |
| Skeleton Knight | 2 | 1.3 | 9 | 300 | Blocks blasts from the front. Hit it from behind or use round blasts. | Laser · Circle · Meteor |
| Werewolf | 2 | 1.8 (chasing 2.8) | 9 | 450 | 2 HP. Lunges when it sees you — still slower than you. Ice stops it. | Ice · Flash · Sticky |
| Fire Imp | 1 | 1.2 (charging 3.4) | 11 | 200 | Shakes, charges, and explodes next to you. Bomb it first. | Remote · Line |
| Ghost | 2 | 1.1 (chasing 1.6) | 12 | 350 | Drifts through walls. Safe inside stone — catch it in the open. | Remote · Flash · Ice |
| Man-eater Plant | 2 | 0 | 13 | 250 | Stays put. Spikes shoot out around it after a warning. | Long · Line · Laser |
| Mole | 1 | 1.3 (bursting out 2.4) | 14 | 300 | Hides underground and bursts out when you come close. | Fire · Poison |
| Mimic Chest | 2 | 3.0 | 15 | 350 | Copies your moves. Stop, and it stops. | Fire · Poison |
| Dark Wizard | 2 | 1.0 | 16 | 400 | Pulls you along its line and steals coins. Walk away. | Magnet · Remote · Shock |
| Ogre King (boss) | 6 | 0.9 (chasing 1.3) | Multiples of 10 | 1,500 | Boss. 6 HP. Raises a foot before it stomps — step back. | Big · Black Hole · Meteor |
| Titan Ogre | 10 | 0.55 (chasing 0.8) | 4 | 1,200 | A giant! 10 HP, slow. Stomps a wide area after raising its foot — keep your distance. | Big · Black Hole · Meteor |
| Treasure Goblin | 4 | 1.6 (fleeing 2.7) | 2 | 500 | Runs from you and drops coins each hit. Catch it in 25 s! | Ice · Sticky |
“First seen” is the level where that monster starts to appear. When it first shows up it comes alone from far away and is introduced with a NEW MONSTER card (levels 1–3). Score is the base kill score (Chapter 14). A 1-HP monster dies to a single bomb; the Big Bomb, Gravity and Laser do 2 damage, Meteor and Black Hole 3, the Drill 1.5 and Ice 0.5.


The special guests
- Ogre King — appears only on the boss stage in front of the exit, every 10 levels. 6 HP (six Basic Bombs, three Big Bombs). It is slow, but if you get close it gives a 0.8 s warning and then stomps (30 damage, ×1.5 on touch) and pushes bombs away. Beat it and you see BOSS DOWN!; the stage’s clear coins get +20.
- Titan Ogre — appears without fail once on level 4, and after that on 45% of stages (75% late in the unlimited levels). It is 2.6 tiles wide with 10 HP. When it gets close it raises its foot for 0.8 s and then rolls across a radius of 2.4 tiles. Meeting one is an event — keep your distance and use Big, Black Hole or Meteor.
- Treasure Goblin — appears without fail once on level 2, and after that on 40% of stages. It does not hurt you. It runs when it sees you (2.7 < 3.6, so you can catch it), drops coins every time it is hit, gives 15 coins when it falls, and pops out of existence after 25 seconds (The goblin got away!). It is the guest that makes you ask “should I chase it now?”
- Elites — red, pulsing monsters mixed in a little from level 30. Their HP is ×1.5 + 1 (Slime 1→3, Ogre 3→6) and they drop double coins. Speed and attacks are unchanged — “the same Slime, but it takes three hits” is the flavor of the late game. They make up at most 40%, and bosses, Titan Ogres and Treasure Goblins never become elites.
- The Reaper — the pursuer from Chapter 4. 999 HP; bombs do not kill it.
Along the way — walls, floors, hazards, zones
Walls
| Wall | How to break it |
|---|---|
| Top and bottom border | Nothing breaks it |
| Stone pillar · rock | Only Drill, Meteor and Black Hole break it (every other bomb is stopped) |
| Brick · wooden crate | Any blast, in one hit (+10 points) |
| Steel crate | Two blasts. From level 4 the share of steel crates among the bricks grows 2% per level, up to 25% |
| Red explosive barrel | Explodes when hit and sets off the bombs and barrels next to it (chain: 60 points × depth) |
Floors and hazards
- Bushes (Forest) — you hide in them as you pass. Sand (Desert) — your walking speed drops to ×0.7. Ice (Snowfield) — you slide (the Ice Grip item stops that). Steam vents (Factory) — 10 tick damage while you stand there. Conveyors (Factory) — step on one and you are carried in one direction.
- Cars (City) — cars that run along road lanes. 25 on contact. Saws — saws that travel a fixed path, 25. Both come in the WATCH THE TRAFFIC zone.
- Lightning and gusts (Storm Zone, and rarely in other worlds after level 14) — lightning strikes after a warning mark appears (35), and gusts push you around.


Segments and their warning lines
A map is built from many segments about 9 tiles long — sized so that one character shows on each screen. After a strong segment, strong ones are drawn less often and a resting segment slips in so you can catch your breath. As a new kind of segment gets close, a one-line warning appears on screen.
| Warning | What the segment is |
|---|---|
| SAFE SPOT | The starting segment — no enemies, a few coins, a place to catch your breath |
| TREASURE ZONE | Coins in a row and good items (from level 3 also one bad item). A few weak enemies |
| ENEMY ARENA | From level 3. Enemies gather here |
| CHAIN ZONE | From level 3. Barrels in a row that go off all at once |
| WATCH THE TRAFFIC | From level 5. Cars and saws pass through (especially often in the City) |
| DARK ZONE | Your view narrows (especially often in the Night City) |
| LIGHTNING! | Lightning and gusts (especially often in the Storm Zone) |
| BOSS! | The boss arena where the Ogre King waits (every 10 levels) |
Five random incidents
In the middle of a stage, big letters suddenly appear in the center of the screen. The incident happens after a 1.6 s warning. The first one comes 18–26 seconds after the start (once you have moved at least 15% of the way toward the exit), and after that every 25–40 seconds. The same incident never comes twice in a row.

| Incident | First seen | What happens |
|---|---|---|
| Treasure rush! | Level 2 | Five coins are scattered (one is a big coin). There is no danger — only the choice of whether to fetch them. |
| Shells incoming! | Level 3 | Several bombs with a fuse of 1.8 s or more drop 3–7 tiles around you. Their shape and blinking are the warning. |
| Enemy wave! | Level 5 | Running enemies pop up 6–10 tiles away (they cannot hurt you for the 0.8 s they take to rise). |
| Lights out! | Level 8 | The screen goes dark for 7 seconds (no damage). |
| Bomb carpet! | Level 12 | A line of bombs goes off in turn over the 4 tiles in front of you. It is a single line, so stepping aside keeps you safe. |
Except for the treasure, getting through one without being hurt gives bonus coins (Survived! Bonus coins). Separately from incidents, 35 seconds without a hit also drops 2 coins.
Ten worlds, weather, day and night
The world changes every three stages. A random pick would give you no sense of “how far I’ve come”, so you start on grass and pass through the Forest, City, Desert, Snowfield, Ruins, Factory, Night City, Fire Zone and Storm Zone, then return to grass (1–3 Grassland → 4–6 Forest → 7–9 City → 10–12 Desert → 13–15 Snowfield → 16–18 Ruins → 19–21 Factory → 22–24 Night City → 25–27 Fire Zone → 28–30 Storm Zone → 31–33 Grassland again).


Day and night
Level 1 is 7 a.m., and each stage adds 1.6 hours, so fifteen stages make one full day. 6:00 to 17:30 is day, 17:30 to 20:00 is dusk, 20:00 to 4:00 is night, and 4:00 to 6:00 is dawn. At night your view narrows (more so in the Night City). Total darkness would mean “you die because you cannot see”, so the darkness has a cap.
Weather
| Weather | Shown as | In which worlds |
|---|---|---|
| Rain | Rain · slippery | Forest and Night City 45%, Ruins 30%, Grassland, City and Factory 25% |
| Snow | Snow · icy | Snowfield 80% |
| Gusts | Gusts | Desert 55%, Ruins 35% |
| Storm | Storm · lightning | Storm Zone 100% |
| Clear | Clear | The rest — and levels 1–2 are always clear (learning stages); the Fire Zone is always clear |
Items — good and bad
Items placed on the map take effect the moment you pick them up. Good items last a long time (8–30 seconds) and bad ones are short (5–10 seconds), so being caught by one ends in “just be careful”. Bad items start mixing in from level 3. The first two stages are for learning to “eat the good stuff” first. When you pick one up, a card shows its name, effect and remaining time.
21 good items

| Item | Lasts | First seen | Effect (shown in game) |
|---|---|---|---|
| Shield | One hit | 1 | Blocks one hit (up to 3 layers) |
| Speed | 15 s | 1 | Move faster (steps ×1.3) |
| Fire Up | Until the zone ends | 1 | Blast range +1 (up to 6 tiles) |
| Bomb Up | Until the zone ends | 1 | One more bomb at once (up to 9) |
| Remote | Next 3 bombs | 4 | Next 3 bombs: detonate at will |
| Fireproof | 15 s | 3 | Fire can’t hurt you |
| Ice Grip | 20 s | 5 | No sliding |
| Magnet | 18 s | 2 | Coins fly to you |
| Slow Time | 8 s | 4 | Enemies slow down |
| Invincible | 3 s | 1 | 3s: nothing can hurt you! |
| Double Coin | 20 s | 2 | Coins ×2 |
| Quick Fuse | 20 s | 3 | Bombs blow sooner |
| Dash | 3 uses | 3 | 3 dashes |
| Small Heart | Instant | 2 | Restores 1/3 of your life |
| Blast Preview | 30 s | 1 | See blasts before they happen |
| Electric Body | 3 s | 1 | 3s: enemies that touch you get shocked |
| Ghost Walk | 3 s | 2 | 3s: walk through walls and enemies |
| Ice Wave | 3 s | 3 | Enemies nearby freeze for 3s (within 8 tiles, Reapers too) |
| Genie Guardian | 4 s | 1 | 4s: a genie punches nearby enemies! |
| Bomb Rain | Instant | 2 | Bombs fall on nearby enemies! |
| Giant Mode | 5 s | 3 | 5s: grow huge, crush enemies and bricks! |


Item effects overwrite each other — Speed erases “Slow” and “Sticky Feet”, Quick Fuse erases “Slow Fuse”, and Fire Up erases “Small Blast”.
15 bad items

| Item | Lasts | First seen | Effect (shown in game) |
|---|---|---|---|
| Slow | 7 s | 3 | You move slower (steps ×0.62) |
| Weak Bomb | 10 s | 3 | Bombs deal half damage |
| Small Blast | 10 s | 3 | Blast range −1 |
| Heavy | 8 s | 4 | Slow to turn |
| Slow Fuse | 10 s | 4 | Bombs take longer |
| Fake Coin | 6 s | 5 | Gotcha! It was fake (steps ×0.8) |
| Reverse | 6 s | 6 | Controls reversed! |
| Sticky Feet | 6 s | 6 | Your feet stick (steps ×0.5) |
| Coin Drain | Instant | 6 | Lost some H-Coins (5 + level÷2) |
| Blind | 8 s | 7 | Vision shrinks |
| No Bombs | 5 s | 7 | Can’t drop bombs |
| Enemy Rush | Instant | 8 | Enemies incoming! (three running enemies 6–8 tiles away) |
| Fire Curse | 10 s | 9 | Fire lasts longer |
| Confusion | 6 s | 10 | Directions get mixed |
| Wild Blast | Next 3 blasts | 11 | Next 3 blasts are random |


Coins, hearts and the Bomb Crate

H-Coins, the shop, 8 H-Items, skins
H-Coins are the money of this game. You pick them up on the map, monsters drop them, you get them as a clear reward (5 + level÷2, +20 on boss stages, up to 2.5× depending on level), earn them in the Daily Challenge and the bonus game, and recharge them with ads. You spend them on bombs, H-Items, skins and continues.
8 H-Items
H-Items are special tools you buy before a stage and switch on from the Item window at the bottom right. You can hold up to 9 of each type, and the effect usually lasts for this zone and disappears when the zone ends. Their names are shown in English on every language.

| Name | Base price | Effect (shown in game) |
|---|---|---|
| H-Shield | 150 | Blocks 3 hits this zone. |
| H-OverBomb | 180 | 25 s: blast range +3, double damage, piercing. |
| H-Magnet | 120 | Coins fly to you for the whole zone. |
| H-Revive | 250 | Revives you on the spot when you fall. (Automatic as long as you own one) |
| H-Ghost | 200 | 10 s: walk through walls and enemies. |
| H-Chaos | 300 | 15 s: every bomb is bigger, chains and scatters bomblets. |
| H-Double | 160 | This zone: items you pick up last twice as long. |
| H-Nullify | 140 | This zone: bad items vanish with a pop. (NULLIFIED!) |


Skins
| Hero outfit | Price | Blast color | Price |
|---|---|---|---|
| Classic | Free | Classic | Free |
| Crimson | 300 | Violet | 250 |
| Forest | 400 | Emerald | 250 |
| Shadow | Watch Ad | Candy | Watch Ad |
| Frost | 600 | Starlight | 800 |
| Gold | 1,200 | Rainbow | 1,500 |
When you are short of coins
You can recharge with the ad button at the top of the shop, and if you are short of coins at the moment of buying, a window asks Watch an ad to get N coins? You can also recharge now and buy later (Still N short — saved for later).
Score, stars and rewards
| What you do | Score |
|---|---|
| Defeat a monster | The score set for that monster (60–1,500) × the combo multiplier |
| Combo | Stacks if you keep killing within 2.6 s. The value of each kill rises to 1 + 0.25 × (combo − 1) times, reaching 2× (the cap) from the 5th in a row |
| Smash a brick | 10 |
| Pick up a coin | 5 (each) |
| Bomb chain | 60 × chain depth (CHAIN ×2!) |
| Escape | Length of that stage (m) × 10 |
| Escape without a hit | 300 + 20 × level if you were never hit |
| Time left | Seconds left × 40 (a reason to clear fast) |
The three star lines
When you clear a stage, star lines pop up one at a time in front of the result window. Each of three conditions you meet gives one star, and your record is kept per level (the Daily Challenge does not record it).
- ★ No damage — never get hurt
- ★ Half the time — escape within half of the time limit
- ★ Smash bricks — smash at least 40% of the bricks that could be smashed at the start (at least 6; on maps with few bricks, all of them)
When you escape, you see distance and kills, like Escaped! 117m · 0 defeated, and if you beat your previous best distance, NEW RECORD! appears.
When you fall — continue and mercy

- Continue — come back to life on the spot by watching an ad or paying H-Coins. The price is 120 + level × 4 (120–350). It works once per zone, refills your life to 50 and gives you 20 more seconds (at least 20 s even if you fell because time ran out).
- With an H-Revive you come back without being asked, on the spot after 0.9 s.
- RETRY — the same level from the start. It is the same map.
- Mercy — after losing 3 times in a row, mercy step 1 (up to step 3) turns on from the next stage. Each step gives +10 s of time limit, +10 s before the Reaper, and a map of the same level with slightly fewer enemies. Clearing one stage resets the losing streak to zero.
Bonus bomb rush, Daily Challenge, bottom bar
Bonus bomb rush
Every five stages you finish (win or lose), a bonus game opens before the next stage. For 10 seconds, on a 7×9 yard, a bomb drops wherever you tap (fuse 0.45 s, 2-tile cross), and every crate you blow up gives coins. Tap to drop bombs — blow up the crates!
- One crate = 2 H-Coins, a gold crate is ×3, and a red barrel chains and blows up what is around it.
- When it ends, Bonus Round Over shows your total (for example H 52 from 18 crates × 2), and you choose Claim (52 H) or Watch ad for 2x (104 H).


Daily Challenge
- The Daily Challenge button on the home screen (Same map for everyone · +110 H-Coins). The date picks one map between levels 8 and 55, so everyone plays the same map.
- You can clear it once a day (Done today · N-day streak). If you fail, Daily Challenge failed — try again today! — and it does not count toward the losing streak (mercy).
- The reward is 80 + 30 × streak days (up to 7 days → 290 H-Coins). Every 7th day an H-Shield comes along as a gift (Streak bonus: free H-Shield!).
Bottom bar


The bottom bar is HOME · MISSION · ACHIEVE · ITEM (the shop) · SETUP · MORE. As its hint line says, +1 step = every 10 levels on the Achieve screen, and the ranks are ROOKIE · AMATEUR · CONTENDER · CAPABLE · SKILLED · EXPERT · VETERAN · ELITE · MASTER · GRANDMASTER · CHAMPION · LEGEND · HERO · MYTH · ETERNAL — fifteen in all.
Endless difficulty — unlimited levels
Size (stage 16), monster kinds (stage 16), steel crates (25%) and enemy density (stage 45) stop growing one after another, and past stage 45 the same stage would repeat. So from level 45 a curve that only approaches a cap is added — unlimited degree = 1 − e−(level−45)/80. It is 0.5 at level 100, 0.86 at level 200 and 0.99 at level 400.
- Enemy density up to +0.12, elite share up to 40% (already starting at level 30), Titan Ogre 45% → 75%, strong segments +40%, and the Reaper up to 20% earlier.
- Speed is not raised. It only gets harder through kinds and numbers.
- The breathing of the stages — it rises and falls within each block of 10 levels. The stage after a boss is ×0.8 to let you breathe, the next one ×0.9, and stages 7–9 before a boss press you at ×1.08.
Settings and language

- Vibration on/off, Reduce effects, Color-blind mode, Graphics (Low · Medium · High)
- Joystick height (Lower · default · Higher) and Joystick side gap — to fit your thumb
- Replay tutorial — brings back the level 1–3 hints and the new-monster cards.
- There are 10 languages: English, Korean, Chinese, Japanese, German, French, Russian, Spanish, Portuguese and Turkish. The game’s title is localized in Korean, Japanese, Chinese and Russian; in every other language it stays BombMaster.
Eight tips for first-time bombers, and the FAQ
- Drop it, then get out of the line. Your own blast does 30 too. The tiles about to blow turn orange in the last 0.9 s, so just step out of that line.
- Drop it next to the bricks. Bricks block the path, and every map is built with cover for each brick on the path.
- Don’t stop. The clock shrinks and the Reaper multiplies every 25 seconds. Every 20% you advance toward the exit gives +15 s.
- Try the zone’s free bombs first. They are picked to work on the stage’s new monster.
- Just run from the Reaper. It cannot hurt you, so don’t panic and head for the exit. Ice and Flash stop it.
- Spend your first coins on an H-Shield and a few bombs. Bombs that are not unlocked yet cost three times as much, so waiting for the unlock is cheaper.
- Bad items start at level 3. Reverse and No Bombs last only a few seconds, so save your bombs in the meantime.
- Do the Daily Challenge every day. Seven days in a row even earns you an H-Shield.
FAQ
| Can my own bomb hurt me? | Yes, for 30 damage. A Shield or Invincible blocks it. |
| Can I kill the Reaper? | No. Bombs do not kill it. Touching it does not hurt, but the time does. |
| What if I run out of bombs? | The Basic Bomb is unlimited. |
| Is it the same map after I lose? | Yes. After 3 losses in a row it changes to the mercy map. |
| What if time runs out? | You fall (100 damage). A continue gives you 20 more seconds. |
| Is there an end? | No. Past level 45 it keeps getting harder. |
| Can I do the Daily Challenge several times? | You can clear it once a day; if you fail, you can try again today. |
| Which bombs should I buy? | Look at the “Bombs that work well” column of the table in Chapter 8. |
Like the other games in the Master series, BombMaster is built for short, one-handed play. Which bomb will you carry into your next stage?
Light the fuse,
and run for the exit.

Play BombMaster now
Playing it is much faster than reading about it.
Find the other Master Series games all in one place at hanilab.app.
More from this game
 BombMaster Bounce Bomb vs Rolling Bomb: Three Interview Rounds
 BombMaster First Run in 8 Steps: From the Joystick to 3 Stars (Tutorial Order)
 BombMaster Traps: Five Mistakes That Lose You the Run (Cars, Saws, Lightning, Steam, Ice)
 BombMaster Item Duration Table: From Blast Preview 30s to Invincible 3s, Good and Bad
🌌 Universe stories
 Roddy Universe, Part 2 — Fallen Down, Only One Step Back at the Roadside
 Roddy Universe, Part 1 — One Beat Before Crossing, the Empty Road Between the Cars
 Bombi Universe, Part 2 — Behind You: The Reaper That Walks Through Walls
Try other games
 FindMaster
 LottoMaster
 TakMaster


