
BalanceMaster Complete Guide — Triangle Controls, Lever Math, 32 Animals, Combos, Weather and Items

Slide one triangle,
balance two animals
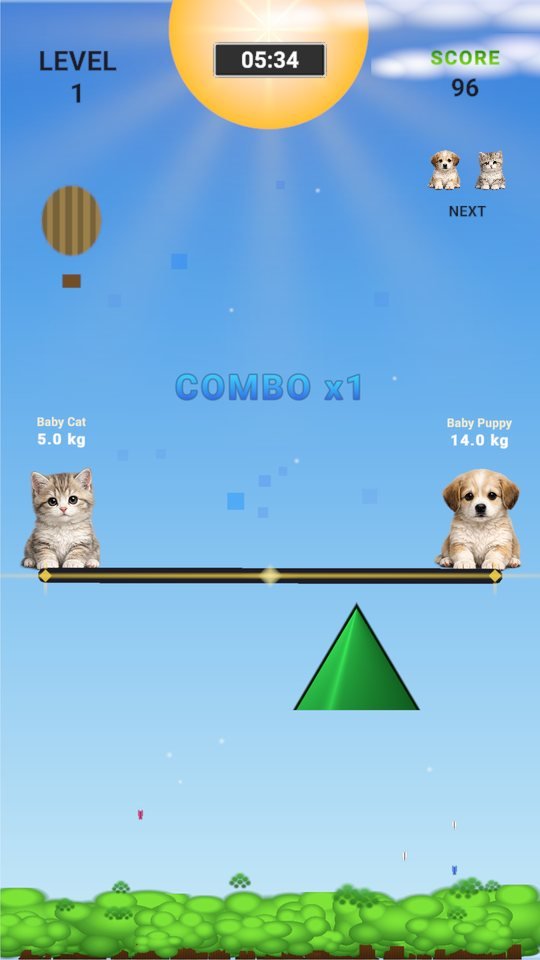
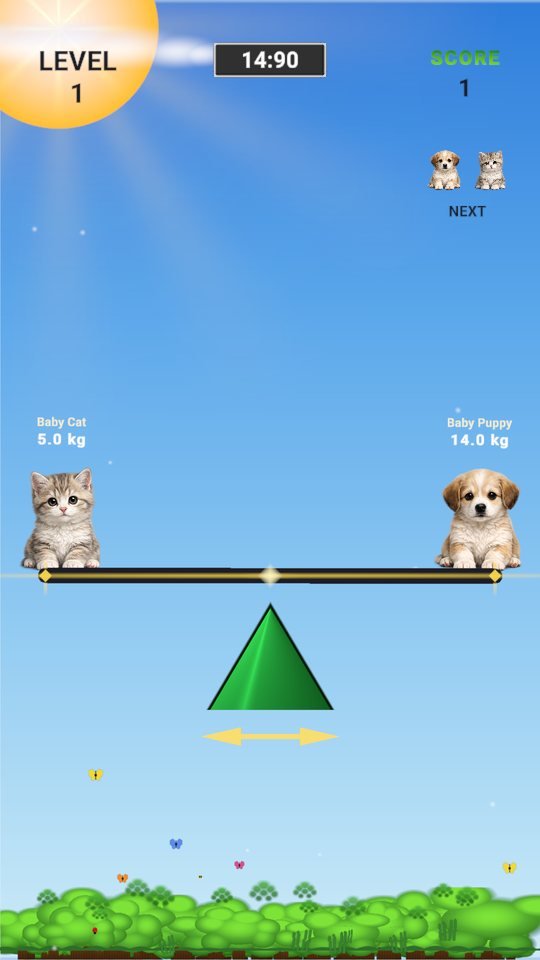
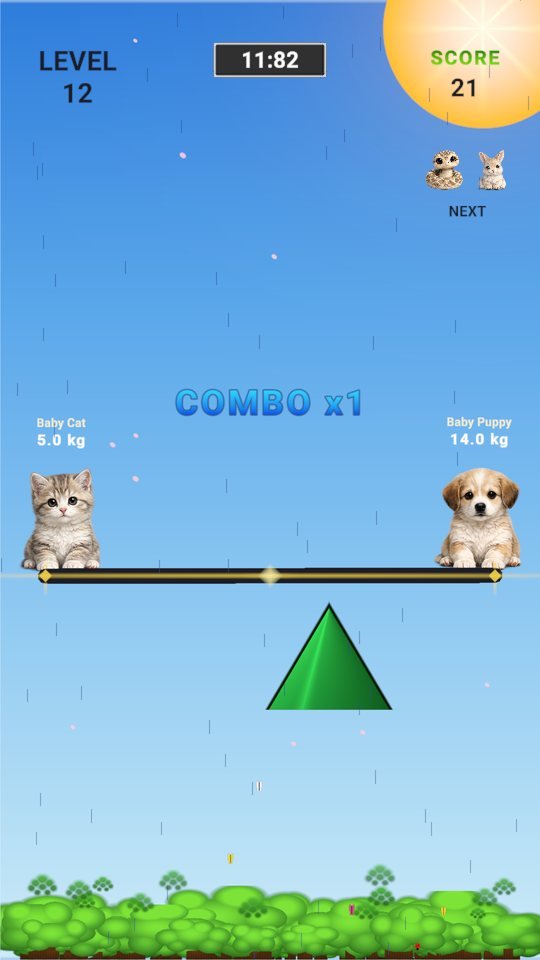
A baby cat sits on one end of a plank, a baby puppy on the other, and underneath there’s nothing but a small triangle. This BalanceMaster guide starts from a single line — drag the triangle with your finger toward the heavier side and the plank levels out. The catch: you can’t trust the weights printed on screen, and the plank keeps wobbling even when you do nothing.

This is the complete BalanceMaster guide. It walks through everything in the game, in order: the rules of a round and the screen layout, exactly what your finger does, the lever principle, the thirty-two animals and their hidden weights, scoring and combos, levels and difficulty, mid-round events like jumps and surprise drops, weather and special modes, the four items, the bonus game every 5 levels, and unlocks, missions and continuing. Every number was checked against the actual game code, and every photo is a screenshot from the real game. If you’re brand new, you can jump straight to six things for first-time players at the bottom.
- The rules of a round — level within ±4°, 15 seconds
- Screen layout — where to look
- Controls — drag the triangle
- The lever principle — toward the heavy side
- Thirty-two baby animals and their hidden weights
- Score and combos
- Levels and difficulty
- What happens mid-round — jumps, surprise drops, final alignment
- Hazards ① Weather — rain, snow, wind, lightning
- Hazards ② Twenty special modes
- Four items plus the record items
- Bonus game — a shower of coins every 5 levels
- Unlocks, ranks, daily missions, settings
- Clear, game over, continuing
- Six things for first-time players
The rules of a round — level within ±4°, 15 seconds
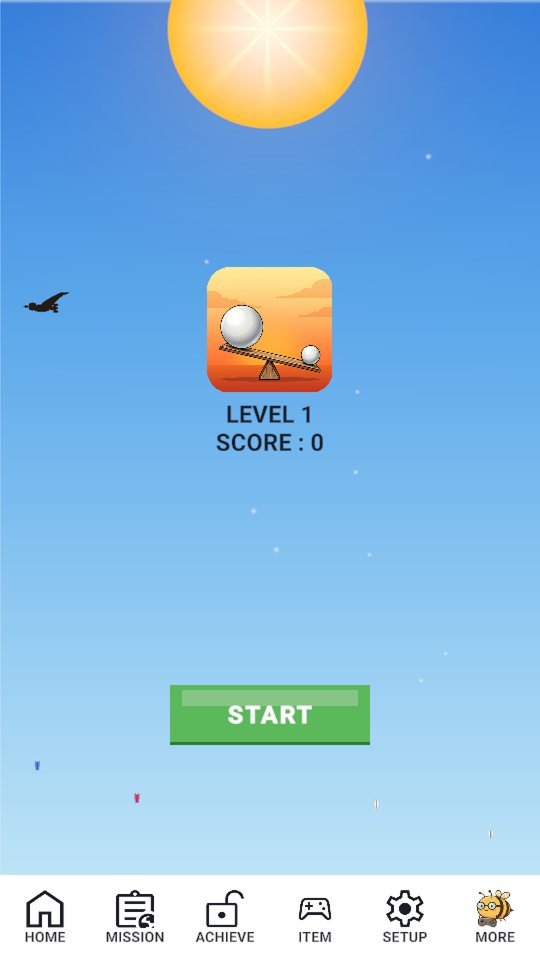
This start screen greets you when you open the game. Tap START and Level 1 begins right away (there’s no item picker in between). The rules are short.
- The plank rests on the triangle, with one baby animal on each end. The animals are stuck to the plank, so they never roll off.
- You clear the level if the plank is level (within ±4°) the moment the timer hits 0. Levels 1–5 give you 15 seconds; it gets shorter as you climb, bottoming out at 8 seconds after level 500.
- Not being level doesn’t mean instant failure. At 0 a final alignment window opens — 3.0 seconds on levels 1–5, 1.5 seconds at high levels — and the instant the plank gets level inside it, you clear.
- There’s exactly one way to fail: the window ends and the plank still isn’t level. The plank can tilt all the way to its 25° maximum without that counting as a loss. However badly it tilts along the way, only the final moment matters.
- There are no lives and no level cap. If you fail, you simply play the same level again.
How a round opens


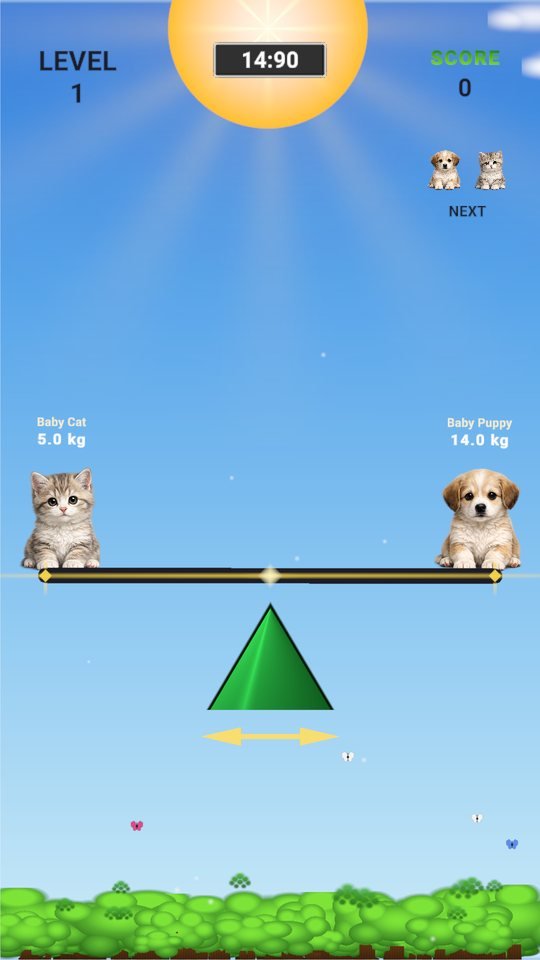
- “LEVEL N” — the text slides in from both sides over 0.5 seconds and lingers. Expect about a 1.5-second wait here.
- 3 → 2 → 1 — one second per number. Under each number, a line reading ○ players are challenging this level now pulses bigger and smaller. That player count isn’t a real headcount; it’s an estimate the game calculates from the level.
- The plank, triangle and both animals appear only after the countdown. There’s nothing to do before that.
- The timer at top center counts down as
SS:CC(seconds:hundredths). For the last 3 seconds it turns red and pulses every second. - When 75% of the timer has passed, the balance gauge drops down from the top (see the screen layout chapter).
- 0 seconds — if the plank is level you clear immediately; otherwise the final alignment window opens. A clear brings fireworks and the result screen.
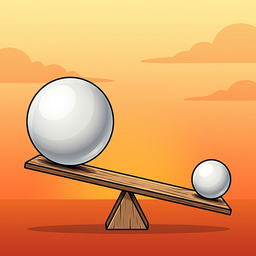
The two white balls on the icon don’t appear in the current game. What actually sits on the plank are thirty-two animals, each named “Baby ○○” (the animals chapter shows them all). One more thing — once a round starts, the bottom tabs (HOME · MISSION · ACHIEVE · ITEM · SETUP · MORE) hide. You can’t tap them during play; they come back on the clear or game over screen.
Screen layout — where to look

- Level — LEVEL N at the top.
- Score — the SCORE label and number. It rises while you hold on, and the combo multiplier is applied the moment you clear.
- Timer —
SS:CC. The moment it hits 0 is when you’re judged. - Next — the NEXT box shows the two animals coming in the next round, in miniature. About once every 10–15 rounds it’s hidden behind a ?. The preview is usually right, but it can be off when an animal gets swapped for having the same mass, or when an occasional extreme animal is slipped in.
- The plank and two animals — above each animal’s head float its name (cream) and a display weight (white). That weight has nothing to do with balance (see the animals chapter).
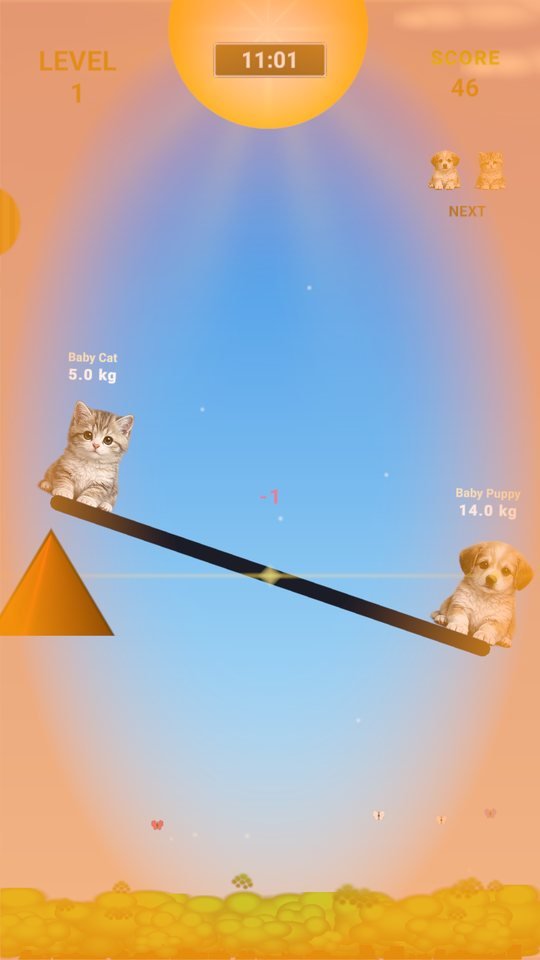
- Triangle fulcrum — the small triangle under the plank is the only thing you control in this game. It’s green when the plank is level and turns red the more it tilts (orange on the bright day theme).
- Yellow ↔ arrow — it blinks under the triangle to tell you “this moves left and right.” It disappears the first time you touch the triangle and comes back at the start of every round.
- Level reference line — a gold horizontal line with a ◆ in the middle. When the plank is within 3°, the ◆ lights up.
The balance gauge — it drops in at 75% of the timer
This was added later so players wouldn’t lose without understanding the rule. Once 75% of the timer has passed, a bar 560 wide and 18 tall drops down from the top of the screen.
- The green zone in the middle is the clear tolerance (±4°), and the white marker is the plank’s current angle (on a ±25° scale). The marker turns green inside the zone and yellow outside it.
- When the timer hits 0 and the final alignment window opens, the bar pulses red and a countdown of the remaining grace time runs to one decimal place, like Level it out! 2.6.

Besides the elements above, a few things appear during play only when needed: the combo popup (combo chapter), the NICE SAVE! text (combo chapter), and the icon of your equipped item (items chapter). The bottom tabs return only when the round is over.
Controls — drag the triangle
This game has no left/right buttons, no tilt buttons, and no phone-tilting controls. Your finger does exactly one thing — grab the triangle and drag it left or right.
Your touch has to start within roughly a quarter of the screen width of the triangle to grab it (precisely, 1.28 world units from its center). That’s generous, so you don’t have to hit the triangle dead-on. Touch too far away and nothing happens.
From the moment you grab it, your finger’s horizontal position becomes the fulcrum’s target. It keeps following even if your finger leaves the triangle. The fulcrum glides smoothly to the target and gets there in about 0.05–0.1 seconds.
When you lift your finger, the fulcrum stops right where it is. It doesn’t return to the center. The wobble keeps going after you let go, though, so even once you’ve found the spot it’s easier to keep your finger down and correct as needed.
- Only one finger counts (the first active touch). A second finger is ignored.
- The fulcrum can travel from −1 to +1 along the plank (left end to right end). If your finger goes further, it stops at the end.
- Even when the plank is tilted, the fulcrum moves along a line that tilts with the plank. Just follow the triangle where you see it.
- If you leave it alone, you lose. Starting 0.5 seconds into a round, the plank gets an irregular wobble that builds up over 2 seconds (see the lever chapter). Even with your finger parked on the perfect spot, the plank drifts slowly, so you have to keep making small corrections.
- The Android back button closes any open panel first; if none is open, it pauses the game and shows a quit confirmation.
There is no first-launch tutorial in the game. The only hint you get at first is the yellow arrow under the triangle. If you want to read more, the SETUP → Tutorial row opens a web manual (hanilab.app). The homepage explains it in this order: “Random animals appear on each side of the scale. → Drag the triangle fulcrum left or right to find the balance point. → Keep the scale level until the countdown ends — level clear!”
The lever principle — toward the heavy side
BalanceMaster uses the same moment (force × distance) you learned in school. The left and right animals sit at −0.93 / +0.93 of the plank’s half-width, and the sum of each animal’s mass × distance to the fulcrum is what turns the plank one way or the other. So the answer is simple.
Where to put the fulcrum = 0.93 × (right mass − left mass) ÷ (sum of both masses) — it’s always on the heavier animal’s side, and the bigger the mass difference, the closer it gets to the end. The left end is −1, the center is 0 and the right end is +1.
| Example pair (left / right) | Mass | Balance point | Tilt speed with fulcrum at 0 |
|---|---|---|---|
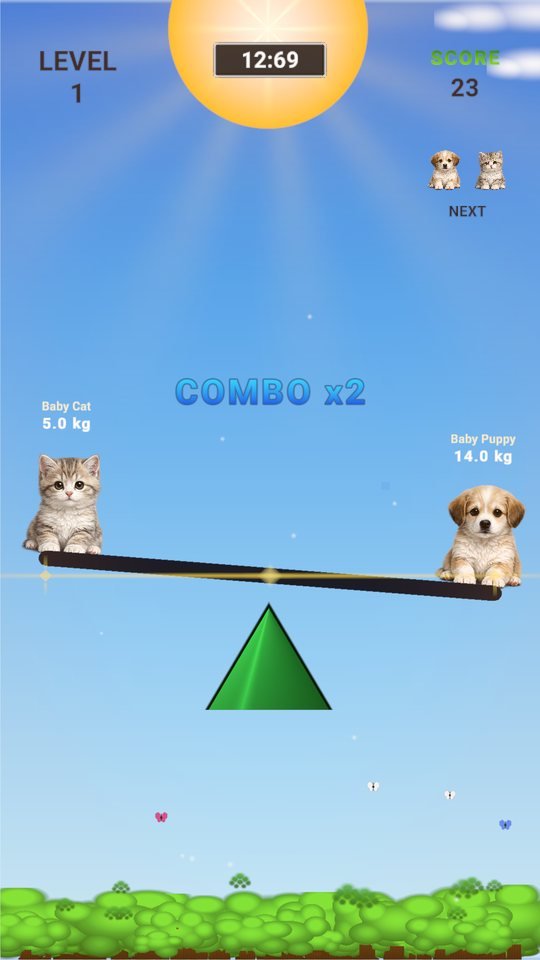
| Baby Cat / Baby Puppy | 0.3 / 0.6 | +0.31 toward the puppy | about 2.8°/s (measured around 2.5°) |
| Baby Koala / Baby Elephant | 1.0 / 4.0 | +0.56 toward the elephant | about 28°/s |
| Baby Sparrow / Baby Hippo | 0.15 / 4.0 | +0.86 toward the hippo | about 36°/s — max angle in 0.7 s |
You can estimate the tilt speed as 10 × (sum of both masses) × (how far the fulcrum is off the balance point) degrees per second. A cat and a puppy (sum 0.9) are forgiving even with the fulcrum in the wrong place, but two big animals (sum 7–8) tilt 10° per second for the same mistake. The heavier the pair, the more the same mistake costs you — that’s the backbone of this game’s difficulty curve. The plank follows at 110° per second, which is fast enough that the computed tilt shows up almost exactly as calculated.

The invisible enemy — automatic wobble
0.5 seconds after a round starts, an irregular torque begins acting on the plank and builds up to its maximum (a drift of about ±3°/s) over 2 seconds. A code comment says this only applies “when you’re not touching,” but with the fulcrum controls the touch time is never updated, so it keeps running even while your finger is down. That’s why the plank slowly wanders even if you hold your finger on the theoretically perfect spot.
- The wobble is the same strength whether the animals are heavy or light. But countering the same ±3°/s requires moving the fulcrum by 0.3 ÷ (mass sum), so the lighter the pair, the bigger the push you need.
- There’s only one fix — don’t freeze your hand completely; keep nudging the fulcrum against the direction the plank is tipping. If the plank starts dropping to the right (clockwise), send the fulcrum a little further right (toward the heavy side).
In short, it’s two steps. ① As the round starts, jump to the balance point in one move (if you don’t know which side is heavier, watch which way the plank tips in the first 0.3 seconds — the side going down is the heavy one). ② After that, only make small corrections.
Thirty-two baby animals and their hidden weights
The animals that sit on the plank are thirty-two creatures, all named “Baby ○○”. They’re all drawn at almost the same size (the sprite scales are matched, so the hippo doesn’t look bigger than the cat). You start with only Baby Cat and Baby Puppy, and more unlock one by one as you level up. The first pair on Level 1 is almost always the cat and the puppy.
Above each animal floats its name and a weight like 5.0 kg or 30 g, but that number is decoration. What actually tilts the plank is a separate balance mass (0.15–4.0), and the two numbers are unrelated. Baby Turtle shows 180 kg but its balance mass is 0.3 — lighter than the cat — while Baby Gorilla shows 12 kg yet has a mass of 3.5, nearly as much as the elephant (4.0). To find the real weight, watch which way and how fast the plank tips, or use the band from the Preview item.
| Unlock | Animal | Balance mass | Weight shown on screen |
|---|---|---|---|
| From the start | Baby Cat | 0.3 | 5.0 kg |
| From the start | Baby Puppy | 0.6 | 14.0 kg |
| Level 2 | Baby Owl | 0.2 | 2.7 kg |
| Level 3 | Baby Koala | 1.0 | 1.6 kg |
| Level 3 | Baby Sparrow | 0.15 | 30 g |
| Level 4 | Baby Rabbit | 0.4 | 2.5 kg |
| Level 5 | Baby Snake | 0.25 | 250 g |
| Level 5 | Baby Tiger | 2.0 | 44.0 kg |
| Level 6 | Baby Crocodile | 0.5 | 6.0 kg |
| Level 7 | Baby Lion | 2.5 | 36.0 kg |
| Level 7 | Baby Parrot | 0.18 | 400 g |
| Level 8 | Baby Panda | 0.45 | 17.0 kg |
| Level 9 | Baby Eagle | 0.35 | 4.9 kg |
| Level 10 | Baby Rhino | 3.0 | 405.0 kg |
| Level 11 | Baby Monkey | 1.0 | 3.8 kg |
| Level 12 | Baby Giraffe | 3.5 | 332.0 kg |
| Level 13 | Baby Bear | 1.0 | 30.0 kg |
| Level 15 | Baby Elephant | 4.0 | 323.0 kg |
| Level 17 | Baby Pig | 2.0 | 102.0 kg |
| Level 20 | Baby Deer | 2.0 | 32.0 kg |
| Level 22 | Baby Zebra | 2.6 | 120.0 kg |
| Level 25 | Baby Shark | 3.0 | 33.0 kg |
| Level 28 | Baby Dolphin | 3.2 | 60.0 kg |
| Level 30 | Baby Calf | 3.0 | 185.0 kg |
| Level 33 | Baby Penguin | 0.4 | 16.0 kg |
| Level 35 | Baby Turtle | 0.3 | 180.0 kg |
| Level 37 | Baby Kangaroo | 1.5 | 4.3 kg |
| Level 40 | Baby Ostrich | 2.0 | 63.0 kg |
| Level 42 | Baby Gorilla | 3.5 | 12.0 kg |
| Level 44 | Baby Camel | 3.0 | 170.0 kg |
| Level 47 | Baby Horse | 3.5 | 245.0 kg |
| Level 50 | Baby Hippo | 4.0 | 250.0 kg |
※ Unlocks are based on the highest level you’ve reached, and balance masses are the values in the game data. On-screen weights under 1 kg show as “N g”; anything heavier shows as “X.X kg”.
How fast animals unlock
- Level 1: 2 animals → 3: 5 → 5: 8 → 10: 14 → 20: 20 → 30: 24 → 50: 32. Reach Level 50 and everything up to the hippo is in play.
- Unlocking is about arriving, not clearing. Your highest level is recorded the moment a round on that level ends, whether you clear or fail — so even if you keep losing on Level 10, the 14 animals up to the rhino are unlocked. Start a new game from Level 1 and the unlocked animals still show up.
- The heaviest animals are Baby Elephant and Baby Hippo (4.0); the lightest is Baby Sparrow (0.15). When the sparrow meets the hippo you get the most extreme round: balance point 0.86 on the hippo’s side and a mass sum of 4.15.


The UNLOCK grid in the bottom ACHIEVE tab is your guide to all thirty-two. They’re laid out four per row in unlock order; locked animals are gray with Lv.N on a translucent band at the bottom. Tap an animal and its name pops up in a speech bubble in your current language.
How the two animals are picked
- The unlocked animals are put in a bag and shuffled, then drawn for left and right in turn. Once the bag is empty, it’s reshuffled.
- The same animal twice, or a pair with equal mass, isn’t allowed. To prevent a round that starts already level, the right animal is swapped for an unlocked animal with a different mass. (Three animals share a mass of 1.0 — koala, monkey and bear — so this swap happens a lot.)
- 3% wildcard — occasionally one side is replaced by the heaviest (50%) or the lightest (50%) unlocked animal. Around Level 5 the heaviest is 2.5 (lion); after Level 15 the cap is 4.0 (elephant). The lightest is 0.15 (sparrow).


Score and combos
Scoring in BalanceMaster comes down to one simple formula: the round’s base score × your combo count. And combos only build while the plank is level.
Base score = seconds survived × 10 · Combo = +1 every 0.8 s while level (±4°) · Clear score = base score × max(1, combo count). For example, if you find the balance within the first 2 seconds and hold it to the end, you’ll stack a combo of about 16, turning a 15-second round’s base 150 points into about 2,400 points.
How combos build and drain
- +1 — every 0.8 seconds while the plank stays within ±4°.
- Leave the 4° zone and only the 0.8-second timer resets; your combo stays as is.
- If you’re still not back to level after a 1.0-second grace period, you lose −1 every 0.6 seconds. Get level again and it resumes building with no further loss.
- Each combo +1 comes with a short vibration (22 ms), and each loss with an even shorter one (15 ms). While draining, a red ring pulses next to the combo popup and a red -1 flashes and fades.
- Points from a failed round don’t count. On a fail only the base score is added, but pressing RETRY rolls your score back to what it was at the start of that round. The only way to keep points is to clear.
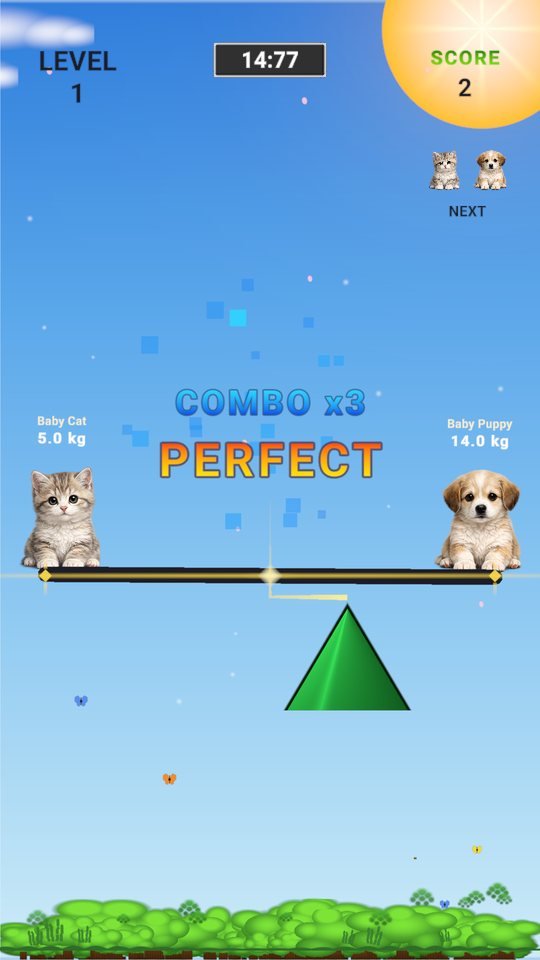
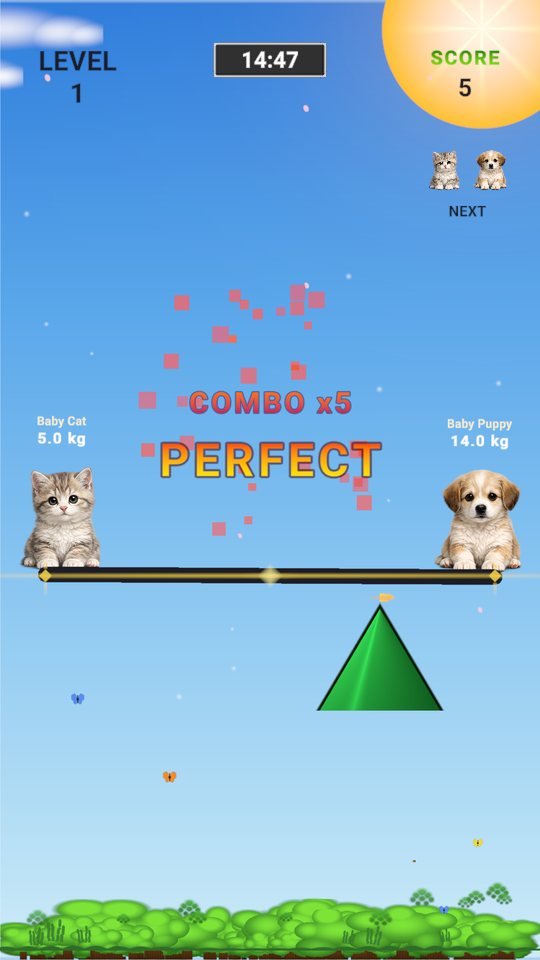
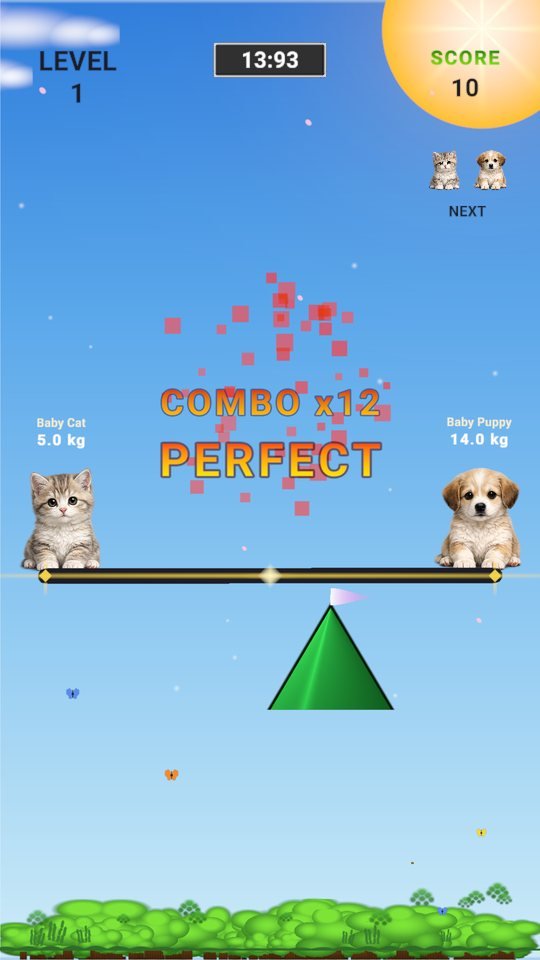
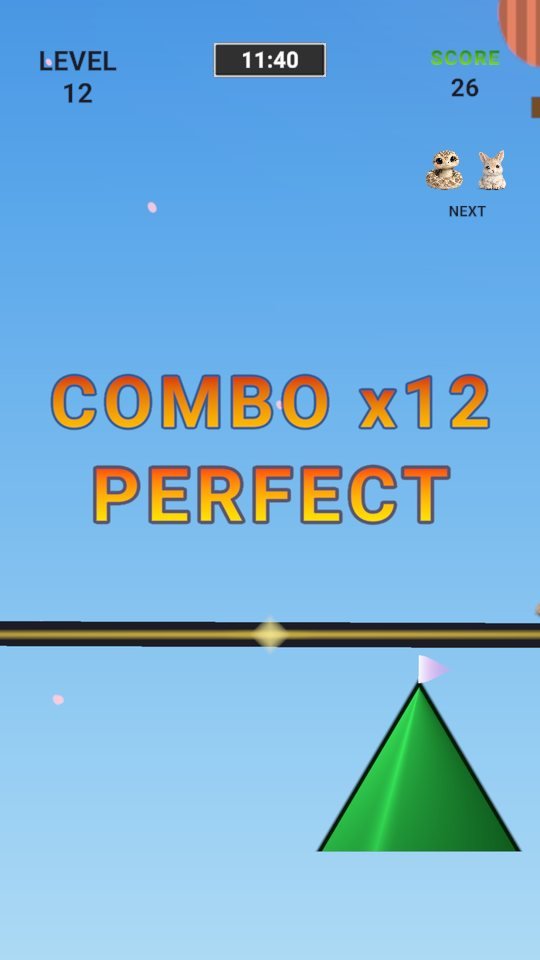
The combo popup appears at 58% of the screen height as COMBO x{n}, and from 3 up it’s followed by PERFECT underneath. The color changes at combo 3 · 5 · 8 · 12. The color trail the triangle leaves behind also changes through the same four tiers starting at combo 3. Stay level from start to finish in a 15-second round and your combo climbs to around 18, so reaching the top tier at 12+ proves you found the balance right away and held it a long time.
NICE SAVE! — coming back from the brink
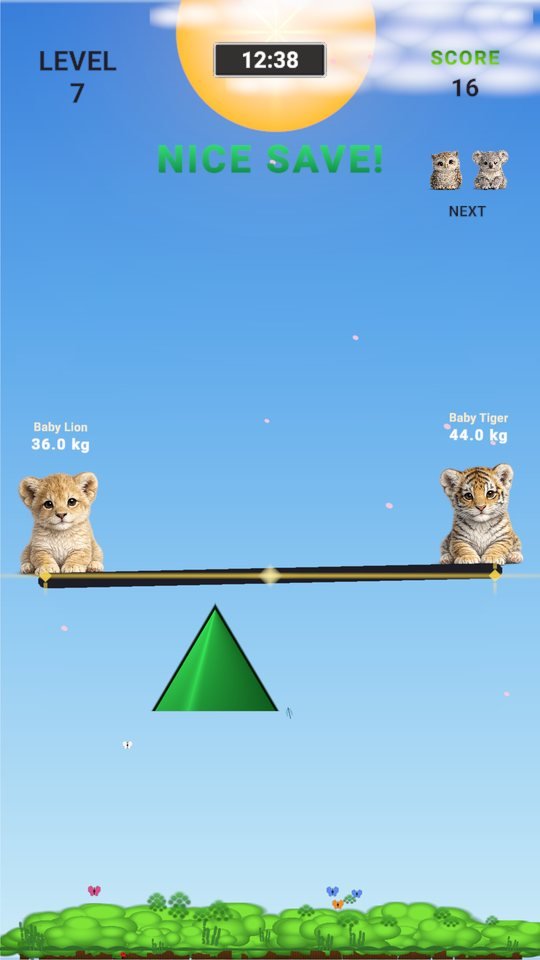
If the plank tilts 22.5° or more (90% of the 25° maximum) and you bring it back within ±4° inside 2.5 seconds, NICE SAVE! appears at the top center for 0.9 seconds. It can’t fire back to back — there’s a 1.5-second cooldown.
- This is a visual flourish, not a score bonus. Still, it means you pulled out of a crisis, and it’s the biggest moment for protecting your combo.
- If the recovery takes too long, it’s treated as ordinary “settling” and doesn’t count.
- Similarly, if a round in which you hit 22.5° or more within the last 1.2 seconds before failing ends in a loss, a 0.25× slow motion plays for 0.5 seconds before the result screen. It’s the game telling you that was a near miss.
The code does calculate a clear bonus based on remaining time, but it’s never added anywhere, so it doesn’t show up in your actual score. The formula above is the only one. The center-distance bonus (how far the animals sit from the plank’s center) is effectively zero early on when the plank is wide, so you don’t need to worry about it either.
Levels and difficulty
Time, grace period, plank width, weather and special modes are set per level band, and each band gets a little tighter. The table below copies the bands straight from the code (half-widths are calculated for a 9:16 screen).
| Level | Target time | Final alignment grace | Plank width | Weather | Special mode |
|---|---|---|---|---|---|
| 1–5 | 15.0 s | 3.00 s | 90% | none | none |
| 6–10 | 14.0 s | 2.80 s | 90% | none | none |
| 11–15 | 14.0 s | 2.80 s | 90% | 30% · one · strength 1–2 | 20% |
| 16–20 | 13.0 s | 2.60 s | 87% | 30% · one · 1–2 | 20% |
| 21–30 | 13.0 s | 2.60 s | 87% | 50% · one · 2–3 | 20% |
| 31–45 | 12.0 s | 2.40 s | 83% | 65% · one/two · 2–4 | 20% |
| 46–50 | 12.0 s | 2.40 s | 83% | 75% · two · 3–6 | 20% |
| 51–60 | 11.0 s | 2.20 s | 79% | 75% · two · 3–6 | 30% |
| 61–75 | 11.0 s | 2.20 s | 79% | 83% · two/three · 4–7 | 30% |
| 76–100 | 10.5 s | 2.00 s | 75% | 83–88% · two/three · 4–8 | 30% |
| 101–150 | 10.0 s | 1.85 s | 71–67% | 93–97% · three · 6–9 | 40% |
| 151–200 | 9.5 s | 1.75 s | 63–59% | 97–100% · three · 7–10 | 40% |
| 201–300 | 9.0 s | 1.65 s | 55% | 100% · two 20 / three 80 · 7–10 | 70% (adaptive) |
| 301–500 | 8.5 s | 1.55 s | 52% | 100% | 70% (adaptive) |
| 501+ | 8.0 s | 1.50 s | random 50–65% | 100% | 70% (adaptive) |
※ Plank width is relative to screen width (90% → 50%); time and grace are the game-code values at the time of writing. Weather reads “chance · number of simultaneous weather types · strength”. The 70% special-mode rate drops by 15% / 30% after a losing streak and rises by 15% after 8 wins in a row.
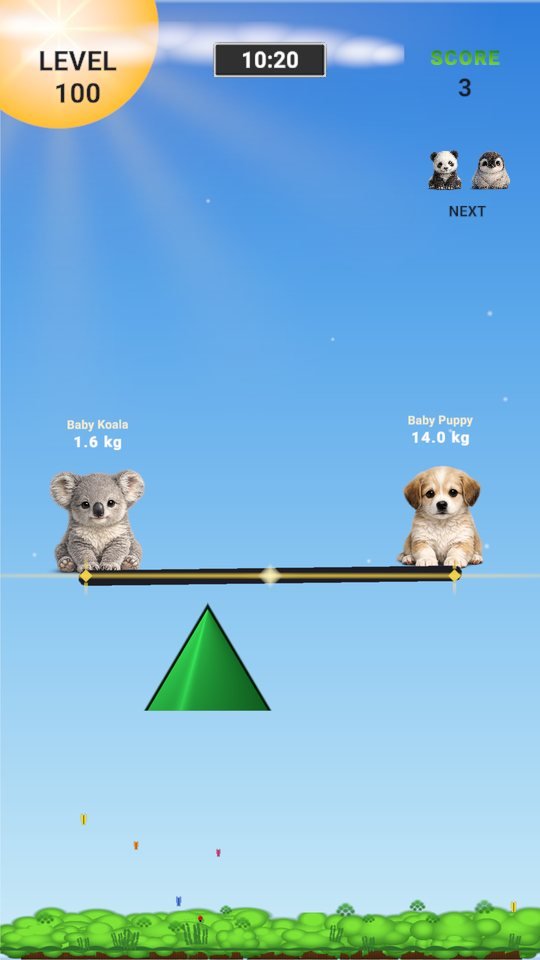
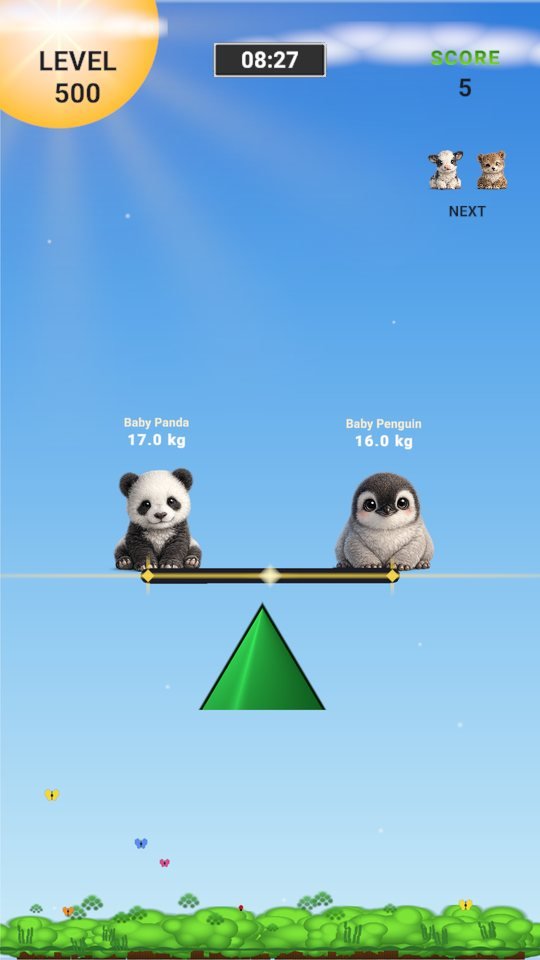
What really makes it harder
- The grace period shrinks — 3.0 s → 1.5 s. If you’re off at 0, you get half the time to recover.
- The plank narrows — as width drops from 90% to 50%, the same finger movement moves the fulcrum further. One unit of finger travel moves the fulcrum about 0.43 at Level 1 and around 0.8 after 500, so the same hand motion becomes nearly twice as sensitive.
- Heavier pairs show up — as more animals unlock, pairs with large mass sums and extreme pairs appear, and the same mistake turns into tilt faster.
- Mid-round events kick in — jumps from Level 5, surprise drops from Level 10 (next chapter).
- Weather arrives — from Level 11, rain (the fulcrum slips) and snow (the fulcrum gets faster) have real effects. Wind barely matters.
- Special modes arrive — from Level 11, one of twenty may switch on. Eleven of them change something you can see, and most of those obscure your view (twenty-modes chapter).
There’s no level cap; from 501 on, time is fixed at 8.0 s and grace at 1.5 s. Only the plank width varies randomly between 50% and 65% each round.
What happens mid-round — jumps, surprise drops, final alignment
Just when you think you’ve got it balanced, two events can shake the plank again. Neither one comes with a warning message. The only signals are the plank suddenly lurching (jump) or an animal falling from the sky (surprise drop).
Animal jump — the better you do, the more they jump (Level 5+)
- It’s called a “jump,” but for the reasons below it’s more accurate to think of it as “one animal’s weight vanishing for 0.8 seconds.”
- The game rolls once per round. Levels 5–10 20% · up to 20 25% · up to 50 30% · up to 100 35% · up to 200 40% · 201+ 25–50% (random).
- It triggers the moment your combo reaches 2 in that round (after 1.6+ seconds of level time). In other words, the better you balance, the sooner the jump comes.
- Who jumps — 25% of the time both at once; otherwise a random one jumps first, then the other jumps after a 0.3–0.7 second pause.
- In the code, the animal leaps 1.3 units in a 0.8-second arc, and while it’s airborne its mass drops to 0.01, so the plank lurches hard toward the other side. A mass-1 animal jumping causes about 7°, a mass-3 animal about 18°. When it lands, the mass returns.
- On the actual screen, though, you don’t see the animal leap. The code that keeps animals glued to the plank resets their position every frame. As the animation in this article shows, the visible signal isn’t the animal — it’s the plank suddenly swinging the other way.

How to handle it: during the jump (0.8 s), the plank behaves “as if the jumping animal weren’t there.” Since that animal’s mass has effectively vanished, moving the fulcrum right under the animal that isn’t jumping (±0.93) reduces the tilt. When it lands, go back to the original balance point. If it’s hard to get there in advance, following the tilt as it happens is the more realistic approach.
Surprise drop — from the sky at the halfway mark (Level 10+)
- Conditions: Level 10 or higher, 35% chance. It happens when half the target time has passed (7.5 seconds into a 15-second round).
- Direction: left only 35% · both sides 35% · right only 30%. The animal falls from the sky (5.5 units above the plank) over 0.55 seconds and sticks to the plank. There’s a falling sound and vibration, but no warning text on screen.
- The new animal attaches inside the existing one, and that side’s mass and position are recalculated as a mass-weighted average, so the balance point jumps instantly. You need to move the fulcrum again.
- Dropped animals disappear when the round ends.
How to handle it: glance at the sky around the halfway point (about 7.5 seconds on the timer). Falling animals are all the same size but their masses vary, so watch which way the plank goes after the drop and immediately push the fulcrum firmly that way.


The code comment for the surprise drop says “left 35 / right 35 / both 30,” but the actual code is left only 35 · both 35 · right only 30 (this article follows the code). Likewise, the probability that actually applies isn’t the code default (80%, from Level 1) but the 35% from Level 10 set in the game scene.
The last 3 seconds and final alignment
- The last 3 seconds — the timer turns red and pulses every second. The background music also rises in pitch to build tension.
- If the plank isn’t level at 0, the final alignment window (3.0 → 1.5 s) opens. What wins it is getting within ±4° even once during that window. The instant you’re in, it’s a clear.
- So if the plank is mid-tilt just before 0, one option is to move the fulcrum to the balance point in one big move and let the plank swing through level (passing through is enough).
Danger signals — red edges and a heartbeat
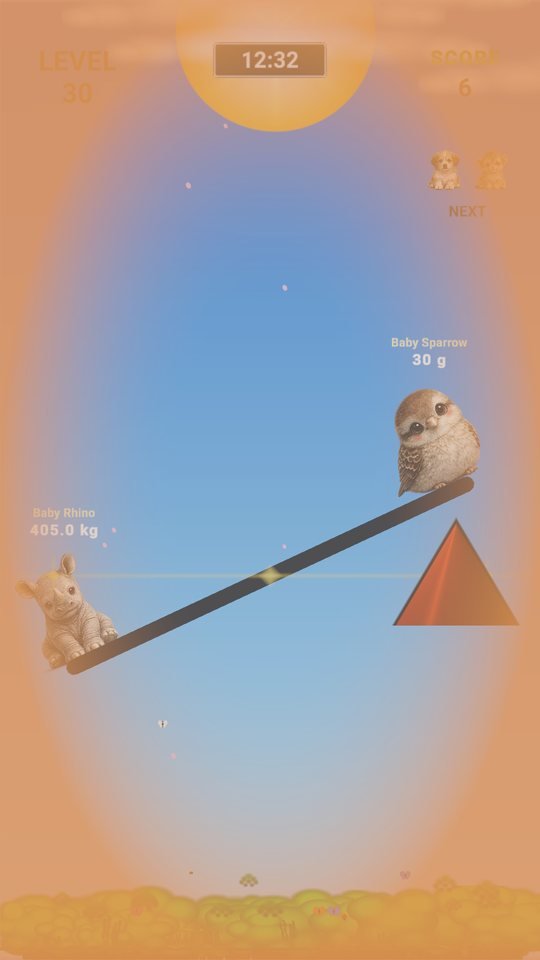

- From 10° a heartbeat sound and vibration start, getting fastest at 20°. A dark red glow spreads across the screen edges (a yellow-orange glow on the day theme).
- Above roughly 19° the screen desaturates and the background music fades (it recovers once you drop below about 17.5°).
- The triangle’s color is another clue — green when level, fully red at 18°. On the day theme it’s orange.
Hazards ① Weather — rain, snow, wind, lightning
Weather starts at Level 11 (levels 1–10 have none). Rain and snow begin 0–1 seconds into the round, wind 2.5 seconds after that, ramping from zero to full strength over 2 seconds. 0.6 seconds before the wind arrives, a direction arrow pulses at the screen edge it will blow from. Weather vanishes the moment you clear or get a game over. How often and how strongly it comes follows the difficulty table above (levels 11–30: 30–50% at strength 1–3; after level 160: 100% at strength 8–10).


| Weather | What you see | What it actually does (code) |
|---|---|---|
| Rain | Up to 120 raindrops, rain sound | The fulcrum’s target jumps randomly. But while your finger is on the screen, the target is overwritten by your finger position in the same frame, so it has no effect; while your finger is off, it shifts by ±(strength ÷ 10 × 0.12). The interval is about 1.2 s at strength 1 and about 0.3 s at strength 10, and the first slip comes 0.5–1.2 s after the start. |
| Snow | Up to 80 snowflakes, occasional drifting snow crystals | The fulcrum follows your finger faster — by strength × 4.5%, about 1.45× at strength 10. Measured in practice, the fulcrum reaches your finger roughly 1 frame (about 17 ms) sooner. |
| Wind | Up to 12 curved wind streaks, direction arrow | It’s meant to push the plank very slightly, but compared with the balance torque (±100 units) it peaks at about 0.15, so it’s essentially cosmetic. The arrow is eye-catching, but you can ignore it. |
| Lightning | One flash (0.8 s) in 30% of rainy rounds, thunder sound | Purely a screen effect. Just don’t let it startle your hand. |
- When it rains, the fulcrum occasionally kicks out of place even when it’s on the balance point. Keep your finger pressed close and drag it back by however much it slipped. The higher the strength, the more often it slips, so you’ll need a habit of small, frequent corrections.
- When it snows, the fulcrum follows more nimbly than usual. Dragging with your normal hand feel will overshoot, so move your finger only a little.
- The wind arrow just means “wind is coming” — the plank isn’t noticeably pushed. Focus on rain and snow instead.
- The Clean item wipes out all of this weather for one round (items chapter).
Day and night
Separately from weather, there are two backgrounds: day (light theme, the default) and night (dark mode). Turn on Dark Mode in the settings for night.
- Day — a sky gradient and sun (rays and corona), clouds, forest, swaying leaves, sparrows, butterflies and dragonflies, a hot-air balloon, dandelion seeds and a rainbow.
- Night — stars, a moon (with halo), night clouds, mountain ranges, an aurora, fireflies, mist, owl eyes, bats, shooting stars and the glow of a cabin.
- In rounds with weather, the weather effects take priority; the night scenery only shows “in dark mode when there’s no weather.”

Hazards ② Twenty special modes
From Level 11, when a round starts there’s a chance (levels 11–50 20% · 51–100 30% · 101–200 40% · 201+ 70%) that one of twenty special modes is drawn — perfectly evenly — and switched on. The game never tells you in text which mode it is. You only see the effect. After level 201, the 70% rate drops by 15% / 30% after a losing streak and rises by 15% after 8 wins in a row. The mode ends as soon as you clear or fail.




| Mode (internal name) | Visible effect (actual values) |
|---|---|
| Screen shake ScreenShake | Camera keeps trembling ±0.12 units (until the round ends) |
| Earthquake EarthQuake | Camera ±0.38 units — settles to 15% over 4 seconds |
| Dark mode DarkMode | A black overlay (alpha 0.85) fades in over 0.5 s — you can barely see |
| Narrowed view NarrowVision | Black overlay at alpha 0.65 |
| Fog vignette FogVignette | Black overlay at alpha 0.33 (0.7 s) |
| Glare FlashBlind | White flash at 0.93, fading out over 0.85 s (once) |
| Camera zoom-in CameraZoom | Camera size ×0.62 (zooms in over 0.8 s, until the round ends) |
| Camera wobble CameraWobble | Camera rocks ±2.8° at 1.3 Hz |
| Slow motion SlowMotion | Time at 0.5× for 3.5 seconds (the timer slows too, so the round gets longer) |
| Speed burst SpeedBurst | Time at 1.65× for 2.5 seconds |
| Ghost animal GhostBall | First (left) animal at alpha 0.22 (fades over 2.0 s) |
The other nine make no visible difference in this game.
- Six of them — InvertControl · GravityShift · GravityPulse · GravityReverse · Tumble · WindGust — are modes that apply gravity or impulses to the animals in the code, but in this game the animals are glued to the plank and balance is decided purely by the moment formula above, so they have nothing to act on.
- Two — DisappearPlatform · GhostPlatform — try to make the plank transparent, but this game draws the plank as a line (LineRenderer), not a sprite, so in actual captures the plank stays perfectly sharp.
- MirrorFlip (left-right mirror) flips the camera’s X scale to −1, but on the screen we actually ran, the plank and animals kept their left-right order (based on a Windows build).
That’s nine out of twenty (45%), so if a special mode is on but the screen looks exactly the same as usual, it’s one of these. And even among the eleven that change the screen, most only block your view — the plank’s physics stay the same.
- When the screen goes dark, the triangle’s color is your most reliable gauge. Green means level.
- In zoom and wobble modes your sense of where your finger is shifts, so drag the fulcrum while checking it with your eyes on screen.
- Slow motion and speed burst only last a few seconds, so keep your fulcrum moves small just for that moment.
Four items plus the record items
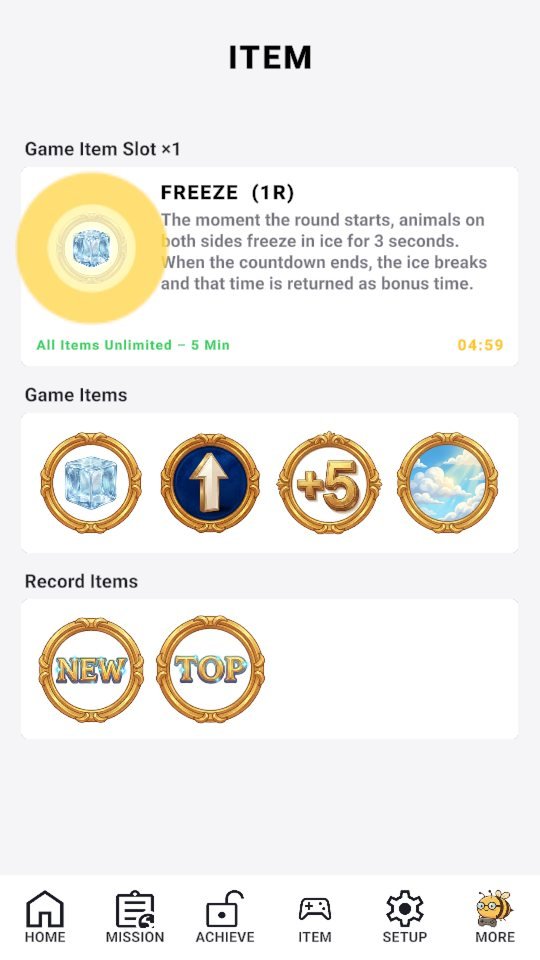
You pick items in the bottom ITEM tab. At the top is the Game Item Slot ×1 card, below it the Game Items list (FREEZE · PREVIEW · 5Booster · Clean), and at the very bottom the two Record Items.

How to use them
- Tap an item icon and a description popup appears, ending with Would you like to equip it? Underneath it adds (Tapping YES will show an ad before equipping the item).
- Tap YES to watch a rewarded ad, after which the item goes into the slot. NO closes the popup.
- There’s only one slot. If one is already equipped and you tap another, you get Only one item can be equipped in the slot.
- The equipped item shows as an icon in the HUD at the bottom of the game screen and is used up when that round ends (clear, fail or retry). Restarting the app clears all equipped items, so if you equip one and quit without using it, it’s gone.
Watch one rewarded ad and the All Items Unlimited – 5 Min pass turns on. During the pass, items equip instantly with no ad and the ad notice disappears from the popup. The remaining time shows under the slot card as MM:SS (yellow). A code comment still says 10 minutes, but the actual default is 5 minutes, and it can be changed from the server. Even during the pass, you always have just one slot.
| Item | What it does | When to use it |
|---|---|---|
| FREEZE FREEZE | As soon as the round starts, both animals are locked in ice blocks and the plank is pinned at 0°. A 3·2·1 counts down below, then the ice bursts with a “pop” and everything is released. The timer is rolled back 3 seconds. | Three safe seconds at the start. Your combo builds +3 in the meantime. |
| PREVIEW PREVIEW | A glowing band pulses at the balance point on the plank (with a ▼ marker and the word Pivot); move the fulcrum into the band for perfect balance. | Basically an answer key. During jumps and surprise drops the band moves in real time too. |
| 5Booster 5BOOSTER | The moment the timer hits 0 (level or not), +5 seconds are added, and combos and scoring keep running during them. At the top of the screen: the word BONUS, a number counting down from “05,” and firework particles. | For chasing points. Just remember you’ll have to do the final alignment again after those 5 seconds. |
| Clean CLEAN | Removes this round’s rain, snow, wind and lightning. One second after weather starts, an EMP-style ring wave spreads out and cancels it. If no weather arrives within 2 seconds, the item quietly disappears. | Rounds after Level 11 where rain or snow is giving you trouble. At Level 10 or below it’s wasted. It can’t remove special modes. |


Here’s the original popup text for two of the items. PREVIEW: “The Preview item shows a glowing band near the center of mass on the platform. Move the arrow into the highlighted area to achieve perfect balance.” · Clean: “While equipped, any weather this round — rain, snow, wind, or lightning — is completely prevented, so you can play the whole round at normal difficulty. If the weather is already clear, the item disappears immediately.”
The FREEZE description says “those 3 seconds are returned to you as bonus time,” but what it actually does is roll the timer back 3 seconds, so the frozen 3 seconds simply don’t count and the round runs that much longer. The real benefit is 3 seconds with the plank at 0° — zero risk — and +3 on your combo. (The survival time used for scoring is rolled back too, so those 3 seconds don’t add to your base score.)
The two record items
- NEWGAME — You will restart from Level 1. Would you like to use this item? It resets your saved progress (level and score) to 0 and takes you to the home screen after a rewarded ad. Your best record and unlocks stay.
- RETRYLEVEL — Resume from your best level, Level {N}. It raises your saved progress to your best level and best score (N is your best level + 1). Use it when failures have pushed your progress far back and you want to pick up from your best.
- Both can be used regardless of the slot, and independently of the item pass they always require an ad.
Getting items for free
- On your first visit of the day (after midnight), a free item — PREVIEW or 5Booster at random — goes into your slot. The popup says Welcome back! with Check Item / Later. If the slot is already full, auto-equip is skipped, and nothing is given on the day you first install.
- There’s also an event where opening the game from a push notification equips a designated item. The prompt asking you to allow notifications shows once, 3 seconds after first launch.
Bonus game — a shower of coins every 5 levels
After clearing a level that’s a multiple of 5, tap NEXT (after an ad, if one plays) and a bonus game slips in before the next level. That’s levels 5, 10, 15, 20, and so on.


- Intro — BONUS GAME / (Keep it balanced) shows for 2 seconds, then 3·2·1 counts down.
- 10 seconds of play — the plank sits a bit lower than usual, and 3–5 rows of animals, two per row, are stacked on the left and right (6–10 animals per side, random left/right). You have to move the fulcrum toward the side with the larger total mass. The stacked columns are centered at ±0.55, so the balance point is 0.55 × (right − left)/(right + left).
- While level (±4°), coins pour out left and right at 10 per second. Each side has an x{n} counter, and the maximum is 100 left + 100 right = 200 coins.
- You can’t fail. For the last 4 seconds the timer turns red, the screen edges pulse red and you get a vibration every second. With 0 coins you hear the game over sound; with 1 or more, fireworks.
- Done — BONUS GAME COMPLETE / {n} Coins x50 + a START button. Tap it and the next level starts right away, with no clear screen.

The {n} Coins x50 on the completion screen is just text — nowhere in the code are the coins added to your score or currency, or saved. The bonus game has no score, no weather, no special modes and no jumps. Use it as a relaxed chance to practice your balancing feel. This game has no coin shop and no revives either.
Unlocks, ranks, daily missions, settings
ACHIEVE tab — MY RANK
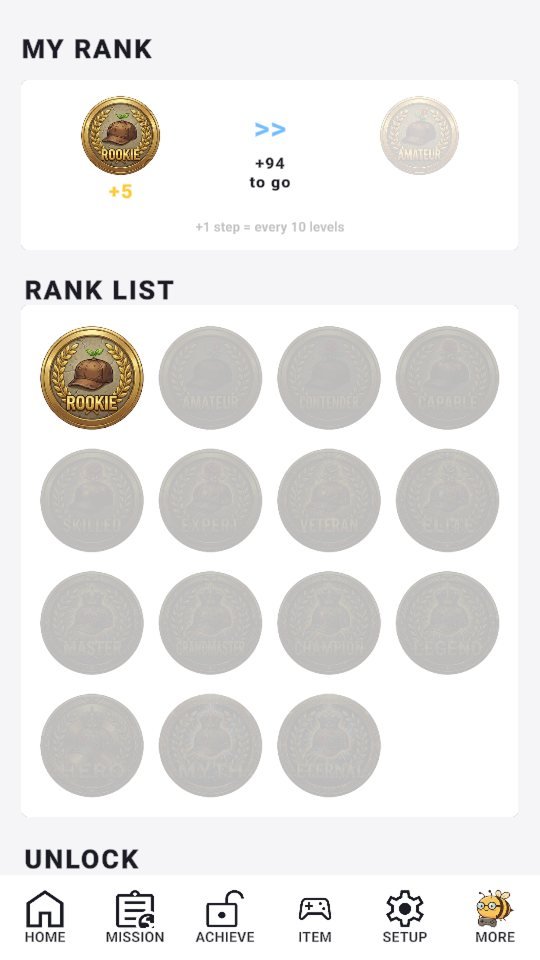
The top of the bottom ACHIEVE tab is MY RANK. It shows your current rank badge with +N, +M to go and the next rank badge (translucent), with the hint +1 step = every 10 levels. Below that come the RANK LIST (15 badges) and the UNLOCK animal grid we saw earlier.
- The 15 badges: Rookie · Amateur · Contender · Capable · Skilled · Expert · Veteran · Elite · Master · Grandmaster · Champion · Legend · Hero · Myth · Eternal
- Progress formula —
+1for every 10 of your highest level, and the next rank every 1000 levels (the last one is MAX). In normal play you’ll only ever see Rookie and +N. The moment you reach a new rank (level 1000, 2000…), a TITLE UNLOCKED popup shows for 5 seconds. - Clear a milestone level (10, 25, 50, 100, 200, 300…) and fireworks go off twice, the camera pulls back slightly, and a Round {N} Special Clear! badge appears.
TODAY’s MISSION — nine of them, reset every midnight

Missions appear as badge images (with English text). They’re black and white until completed, then switch to color.
| Badge | Condition |
|---|---|
| LEVEL 1 CLEAR | Your first level clear of the day |
| 5 STAGES CLEAR | Play 5 rounds today (clears and fails both count) |
| COMBO x1 OKAY | Clear with a combo of 1 or more |
| COMBO x5 OKAY | Clear with a combo of 5 or more |
| 10 STAGES CLEAR | Play 10 rounds today (clears and fails both count) |
| 3 CLEAR STREAK | 3 clears in a row (a fail resets the counter) |
| 10 LEVELS UP | Climb 10 levels above where you started today |
| 5 CLEAR STREAK | 5 clears in a row |
| WEATHER WIN x3 | Clear 3 rounds that had weather |
- Despite their names, the two “STAGES CLEAR” badges count rounds played, clears and fails combined.
- Missions give no rewards (there’s no code that hands out coins or items). Days on which you complete all nine are recorded in the HISTORY below the mission tab (year/month accordions with date numbers). While the app is open, it checks the date every minute and resets at midnight.
SETUP tab
- NICKNAME — your nickname (auto-generated on first launch as color + animal + number, up to 12 characters) and avatar (pick one of the animal sprites).
- GAME — Language · Vibration · Sound · Dark Mode · Push Notifications · Tutorial.
- COMMUNITY — Homepage · Rate Us · Contact Us · Share Game.
- POLICY — Privacy Policy · Terms of Service · Data & Privacy. At the very bottom: Version 1.0.4 and Quit Game.
- 10 languages — English · 한국어 · 中文 · 日本語 · Deutsch · Français · Русский · Español · Português · Türkçe. On first launch it follows your device language, and the animal names come in all 10 languages too.

Clear, game over, continuing


- Clear — big text LEVEL N Clear! + Final Score : X and the NEXT · BRAG IT! buttons. (If the ranking server is connected, You’re in the top {N}% and {score} pts to reach top {p}% are added.) Interstitial ads show only after wins: from Level 10 up, once every 8 total wins (levels 10–29), 7 (30–39), 6 (40–99) or 5 (100+).
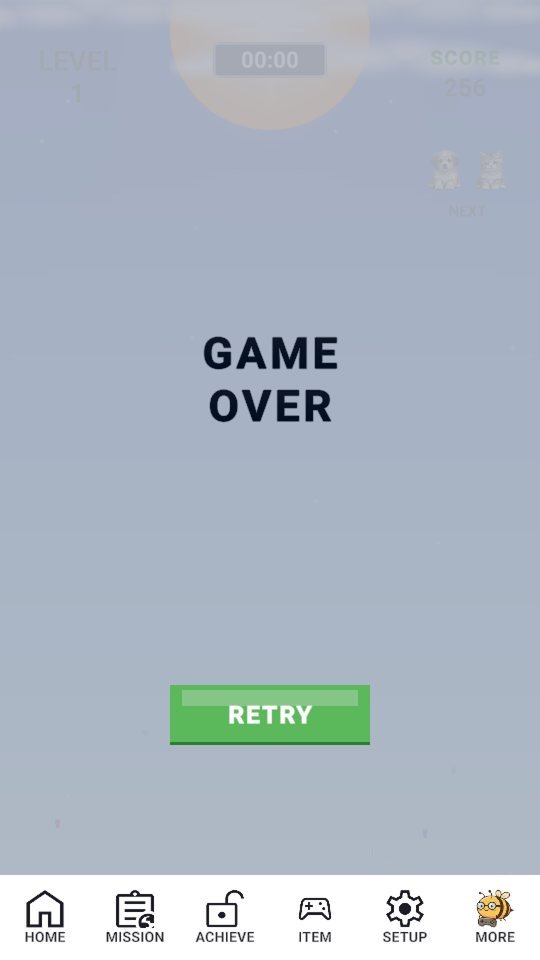
- Game over — a big gradient GAME OVER and a single RETRY button. At the moment of failure your phone vibrates, the screen shakes for 0.15 seconds, and the result panel appears 0.2 seconds later. There are no ads on a fail; RETRY starts the same level with new animals and your score goes back to where it was when the round began.
- Continuing — reopen the app and the home screen shows LEVEL {last cleared level + 1}, SCORE : {total} and START. New players see LEVEL 1 / SCORE : 0. The bottom HOME tab, when tapped mid-game, pauses and shows RETRY / BACK (BACK = resume, RETRY = start over after a rewarded ad).
- BRAG IT! — the share card title is “Level {N} Cleared! Can you beat my record?” and the body reads “See where your balance ranks globally. Challenge BALANCE MASTER now!”
- Your best record (level and score) isn’t erased by a new game or the record items, and it’s protected by a tamper check (checksum).
Six things for first-time players
- Move the triangle toward the heavy side. The side the plank tips toward is the heavy one. Watch which way it drops right at the start and drag the triangle that way in one move.
- Forget the kg on screen. The 180 kg turtle is light and the 12 kg gorilla is very heavy. Trust the direction and speed of the tilt, or the Preview band.
- Don’t stop your hand. From about 2 seconds in, the plank wobbles on its own. This isn’t a game of parking on the perfect spot — it’s about small, constant corrections. The bigger the animals in a round, the less you should swing your hand around.
- Tilting mid-round is fine. In this game you never lose for tilting during play. Your combo drains, though — what really matters is being within ±4° at 0 and during the final alignment window.
- Combos make your score. +1 for every 0.8 seconds level, and score = base × combo. Settle early and hold it long, and your score explodes. Points from a failed round vanish on retry, so chase points only after you’ve got the clear.
- Events start at levels 5 and 10. From 5, building a combo can make one animal’s weight briefly vanish (a jump) and the plank lurches the other way; from 10, an animal can drop from the sky at the halfway mark. From 11, rain, snow and special modes arrive. Use the bonus game every 5 levels to practice stress-free.
Pro tips
- Big pairs put the balance point near the end. Sparrow vs hippo is +0.86 — you have to send the triangle almost all the way to the hippo’s end. Animals of similar mass, on the other hand, keep it near the middle.
- A combo of 2 is the jump signal. If the plank suddenly lurches to one side after 1.6 seconds of level time, that’s a jump. You can’t see which animal jumped, so send the fulcrum in one move under the animal on the side that’s going down (the one that didn’t jump), then return to the original balance point 0.8 seconds later.
- Look at the sky at the halfway mark. From Level 10, a drop can come at half time. The new mass-weighted average shifts the balance point all at once.
- FREEZE is insurance for the first 3 seconds, 5Booster is for chasing points, PREVIEW is the answer key, and Clean is your rain-and-snow fix for Level 11+. Turn on the 5-minute pass with a single ad and you can use several in a row (still one slot at a time).
- New animals unlock just by getting there. Even if you fail on a level you’re stuck on, the animals up to that level are unlocked, so you don’t have to force a clear to fill out the collection.
BalanceMaster supports 10 languages: English, Korean, Japanese, Chinese, German, French, Russian, Spanish, Portuguese and Turkish. Like the other games in the Master series, it’s made to be played one-handed in short bursts.
One triangle, one balance.
Which animals will you even out today?

Play BalanceMaster now
Playing it is much faster than reading about it.
Find the other Master Series games all in one place at hanilab.app.
More from this game
 “Caster, the triangle is on the move!” Reading one BalanceMaster round as a broadcast script
 BalanceMaster Game Over: 7 Ways You Lose When the Animals Never Fall
 BalanceMaster Level 1 vs Level 500: Is It the Same Game? Timer 15 s to 8.5 s, Plank 90% to 52%
 BalanceMaster Weather and Special Modes — Rain, Snow, Lightning and 20 Modes, Measured
🌌 Universe stories
 Roddy Universe, Part 2 — Fallen Down, Only One Step Back at the Roadside
 Roddy Universe, Part 1 — One Beat Before Crossing, the Empty Road Between the Cars
 Bombi Universe, Part 2 — Behind You: The Reaper That Walks Through Walls
Try other games
 FindMaster
 LottoMaster
 TakMaster