
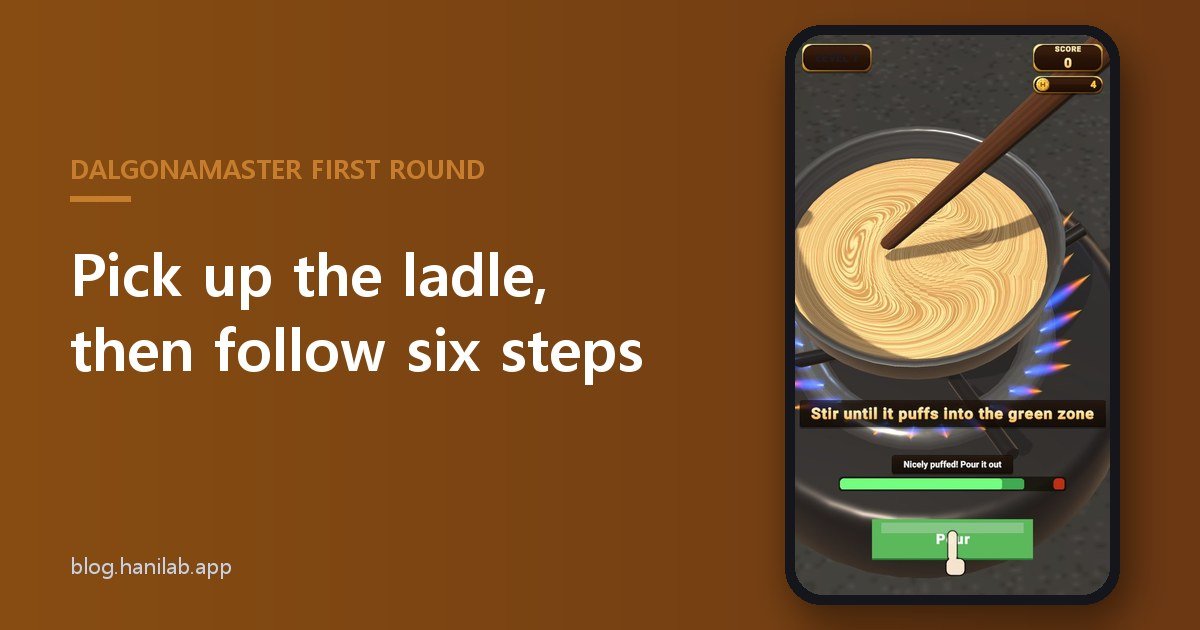

Pick up the ladle,
then follow these six steps
This part is imagination. A cold evening at the mouth of an alley, one ladle sitting over a charcoal fire. The sugar sinks slowly in the bowl and I’m crouching in front of it. The DalgonaMaster first round starts from exactly this picture, except the game puts the ladle over an on-screen burner and sends a guide finger to tag along.
That’s the end of the imagining. From here on I only talk about what is actually inside the game. In the DalgonaMaster first round you melt sugar in a ladle, add baking soda, pour, press, stamp a shape and let it set, and only then do you start tearing the dalgona apart. The first-round guide walks you through all six steps in one go. The first line on screen when you start is: “Draw circles to stir the sugar”. This post begins at that line and follows the round in order, all the way to the moment you tear off your first piece.
The first round is a special one. There is no time limit, and tearing is a little more forgiving of mistakes. The “Quick ▶▶” button you’ll see from round two on is not there, because the first round wants you to do all six steps by hand. So the order of this post is the order of the game.
Melt the sugar: draw circles
The first screen shows a ladle, a pair of chopsticks and a burner with a blue flame underneath. All you do is draw circles over the ladle with your finger. The guide says “Draw circles to stir the sugar” and the hint line reads “Draw slow circles in the ladle”. A guide hand draws the circle first, so you only have to copy it.
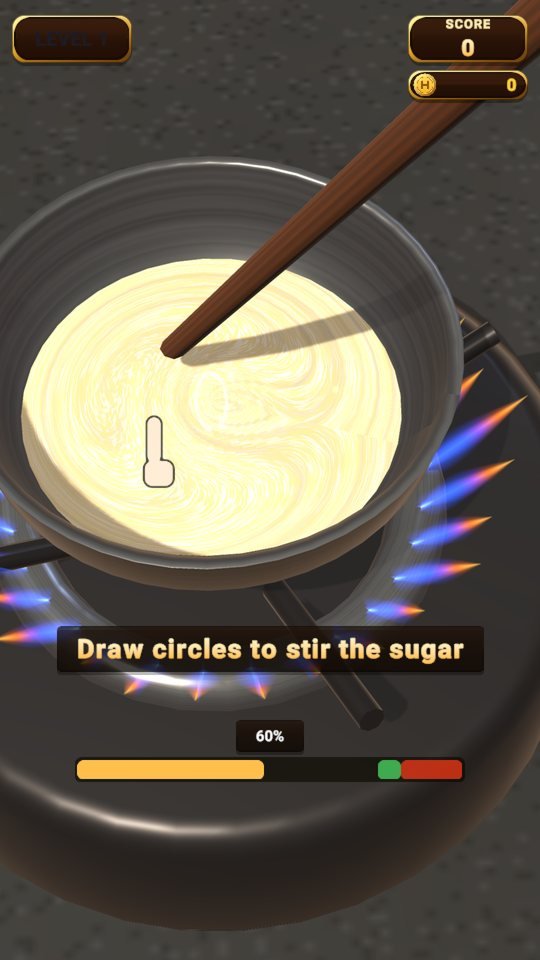 The sugar at 60% melted. The green zone at the right end of the gauge is the sweet spot.
The gauge in the lower middle is how far the sugar has melted. Left alone it still melts a little, but that takes close to 10 seconds; stirred well, it drops to a bit over 5. Well means neither too slow nor too fast. If you whip your finger around too hard the syrup splashes and it actually doesn’t help, so turn it slowly and steadily.
Around 85% the “Add soda” button shows up, and only at 100% does it light up. Here is the first trap. If you leave the pot alone once it has melted, the sugar starts to burn. “It’s starting to burn!” isn’t yet too late, but the burn stays with you through the later steps. Burnt dalgona is harder, and when you tear it the cracks run jagged. The first-round guide says it plainly: once it’s melted, add the soda right away.
Baking soda: stir until it puffs
Press the button and baking soda falls into the ladle. It takes about 0.9 seconds for the powder to settle, and after that you stir again. This time the guide says “Stir until it puffs into the green zone”. You raise the puffiness by stirring, and the sugar meets the soda and swells.
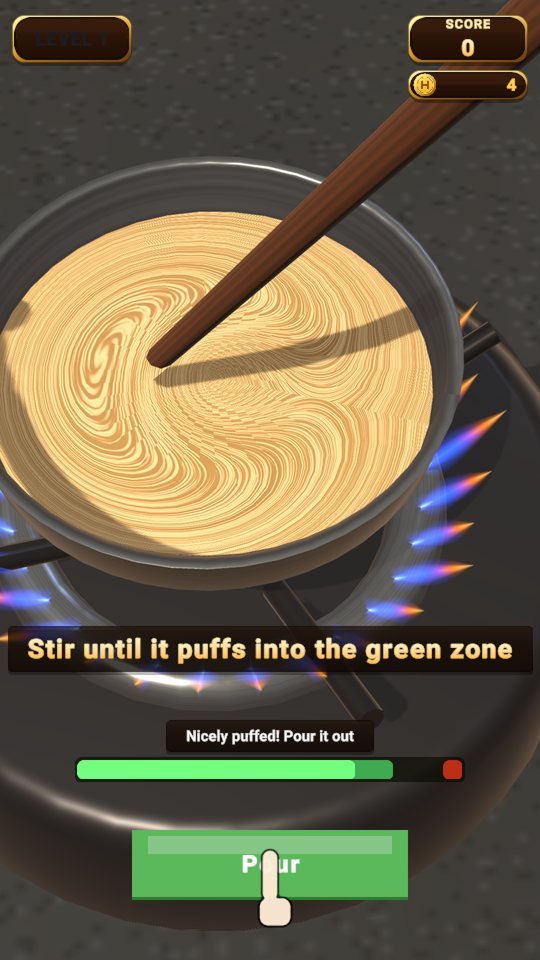 Once the gauge is inside the green zone, “Nicely puffed! Pour it out” appears.
The green zone of the puff gauge runs from 0.60 to 0.82. The more you stir, the higher it climbs, so the goal is to stop inside the zone. Inside it, the text changes to “Nicely puffed! Pour it out”. The Pour button is visible from around 0.4, but only the green zone counts as a good state. If you get greedy and keep stirring past 0.95, you get “Over-stirred — big uneven bubbles”. The bubbles inside the dalgona turn big and uneven, and you’ll find weak spots here and there when you tear it.
The trick for this step is a single one. When you see the green zone, ease off before you reach it. The gauge rises in proportion to how fast you stir, so the slower you turn near the end, the easier it is to stop inside the zone.
Pour: hold the button, then let go
The third step is one where you hold the button. While you hold, the ladle tips and the batter runs onto the iron plate; let go and it stops. The guide spells the rule out: “Hold to pour, let go in the green zone”. A full pour takes about 2.8 seconds and the green zone runs from 0.62 to 0.82.
 Mid-pour. The gauge hasn’t reached the green zone yet, so “A little thin” is showing.
Before the green zone you see “A little thin”, well past it you see “Too much — it’ll be thick”, and inside it the game says “Just right!”. The amount you pour decides the size and thickness of the dalgona. A piece big enough to fit the mold is guaranteed either way, but pour too much and you get thick dalgona that is harder to tear later. The window for letting go inside the zone is about 0.55 seconds. You don’t need eagle eyes, but you do need one practice go to get the feel.
Press: while the lid comes down
Next the lid presses the dalgona flat. The lid comes down by itself and the bar at the bottom of the screen fills as it goes. A full bar takes 2.6 seconds. All you do is tap “Stop pressing” in the green zone. That zone runs from 0.45 to 0.62, which is only about 0.44 seconds. The guide puts a “Stop here” arrow over it.
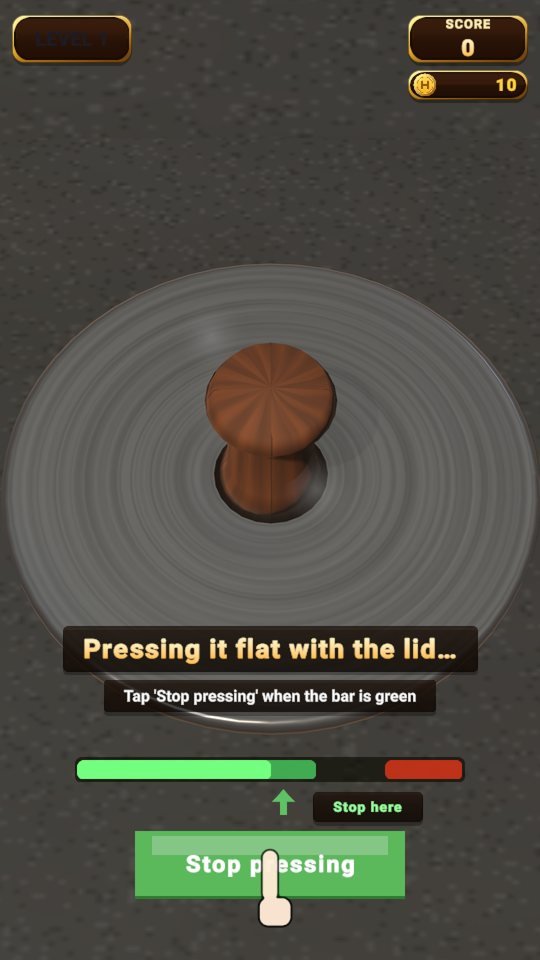
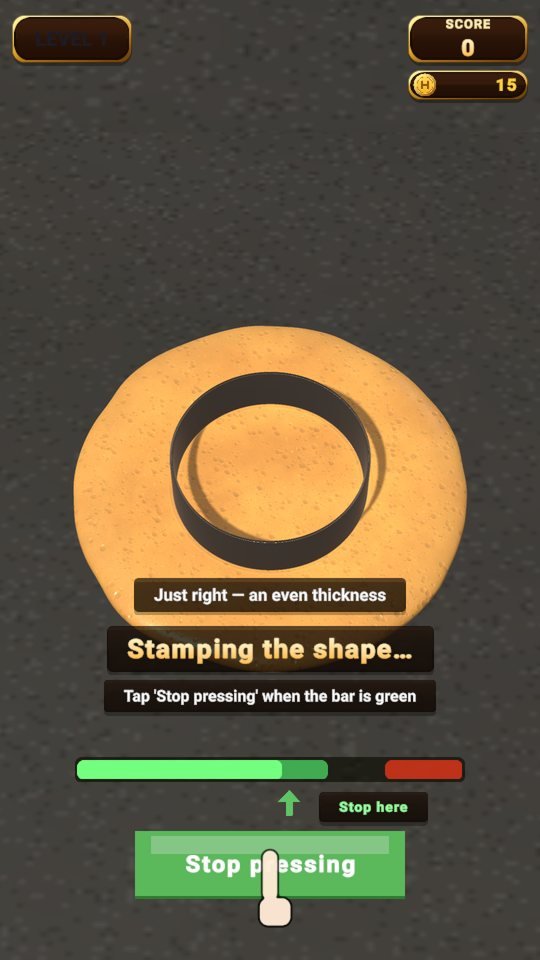
Stop early and the dalgona stays small and thick. After you stop, the hint “Pressed too little — small and thick. It’s hard, so a piece may take a few pulls” shows for about 3.2 seconds. Run the bar to the end and you get “Pressed too hard — wide and thin”, and thin dalgona lets cracks spread sideways when you tear it. Stop in the green and you see “Just right — an even thickness”. The red zone starts at 0.8, and near it the lid creaks and the phone vibrates. That’s your cue to notice by sound and feel.
Stamp the shape: the shortest green
The fifth step is the one that makes hands shake in the first round. The mold comes down onto the dalgona and stamps it with a pop, and the bar fills as the mold descends. This bar is full in 1.6 seconds, and the green zone runs from 0.45 to 0.65, about 0.32 seconds. That is even shorter than the 0.44 seconds of pressing. The text says “Stamping the shape…” and the guide is the same as before: “Tap ‘Stop pressing’ when the bar is green”.
Stamping decides how deep the line is cut. The groove becomes the “tear only this far” line in the tearing stage. Stamp too lightly and you get “Stamped too lightly — the line is faint. Cracks may run past it”, so a crack can walk straight past the line. Stamp too deep and you get “Stamped too deep — the line is thin and weak. Be gentle near it”, which means you’ll have to go gently close to the line. In the green zone you get “A clean, sharp stamp!”.
If you stop after the bar passes 0.75, the dalgona can crack. The chance is 10% at 0.75, 30% at 0.8, and up to 90% if you run it to the end. A crack shows “Pressed way too hard — the dalgona snapped in pieces!”, skips the setting step and ends the round right there. Stopping close to the green zone is the safest play.
Set: the waiting step
The sixth step is the easiest. Under the text “Setting…” the dalgona’s gloss slowly fades and its color settles. The guide says “Wait for it to set”. It takes 2.6 seconds, but if you keep a finger on the screen it sets three times as fast. That is what “Tap to speed up” means. If you’ve been tense through the first five steps, take one breath here. Once it has set, a clear line is visible on the dalgona. This is when the first-round guide says: “See the line? Keep everything inside it whole”.
One more thing: making never fails. Miss the soda or miss the bar and the round doesn’t end. The result simply stays on the dalgona. You end up with dalgona that is thick or thin, with a faint or deep line, with even bubbles or uneven ones, and tearing that dalgona is the next job. Your skill across the six steps adds up to a quality that makes tearing a little easier or harder.
| Step | What you do | Green (the good zone) | First-round guide text |
|---|---|---|---|
| 1 Melt | Stir in circles | Soda button turns on at 100% | Draw circles to stir the sugar |
| 2 Soda | Stir until it puffs | 0.60-0.82 | Stir until it puffs into the green zone |
| 3 Pour | Hold, then let go | 0.62-0.82 | Hold to pour, let go in the green zone |
| 4 Press | Stop pressing | 0.45-0.62 (about 0.44 s) | Tap ‘Stop pressing’ when the bar is green |
| 5 Stamp | Stop pressing | 0.45-0.65 (about 0.32 s) | Tap ‘Stop pressing’ when the bar is green |
| 6 Set | Wait (tap for 3x speed) | None | Wait for it to set |
The time of each green zone is the zone’s width multiplied by the full length of the bar, a calculated value. The numbers on the bars aren’t shown on screen, so as a rule of thumb the zone sits roughly where the bar is a little past half full, around two thirds.
The first piece: tap the edge
Now a clear line sits on the dalgona. “Line freed 0%” is at the top of the screen and the tools are lined up along the bottom. The guide says “Tap near the edge — the fingers tear a piece off”. There is no dragging or pinching of your own in the tearing. Tap the outer part of the dalgona once, lift your finger, and a thumb and index finger fly in within 0.16 seconds, grab that spot and tear a piece away.
 Crumbs are left where the first piece came off. The message below reads “Inside the line is the shape — touching it breaks it”.
Two of the most important lines of the first round come next. “Far from the line you can tear bigger pieces”, and then “Closer to the line, smaller pieces!”. Outside the line is where you may tear; inside it is the shape itself and pressing it breaks it. Everything people say about why dalgona is hard is packed into this one idea. The basic technique is to take big bites far from the line first, then nibble smaller and smaller as you close in. Press too close to the line and a crack can cross it and split the shape itself.
The first round is forgiving here too. The depth you may overshoot the line is more generous, pieces drop a bit faster, and the chance that thick dalgona won’t come off is cut in half. Only the first round gets that help. As the round goes about halfway, the guide has one last thing to say: “Stuck? Try the tools below”. The tools along the bottom of the screen are the Toothpick, Awl, Water, Undo, Magnifier and Guide. I’ll save those for another time; for the first round, just remember the one thing the guide hands you. When “You’ve got it!” appears at the end, your first dalgona is complete.
After the first round
From round two it changes. A “Quick ▶▶” button appears on the first making screen, and tapping it plays a 2-second montage of pressing, stamping and setting and gives you standard-quality dalgona. Under the button it says “Standard quality · no making bonus”. It’s convenient, but it means you give up what skill in the six steps earns you. And a time limit appears.
So treat the first round as a slow one-time lesson that teaches the six steps through your hands. Hitting a green zone of 0.32 seconds is hard at first, but after two or three tries the rhythm of the rising bar settles into your fingers. By the time the first round feels easy, you have already learned half of making dalgona.
The sugar on the ladle has started to melt. Draw circles and stir. When you see the green zone, ease off; when you see the line, start far away. The only scene I made up in this post is the charcoal fire at the start. Every other rule and every line of text is inside the game.
Play DalgonaMaster now
Playing it is much faster than reading about it.
Find the other Master Series games all in one place at hanilab.app.
More from this game
 ‘Just One Take-Back, Please’: Asking the Dalgona Vendor About Undo, Continue and Retry in DalgonaMaster
 Ten Squares of the Shape Book: DalgonaMaster Levels 1-10 Play Diary
 Today’s Stall Price Board: How DalgonaMaster H Coins Come In and Go Out
 Use a Tool, Lose Points? DalgonaMaster’s Six Tools and a Don’t-Use-It-When List
🌌 Universe stories
 Roddy Universe, Part 2 — Fallen Down, Only One Step Back at the Roadside
 Roddy Universe, Part 1 — One Beat Before Crossing, the Empty Road Between the Cars
 Bombi Universe, Part 2 — Behind You: The Reaper That Walks Through Walls
Try other games
 FindMaster
 LottoMaster
 TakMaster