
FingerMaster Complete Guide — 10 Fingers, 38 Objects, Perfect Combos, Hazards and Items

Balance the Eiffel Tower
on your fingertip
A baseball bat stands upright on a single index finger. Then a broom. Then, eventually, the Eiffel Tower and a fridge. Hold the left half of the screen and the hand slides left; hold the right half and it slides right — that one line is where every FingerMaster guide starts. The trouble is that the objects never sit still. Leave them alone and they tip over on their own; move the hand and inertia leans them the other way; climb the levels and you get wind, snow and lightning, plus twenty-two surprise twists that arrive without any warning. Go past 75° from vertical and the round is over.

This FingerMaster guide covers everything in the game, in order: the rules of a round and the controls, the screen layout, the ten fingers, the thirty-eight objects, scoring and Perfect Combos, levels and difficulty, the hazards (weather, special modes and danger warnings), the six items and H Coins, the bonus coin round that opens every 10 levels, and finally unlocks, titles and daily missions. Every number was checked against the game’s code, and every photo and animation was captured from the real game running. It’s a long read, so take your time — if you’re brand new, you can jump straight to six things for first-time players at the bottom.
- The rules — 75° and 6.8 seconds
- The screen — where to look
- Controls — left, right, and letting go
- The ten fingers
- The thirty-eight objects
- Score and Perfect Combos
- Levels and difficulty
- Hazards ① Weather — wind, snow, rain and lightning
- Hazards ② The twenty-two special modes
- Hazards ③ Danger warnings — red edges and a heartbeat
- The six items
- H Coins and the bonus coin round
- Unlocks, titles and daily missions
- Clear, game over and continuing
- Six things for first-time players
The rules — 75° and 6.8 seconds
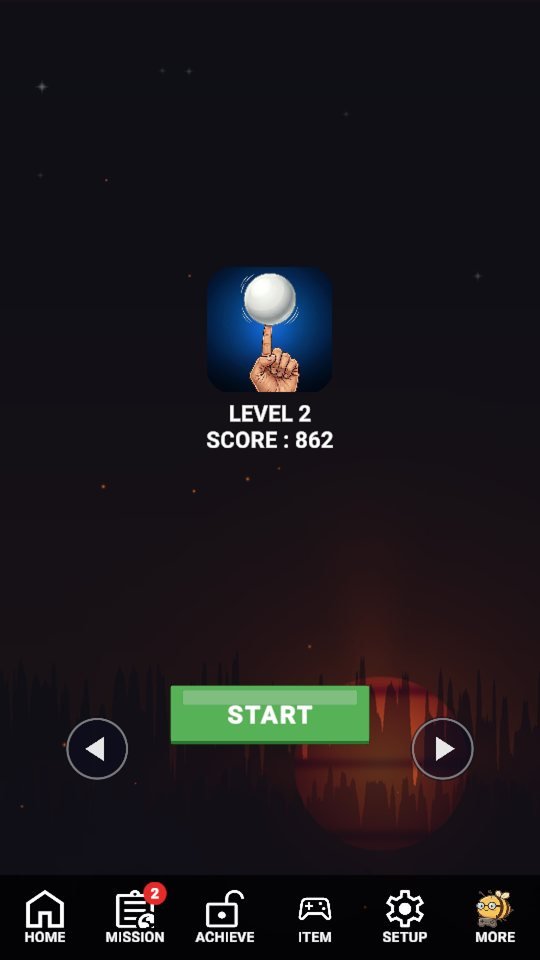
This start screen greets you when you open the game (here it shows a saved game at level 2; on a fresh install it reads level 1, score 0). Tap START, pass through the item picker once, and level 1 begins right away. The rules are short.
- The object is pinned to your fingertip. It never falls off; it only tips under its own centre of gravity (an inverted pendulum). When the hand moves, its inertia leans the object the opposite way.
- There is exactly one way to fail: more than 75° from vertical. It doesn’t matter what part of the object touches what — only this angle counts.
- To clear, survive the target time. Level 1 is 6.8 seconds; it grows with the level and tops out at 14 seconds at level 1000.
- There are no lives. If it falls, you simply replay the same level — and the levels never end.
How a round opens
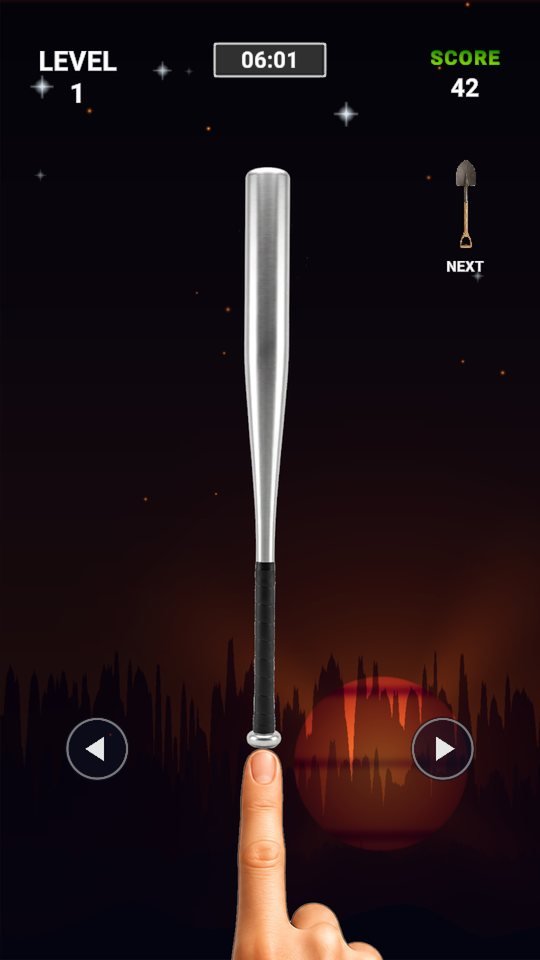
- “LEVEL N” — split around the centre, the left letters slide in from the left and the right letters from the right, covering 380px in 0.5 seconds, hold for about 1.2 seconds and then vanish. The HUD stays hidden meanwhile.
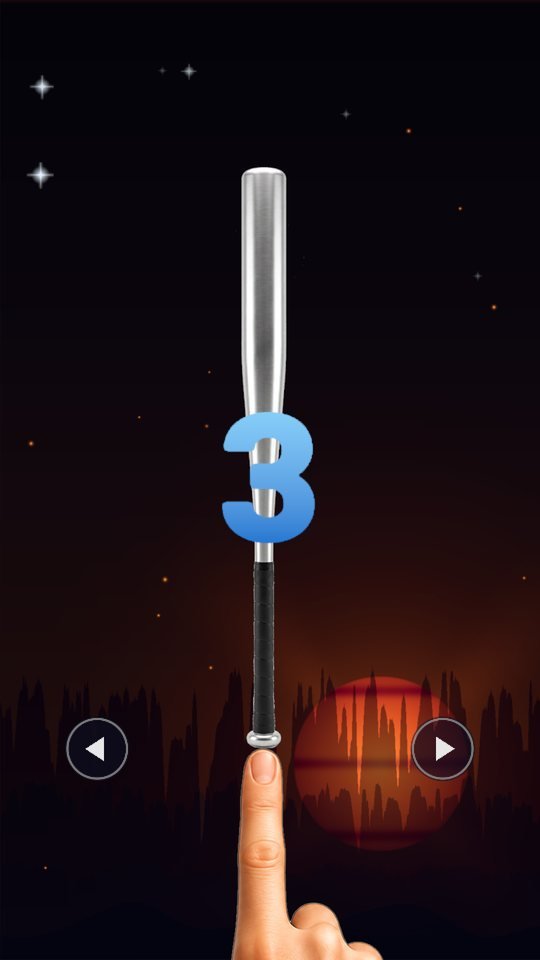
- After 1.5 seconds the hand and the object appear. The object sits calmly upright on the fingertip.
- 3 · 2 · 1 — numbers fading from sky blue to deep blue count down. The object still doesn’t move.
- It gets a small nudge the moment it’s released. When the countdown ends, the object is let go with an angular velocity of 3.6–6° per second to the left or right (random). A perfectly upright object is in theoretical equilibrium and would give you nothing to react to, so the game deliberately starts it leaning one way. For the first 5 physics steps, the tilt check takes a break.
- The timer at the top centre counts down the remaining time as
SS:CC(seconds:hundredths). Keep the object up until it hits zero and you get Clear!
Falling doesn’t end things instantly. Once you pass 75°, the game-over screen appears 0.8 seconds (real time) later. In those 0.8 seconds the Revive item can bring the object back (see the items chapter). And when a round fails, pressing Retry rolls your score back to what it was when that round started — the botched round simply never happened.
The white ball on the icon isn’t one of the current thirty-eight objects. What you actually balance in the game are long things that tip easily — sticks, towers, furniture, food and animals (all of them are shown in the objects chapter).
The screen — where to look
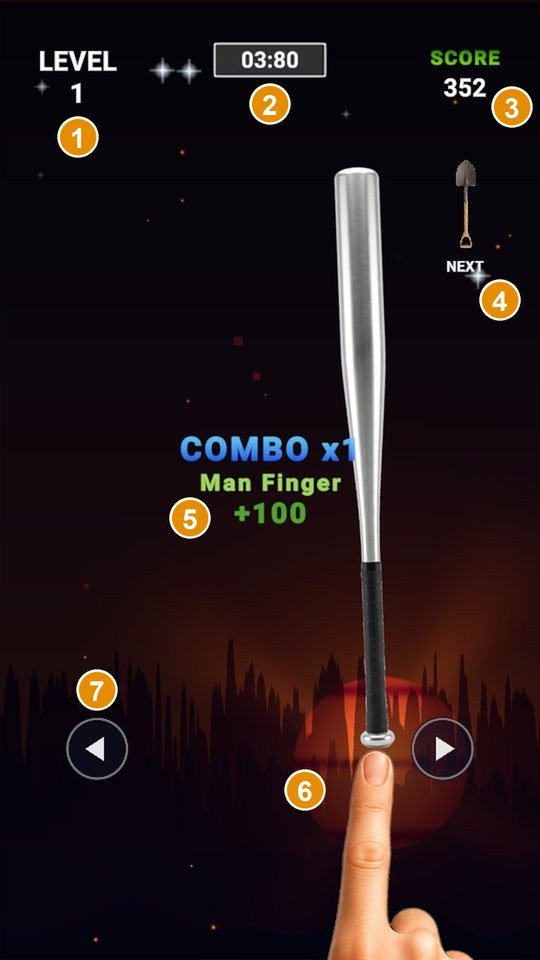
- Level — LEVEL N in the top left. Once the level reaches three digits, the text wraps onto two lines.
- Time left — the box at the top centre. It counts down the time remaining to the target as
SS:CC. Level 1 starts at 06:80. - Score — top right. It ticks up in real time while you hold on, and jumps in big steps whenever a Perfect Combo fires.
- Next object — the NEXT slot on the right shows a small preview of the object coming in the next round. Once every ten to fifteen rounds, it’s hidden behind a ?.
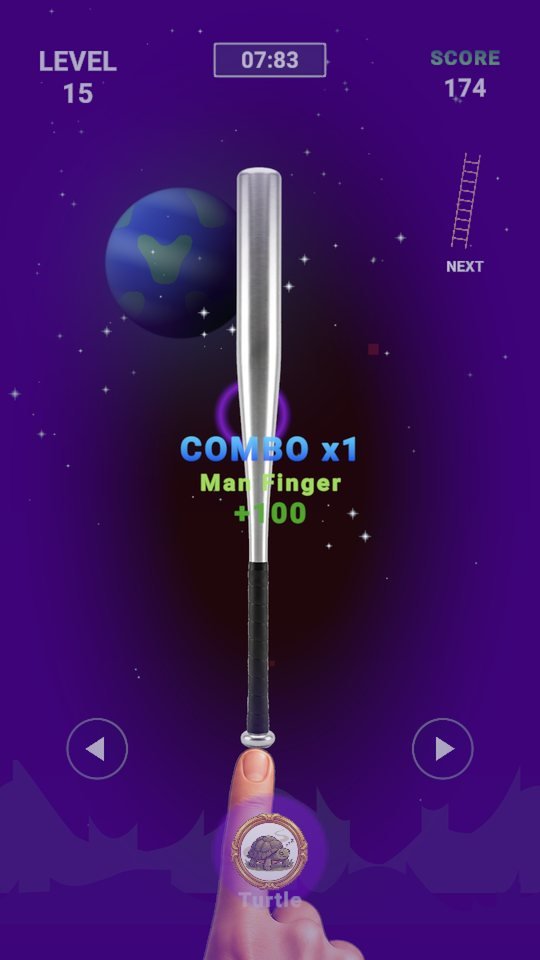
- Perfect Combo text — COMBO x1, the finger’s name and +100 appear in the middle of the screen (see the combo chapter).
- Hand and object — the object stands on the index fingertip of a hand rising from the bottom. The hand changes every round.
- Left and right arrows — the semi-transparent circles at the bottom corners. They’re just guides; the real input is each half of the screen, so you don’t need to hit the circles precisely.
The bottom bar (HOME · MISSION · ACHIEVE · ITEM · SETUP · MORE) stays hidden during play and only appears on the clear screen, the game-over screen and the home screen. That way you can’t tap it by accident mid-round (all the drawer screens in the later chapters open from here). When the game fetches ranking data over the internet, a TOP N% badge also appears under the level in the top left — the screenshots in this article were taken without a server connection, so you won’t see it here.
Eight night-time backdrops
The screen is always set at night (there is no light mode). There are eight backdrop scenes — forest night, deep space, the lunar surface, an aurora snowfield, a moonlit valley, an ember dusk, a glow-in-the-dark garden and a lantern night — shuffled into a cycle and swapped every 150 seconds (the cycle carries on between rounds). The sky sparkles every time your Perfect Combo climbs a step, a shooting star passes every 5 steps, and the night grows redder and deeper as the levels rise. It’s pure atmosphere with no effect on the rules or the numbers.
Controls — left, right, and letting go
No buttons, no swipes. Hold the left half of the screen and the hand moves left; hold the right half and it moves right. It doesn’t matter where your finger is, as long as it stays on the correct side of the vertical centre line. Let go, and the hand stops on the spot.

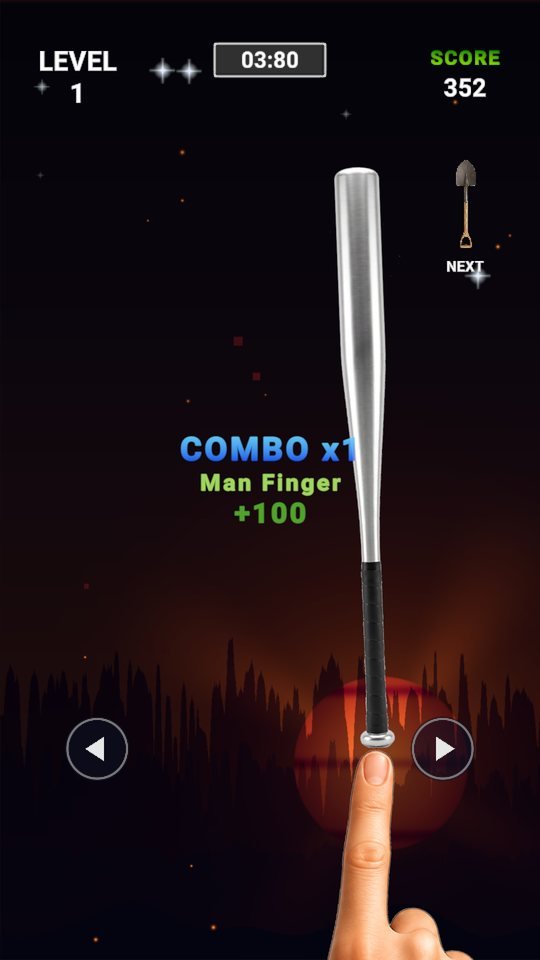
The hand hits its set speed the instant you press and stops the instant you let go. No acceleration, no sliding. So how long you hold equals how far it travels.
The real speed is the hand’s move speed multiplied by 0.4. The fastest, Child Finger, crosses the screen edge to edge in just over a second; the slowest, Stone Finger, takes almost 5 seconds (see the table in the next chapter).
The hand stops at the left and right edges. If you’re pinned against one edge and the object falls toward the other side, there’s no way to get under it — staying near the middle is the safe play.
Wind pushes only the object. It has no effect on the hand at all. The only hazard that slows the hand is snow (see the hazards chapters).
The whole trick in one sentence
Move your hand toward the side the object is leaning and catch it from below. If it leans right, press right so the hand slides under it; if it leans left, press left. But the moment the hand starts moving, its inertia pushes the object the other way — sometimes that cancels the lean nicely, sometimes it overshoots and tips it over the opposite side. That’s why short, chopped taps beat long holds: they keep you from overreacting. Pressing and releasing again and again lets the hand keep correcting its position under the object.
- The change-of-direction effect — when you switch from one side to the other, the hand whips and squashes slightly. That’s purely visual and doesn’t affect the physics. The same goes for the small up-and-down bob while it moves.
- Heavy objects make the hand sag and bounce — this one is not cosmetic: it’s real movement that lasts until the end of the round (see the objects chapter).
- Input — on a touch screen, one finger is all you need. If several fingers are touching, the game reads only one of them.
The ten fingers
There are ten hands that can hold up your object. You don’t get to choose — at the start of every round the game shuffles the unlocked hands into a cycle and deals them out in order, so the same hand never shows up twice within one cycle.


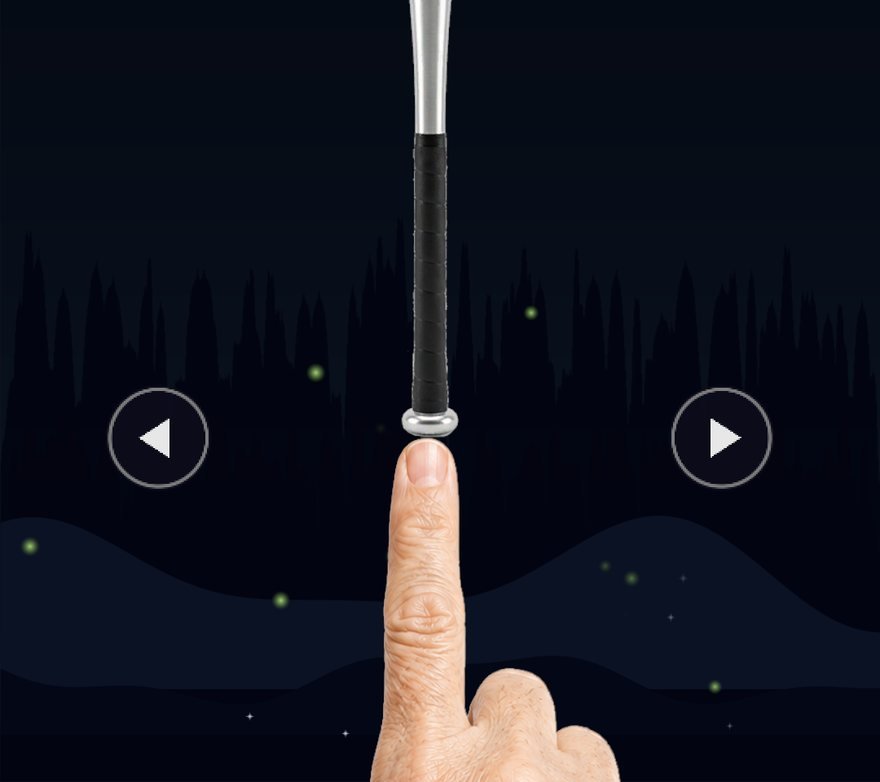


Only three things really differ between hands: move speed, the Perfect Combo score multiplier, and — for Child Finger only — the combo tolerance angle. In the table below, real speed is the hand’s move speed times the screen factor of 0.4 (world units per second), and edge-to-edge time is the screen width of about 5.6 divided by that speed.
| Finger | Name shown in combos | Unlock (best level) | Move speed | Real speed | Edge to edge | Combo multiplier |
|---|---|---|---|---|---|---|
| Man | Man Finger | From the start | 6 | 2.4 | 2.3 s | ×1 |
| Woman | Woman Finger | From the start | 8 | 3.2 | 1.8 s | ×1 |
| Grandpa | GrandPa Finger | From the start | 4 | 1.6 | 3.5 s | ×1.2 |
| Grandma | GrandMa Finger | From the start | 4 | 1.6 | 3.5 s | ×1.2 |
| Child | Child Finger | From the start | 12 | 4.8 | 1.2 s | ×1.3 |
| Wood | Wood Finger | From the start | 5 | 2 | 2.8 s | ×1 |
| Gini | Gini Finger | Level 5 | 6 | 2.4 | 2.3 s | ×2 |
| Metal | Metal Finger | Level 5 | 5 | 2 | 2.8 s | ×1.5 |
| Robot | Robot Finger | Level 10 | 7 | 2.8 | 2.0 s | ×1.8 |
| Stone | Stone Finger | Level 10 | 3 | 1.2 | 4.7 s | ×1.5 |
You can’t pick a hand, but here’s how to read them
- Slow hands (Stone, Grandpa, Grandma) take a while to catch up when the object tips. In exchange their combo multiplier is 1.2–1.5×, so if you can keep the object still and upright, they pay better.
- Fast hands (Child, Woman) get under a leaning object quickly, but they also kick it harder with inertia. Child Finger has a special bonus: it widens the Perfect Combo tolerance from 5° to 8°, so your combo survives a bit of wobble.
- Gini Finger has an ordinary speed but the biggest combo multiplier: 2.0×. A round with Gini is your chance to bank points.
- The best level used for unlocks is recorded the moment a round at that level ends, whether you clear it or fall. Merely reaching level 5 and falling still unlocks Gini and Metal. Hands you’ve already unlocked stay available even if you start a new game from level 1.
The thirty-eight objects
There are thirty-eight objects that can stand on your fingertip. At level 1 only six are unlocked — baseball bat, golf club, broom, sari broom, shovel and umbrella — and by the time you reach level 100, everything from the Eiffel Tower to the fridge to the elephant is in play. The photos below are real game screens, each with one object standing on the same hand (Man Finger). Look at how wildly the heights vary — some stick out past the top of the screen.
* Object names never appear in the game itself — objects are shown only as pictures. The names below are the ones written in the game’s data.
 Baseball BatLevel 1
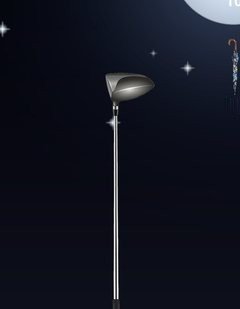 Golf ClubLevel 1
 BroomLevel 1
 Sari BroomLevel 1
 ShovelLevel 1
 UmbrellaLevel 1
 CaneLevel 2
 SafeLevel 5
 LadderLevel 8
 SurfboardLevel 11
 Palm TreeLevel 15
 ToiletLevel 18
 GuitarLevel 21
 FridgeLevel 24
 Statue of LibertyLevel 27
 Eiffel TowerLevel 30
 Namsan TowerLevel 34
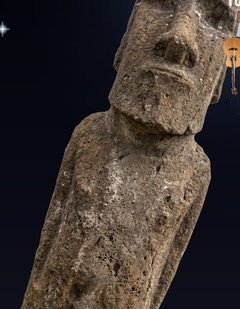 MoaiLevel 37
 Tower of PisaLevel 40
 CarrotLevel 43
 ForkLevel 46
 Corn DogLevel 49
 New York Hot DogLevel 53
 SpoonLevel 56
 Korean RadishLevel 59
 CucumberLevel 62
 Sports CarLevel 65
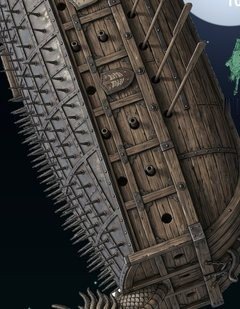 Turtle ShipLevel 68
 Giant SquidLevel 72
 SharkLevel 75
 Ballet DollLevel 78
 Back ScratcherLevel 81
 High HeelLevel 84
 Bowling PinLevel 87
 City BusLevel 91
 ElephantLevel 94
 T-RexLevel 97
 GorillaLevel 100
How objects are picked, and when they unlock
- Unlocked objects are shuffled into a cycle and used in order. They’re only reshuffled once the whole cycle has been used, so the same object never appears twice within one cycle. The NEXT slot at the top right previews the upcoming object.
- Unlocks are based on your best level — an object opens when you reach the level shown in the table below. Reaching the level is enough, you don’t have to clear it: get to level 40 and fall, and the Tower of Pisa is still yours. Once unlocked, an object stays unlocked even in a new game.
- In the bottom bar, ACHIEVE → UNLOCK shows all thirty-eight slots in unlock order; the ones still locked are dimmed with a LEVEL N padlock.
- Gravity is set per object (only the safe is 1.2×; everything else is 1×). The whole game then multiplies it by 0.5, and finally by the per-level multiplier (see the levels chapter).


The full list
Virtual weight is the “real weight (kg)” the developer assigned to each object. It’s separate from the mass used in the physics (the first number in the table), and it decides how much the hand sags and bounces.
| Unlock | Object | Data name | Mass | Virtual weight (kg) | Hand sag |
|---|---|---|---|---|---|
| 1 | Baseball bat | Baseball Bat | 1.5 | 0.9 | None |
| 1 | Golf club | Golf Club | 0.8 | 0.4 | None |
| 1 | Broom | Broom | 1 | 0.3 | None |
| 1 | Bush-clover broom | Sari Broom | 0.7 | 0.5 | None |
| 1 | Shovel | Shovel | 2 | 1.5 | None |
| 1 | Umbrella | Umbrella | 0.8 | 0.4 | None |
| 2 | Cane | Cane | 1 | 0.3 | None |
| 5 | Safe | Safe | 8 (gravity ×1.2) | 5,000 | Large |
| 8 | Ladder | Ladder | 4 | 10 | None |
| 11 | Surfboard | Surfboard | 1.5 | 7 | None |
| 15 | Palm tree | Palm Tree | 3.5 | 800 | Medium |
| 18 | Toilet | Toilet | 5 | 45 | None |
| 21 | Guitar | Guitar | 1.8 | 2.5 | None |
| 24 | Fridge | Fridge | 8 | 3,000 | Large |
| 27 | Statue of Liberty | Statue of Liberty | 3.5 | 204,116 | Largest |
| 30 | Eiffel Tower | Eiffel Tower | 4 | 10,100,000 | Largest |
| 34 | Namsan Tower | Namsan Tower | 2.5 | 9,000,000 | Largest |
| 37 | Moai | Moai | 4 | 13,000 | Largest |
| 40 | Leaning Tower of Pisa | Tower of Pisa | 3 | 14,500,000 | Largest |
| 43 | Carrot | Carrot | 0.6 | 0.1 | None |
| 46 | Fork | Fork | 0.5 | 0.05 | None |
| 49 | Corn dog | Corn Dog | 0.7 | 0.15 | None |
| 53 | New York hot dog | New York Hot Dog | 0.6 | 0.12 | None |
| 56 | Spoon | Spoon | 0.5 | 0.05 | None |
| 59 | Korean radish | Korean Radish | 0.8 | 0.4 | None |
| 62 | Cucumber | Cucumber | 0.6 | 0.3 | None |
| 65 | Sports car | Sports Car | 4 | 1,500 | Medium |
| 68 | Turtle ship | Turtle Ship | 4 | 1,800 | Medium |
| 72 | Giant squid | Giant Squid | 2 | 200 | None |
| 75 | Shark | Shark | 3 | 500 | Medium |
| 78 | Ballet doll | Ballet Doll | 1.5 | 0.5 | None |
| 81 | Back scratcher | Back Scratcher | 0.5 | 0.2 | None |
| 84 | High heel | High Heel | 1.2 | 0.3 | None |
| 87 | Bowling pin | Bowling Pin | 1.5 | 1.5 | None |
| 91 | City bus | City Bus | 5 | 12,000 | Largest |
| 94 | Elephant | Elephant | 5 | 5,000 | Large |
| 97 | Tyrannosaurus | T-Rex | 6 | 8,000 | Large |
| 100 | Gorilla | Gorilla | 6 | 6,000 | Large |
Heavy objects weigh the hand down
Any object with a virtual weight over 300kg makes the hand bob up and down. Catching a lean while the hand is also rising and sinking makes it much harder to keep things upright, and this bobbing lasts until the round ends (it ramps up to full amplitude over 0.5 seconds). There are three tiers.
| Tier | Threshold | Amplitude | Bob rate | Objects |
|---|---|---|---|---|
| Medium | 300kg or more | 0.12 | 1.6 per second | Palm tree · sports car · turtle ship · shark |
| Heavy household items · large animals | 2,000kg or more | 0.24 | 1.3 per second | Safe · fridge · elephant · tyrannosaurus · gorilla |
| Buildings · towers | 10,000kg or more | 0.42 | 1.0 per second | Statue of Liberty · Eiffel Tower · Namsan Tower · moai · Tower of Pisa · city bus |
Amplitude is in world units (the screen is 10 tall), so 0.42 is a little over 4% of the screen height. The heaviest tier sways slowly (once per second), while the medium tier makes small, quick bobs. When a Perfect Combo fires while you’re holding up something heavy, you also get contact particles spraying from the fingertip.
Score and Perfect Combos
Points come from two sources. One is the base score that builds up with the time you survive; the other is the Perfect Combo that fires when you keep the object upright. And they’re nowhere near the same size — at level 1 the base score can’t even reach 400 no matter how well you play, while Perfect Combos go up to 3,600. In this game, score basically means combos.
Base score — time × (10 + centre bonus)
- The base is 10 points per second, plus a centre bonus. The closer the object is to sitting right above the fingertip, the bigger it gets — 30 when the horizontal distance between object and fingertip is 0, falling to 0 at a distance of 2, and multiplied by 1.5 (up to 45) when the distance is within 0.3.
- The formula is
(10 + centre bonus) × time survived: it takes the value at this very moment and multiplies it by the whole duration. So how straight the object stands over the fingertip at the instant the round ends has a huge effect on your base score. - Hold level 1 (6.8 s) perfectly centred the whole way and you get about 374 points (55 × 6.8). At level 1000 (14 s), it’s about 770.
Perfect Combo — ±5° for 0.8 seconds


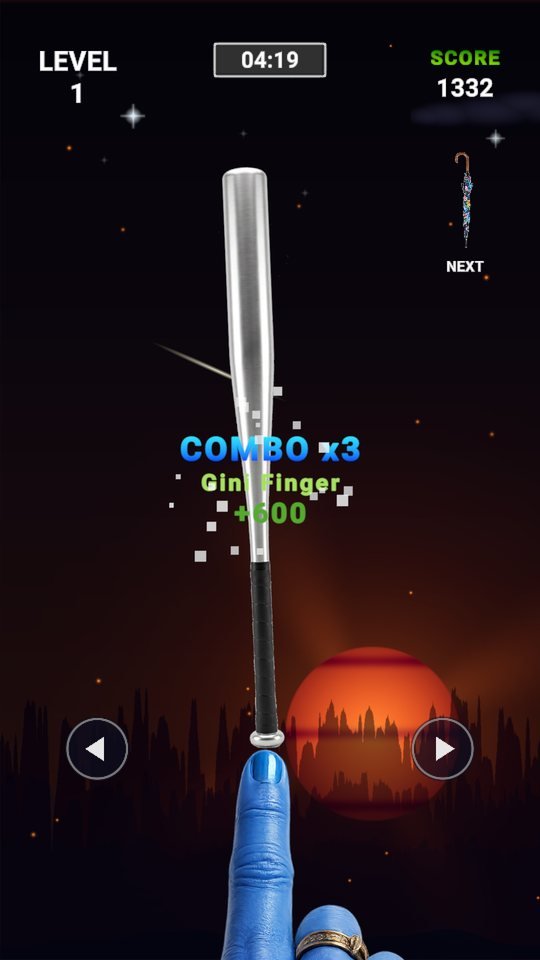
- Condition — keep the object within ±5° of vertical for 0.8 seconds and the combo goes up one step. Keep it straight and it climbs to step 2, step 3… every 0.8 seconds, with no cap.
- Points — the moment it climbs,
step × 100 × hand multiplieris added to your score immediately. Step 3 is +300; with Gini Finger (×2.0) it’s +600. Points you’ve received stay put even if you wobble later. - Breaking — the instant you go past 5°, the step count drops straight to 0 (your points are kept). Stand it up again and you start over from step 1.
- Child Finger’s tolerance is a wider 8° (5° × 1.6).
- Fever from step 10 — the text changes to * FEVER x10 * and turns gold.

Reaching Fever means standing perfectly still for over 8 seconds, so you’ll only see it at higher levels where rounds are long. The text gets deeper in colour as the steps rise (steps 1–5), the sky sparkles on every step, and a shooting star crosses every 5 steps.
The highest step you can reach in one round is target time ÷ 0.8 s.
- Level 1 — 6.8 s → 8 steps
- Level 100 — 11.3 s → 14 steps
- Level 1000 — 14 s → 17 steps
An unbroken run of N steps is worth 100 × N(N+1)/2 × hand multiplier. The more steps, the faster it snowballs — quadratically.
| Unbroken steps | × 1.0 | × 1.2 | × 1.3 | × 1.5 | × 1.8 | × 2.0 |
|---|---|---|---|---|---|---|
| 1 step | 100 | 120 | 130 | 150 | 180 | 200 |
| 3 steps | 600 | 720 | 780 | 900 | 1,080 | 1,200 |
| 5 steps | 1,500 | 1,800 | 1,950 | 2,250 | 2,700 | 3,000 |
| 8 steps | 3,600 | 4,320 | 4,680 | 5,400 | 6,480 | 7,200 |
| 10 steps | 5,500 | 6,600 | 7,150 | 8,250 | 9,900 | 11,000 |
| 14 steps | 10,500 | 12,600 | 13,650 | 15,750 | 18,900 | 21,000 |
| 17 steps | 15,300 | 18,360 | 19,890 | 22,950 | 27,540 | 30,600 |
The multipliers are 1.0 for Man, Woman and Wood, 1.2 for Grandpa and Grandma, 1.3 for Child, 1.5 for Stone and Metal, 1.8 for Robot and 2.0 for Gini. Since you can’t choose the hand, keeping the object as straight as possible whenever a high-multiplier hand comes up is your biggest scoring opportunity.
Combo points go into your running total the instant you earn them, but if you then fall in that round and press RETRY, your score rolls back to what it was when the round started. Only a clear keeps your points safe.
Levels and difficulty
The levels never end. Difficulty doesn’t rise in steps but along one continuous curve — the level number is converted into a value D between 0 and 1, and target time, gravity, weather and special modes all follow this D.
D = log10(level + 1) ÷ log10(1001) — 0.10 at level 1 and 1.00 at level 1000. Because it’s logarithmic, it’s steep early on and flattens out later. Level 10 is already 0.35, and level 100 is 0.67.


| Level | D | Target time | Gravity multiplier | Weather chance | Weather strength | Special mode chance |
|---|---|---|---|---|---|---|
| 1 | 0.10 | 6.8 s | 0.84–1.14 | — | — | — |
| 5 | 0.26 | 8.1 s | 1.06–1.36 | — | — | — |
| 10 | 0.35 | 8.8 s | 1.19–1.49 | — | — | — |
| 11 | 0.36 | 8.9 s | 1.20–1.50 | 59% | 2–5 | 20% |
| 20 | 0.44 | 9.5 s | 1.32–1.62 | 63% | 3–6 | 20% |
| 50 | 0.57 | 10.6 s | 1.50–1.80 | 68% | 3–7 | 20% |
| 100 | 0.67 | 11.3 s | 1.64–1.94 | 72% | 4–7 | 30% |
| 200 | 0.77 | 12.1 s | 1.77–2.07 | 76% | 4–8 | 40% |
| 500 | 0.90 | 13.2 s | 1.96–2.26 | 81% | 5–9 | 70% |
| 1000 | 1.00 | 14.0 s | 2.10–2.40 | 85% | 5–10 | 70% |
- Target time —
6 + 8 × Dseconds, capped at 14. The higher the level, the longer you have to hold on. - Gravity multiplier — how fast the object tips over. The base value is
0.85 + 1.4 × D, and each round it varies by up to ±0.15. The same object falls noticeably faster at high levels. - Weather starts at level 11, with its chance and strength rising with D (see the hazards chapters). Special modes have a 20% chance from level 11, 30% from 51, 40% from 101 and 70% from 201. Levels 1–10 are a calm stretch with neither.
The occasional breather round
If a game only ever gets harder, players who are stuck tend to lose interest. So every now and then the game slips in a “go-easy” round that lowers D for that round only. A lower D makes the target time, gravity, and weather chance and strength all lighter at once — and special modes don’t appear at all.
- After repeated failures — once you’ve had three game overs in total (clearing in between doesn’t reduce the counter), the next level you start fresh gets its D lowered by 0.32, and the counter resets to 0. The code comment says “three in a row without a combo”, but in practice it’s counted cumulatively like this.
- A bonus from level 50 up — if at least 4 rounds have passed since the last go-easy round, there’s an 8–18% chance (higher with higher D) of getting a round with D lowered by 0.22.
- This check only happens when a new level starts. Retry doesn’t re-roll it, and any easing you already got carries over.
Hazards ① Weather — wind, snow, rain and lightning
From level 11, weather can roll in right after a round starts. Whether it comes at all is a dice roll, and if it does, wind, rain and snow are each rolled separately — so they can all arrive together. The game never announces “it’s raining” — you have to notice the screen changing and work it out yourself.
When, and how strong
- Chance of weather — rises with the level: 59% at level 11, 72% at level 100 and 85% at level 1000 (a curve from
45% → 85%following D). - Strength runs from 1 to 10. Around level 11 it’s picked between 2 and 5, at level 100 between 4 and 7, and at level 1000 between 5 and 10.
- In a round with weather, wind, rain and snow are each rolled independently. Wind goes from 40%→75%, rain 20%→65% and snow 5%→50% (following D). If none of them hits, wind is forced on.
- Timing — rain and snow arrive first, 0–1 seconds after the round starts, and wind kicks in 2.5 seconds after that, building up in eight stages over 2 seconds. In other words, the first few seconds are calm.
- In a round where you use the CLEAN item, the weather never starts at all.
Wind — it pushes the object

Wind applies a horizontal force to the object only — direction × strength × 0.45N, for the entire round (4.5N at strength 10). The hand isn’t pushed at all.
- The direction is left or right, fifty-fifty. The stronger it is, the more it keeps shoving in the same direction, so you have to hold on with the object leaning to one side.
- You’ll keep sending the hand toward the side it’s being pushed, so starting near the middle gives you room to work with.
Snow — the hand slows down
Snow doesn’t touch the object — it affects the hand. Move speed drops from almost unchanged at strength 1 to 40% at strength 10 (a straight line from 1 to 0.4). Even holding the same direction, the hand feels sluggish and arrives under a leaning object later.
- When it snows, you need to catch the object earlier and with shorter taps. Stone Finger (real speed 1.2) in strength-10 snow only covers 0.48 per second.
- Now and then a giant snowflake drifts across the screen, but it’s purely decorative (no effect on anything).

Rain and lightning — rain is just for show, lightning hits

Rain has no effect on the physics at all. You just see the streaks (they slant more when the wind is strong). The real threat is the lightning that comes with the rain.
- In a rainy round there’s a 30% chance of lightning striking 1–2 seconds after the rain begins.
- At the second flash, the code gives the object an angular velocity of 13–22° per second to the left or right (in measurements, what actually reaches a bat pinned to the fingertip is about 1.7–2.2° per second). You hear a sharp crack first, followed closely by thunder.
- It’s a single jolt. The change in tilt one second later measured 1.6–3.8°, so if your hand is holding the object straight it’s not very dangerous. Just don’t panic and fling the hand the other way.

When it all comes at once
The higher the level, the more often you get rounds with wind, rain and snow all together. The wind shoves the object, the snow makes your hand sluggish, and when lightning joins in — those are the most thrilling rounds. That’s exactly when to stay in the middle and hold on with short, chopped taps.
And the item that shines in weather like this is CLEAN. It wipes out the weather entirely for one round (see the items chapter).

Hazards ② The twenty-two special modes
Separately from the weather, a round can be hit by one special mode the moment it starts. The chance depends on the level range — 20% at levels 11–50, 30% at 51–100, 40% at 101–200 and 70% from level 201 (none at levels 1–10 or in go-easy rounds) — and when one triggers, it’s picked from the twenty-two with equal odds.
The scariest part is this: neither the mode’s name nor any warning appears on screen. You only realise when the screen suddenly goes dark or the hand starts moving backwards. All effects are cleanly reset once the round ends (clear, fall or the next round starting).
Eight modes, as they look on screen
Below are real screens taken just after each mode kicked in. Modes you notice by motion — shaking, flashes, blackouts — don’t come across in a single still, so they’re left out.


All twenty-two
Every number comes from the game’s code. “Until the end” means it lasts until that round is over. The mode names in the first column are this guide’s labels — the game itself never names them.
| Mode | Code name | What happens |
|---|---|---|
| Inverted Controls | InvertControl | Your input is reversed — press left and the hand goes right. Until the end. |
| Sideways Gravity | GravityShift | Gravity changes to (±9.81, −2.5), pulling sideways instead of down. Left or right fifty-fifty, until the end. |
| Screen Shake | ScreenShake | The camera shakes randomly (intensity 0.15). Until the end. |
| Narrow Vision | NarrowVision | A black veil fades in over 0.4 seconds to an opacity of 0.65. |
| Dark Mode | DarkMode | A black veil fades in over 0.5 seconds up to an opacity of 0.85 — you can barely see anything. |
| Speed Burst | SpeedBurst | Time runs 1.65× faster for 2.5 seconds (real time). |
| Camera Zoom | CameraZoom | The camera zooms in to 0.62× size over 0.8 seconds and stays there. |
| Camera Wobble | CameraWobble | The camera tilts back and forth by ±2.8°, 1.3 times per second. |
| Flash Blind | FlashBlind | A white flash (0.93) in 0.07 seconds → held for 0.05 seconds → clears over 0.85 seconds. |
| Ghost Hand | GhostPlatform | The hand fades over 1.8 seconds to an opacity of 0.28. |
| Earthquake | EarthQuake | The camera shakes hard (0.38), then calms down to 15% over 4 seconds. |
| Ghost Object | GhostBall | The object fades over 2 seconds to an opacity of 0.22. |
| Gravity Pulse | GravityPulse | Gravity swings between −9.81 and −19, 1.5 times per second. Until the end. |
| Fog | FogVignette | A thin darkness (0.33) settles over 0.7 seconds. |
| Tumble | Tumble | The object gets a single spin of 350–650° per second (random direction). |
| Wind Gust | WindGust | A 6–14N side wind hits the object for 1.3 seconds (random direction). |
| Reverse Gravity | GravityReverse | Gravity flips upward (+7.5), then returns after 1.8 seconds. |
| Static Noise | StaticNoise | TV-style static covers the screen (0.24, refreshed 16 times per second). Until the end. |
| Blackout | Strobe | The screen goes pitch black 4–6 times, for 0.05–0.11 seconds each (0.2–0.65 seconds apart). |
| Warning Pulse | WarningPulse | A red border pulses 1.15 times per second (up to 0.60). Until the end. |
| Heartbeat Zoom | PulseZoom | The camera size throbs 1.6 times per second, by up to 8.5%. |
| Object Flicker | ObjectFlicker | For the first 1.6–2.6 seconds, the object flickers irregularly (12% opacity). |
Getting a feel for each type
- Modes that hide the screen (Dark Mode, Narrow Vision, Fog, Blackout, Flash Blind, Static Noise, Ghost Object/Hand, Object Flicker) leave the physics unchanged. If you remember where the hand and object are, you can survive most of them. Even in Dark Mode, the object falls exactly the same way.
- Modes that shake the camera (Screen Shake, Earthquake, Camera Wobble, Zoom, Heartbeat Zoom) also leave the physics alone — only what you see moves. Don’t trust the lines on screen; trust only the object’s tilt.
- Six modes actually change the physics — Inverted Controls, Sideways Gravity, Gravity Pulse, Reverse Gravity, Tumble and Wind Gust. Speed Burst, which speeds up time, also cuts your reaction window. In these rounds, suspect your hand first.
- Inverted Controls does exactly what it says. If the object leans right, you have to press left. Spotting it before the first lean arrives is what matters.
- Special modes can’t be blocked by the CLEAN item. CLEAN only removes weather.
Hazards ③ Danger warnings — red edges and a heartbeat
This chapter isn’t about a hazard but about warnings the game gives you. As the object gets close to 75°, the screen tells you first. The figures are ratios of the current tilt to the fall threshold (75°).


| Tilt | Ratio | What happens |
|---|---|---|
| Under about 26° | Under 35% | Nothing is shown. |
| About 26° or more | 35% or more | A red border pulses in at the screen edges (1–3.2 times per second). The more it tilts, the deeper (up to 0.55 opacity) and faster it gets. |
| About 41° or more | 55% or more | A heartbeat vibration and sound join in. As the tilt grows, the gap between beats shrinks from 0.85 to 0.16 seconds, and the sound gets higher and louder (pitch 1.0→1.6, volume 0.35→0.85). |
- Once the red border starts spreading, this is no time to admire the effects. You’re already at 26°, and one more step brings the heartbeat. When the vibration speeds up, send your hand under the leaning side right away.
- This warning is not a special mode. It appears the same way in every round and fades as soon as the danger passes.
- There’s even a slow-motion reward for escaping a crisis. If, mid-round, the object leans 80% (about 60°) or more and comes back within 35% inside 2 seconds, or recovers from 92% (about 69°) to within 50% inside 1 second, the screen slows down for about 0.3 seconds and zooms in slightly. Once per round.
The six items
You can use one item per round: you pick it right before the round starts, and it’s gone when the round ends. Revive and Stop3 are “one-time rescues”; CLEAN, Wall, Speed and Turtle are “help for a whole round”. Prices follow a simple rule: the more an item can undo a failure, the more it costs.
| Item | Price (H Coins) | In one line |
|---|---|---|
| Revive | 100 | Brings a fallen object back to the fingertip and cancels the failure — once |
| Stop3 | 80 | Freezes the hand, object and weather from 3 seconds before the target time |
| CLEAN | 70 | Wipes out the round’s weather entirely |
| Wall | 60 | An electric barrier on one edge of the screen bounces the object back |
| Speed | 60 | Every hand moves at the same high speed |
| Turtle | 50 | Caps the object’s sideways movement and rotation speed |
How to get them, and when to use them

Every time a round starts, the Choose an item to use window opens. Your H Coins are at the top, the six items are listed below, and there’s a Start without item button at the bottom. The small print at the very bottom reads Purchased items can be used for 24 hours.
- If you own one, its row shows x count on the right; tap it and you start with it right away.
- If you don’t, you’ll see the price next to x0; tap it and a window lets you choose between Use for N coins and Watch Ad · Use. The ad option costs no coins. If neither coins nor an ad are available, the row shakes and Not enough coins appears.
- This window opens on a new game, after [NEXT] on a clear, after [RETRY] on a game over, when you continue after reopening the app, and after a bonus round. In other words, every Retry means picking an item again (and using up another one).
The ITEM tab in the bottom bar is for buying only. Six cards show each item’s icon, name, how many you own, time left (e.g. 23:59 left) and a price button, and up top there’s your H Coin balance plus a Watch Ad · +100 top-up button. Equipping happens in the start window above.
- Every purchase starts its own 24-hour clock for each unit, and the one closest to expiring is used first.
- Your first login of the day gives you one free item (random, out of the six).
- Item descriptions aren’t shown in the game. You only see the name, price, count and time left, so use the explanations below.

Revive — 100 coins

The moment you pass 75°, within the 0.8 seconds before game over is confirmed, it cancels the fall and swings the object back onto the fingertip along a curve. The hand also teleports to the centre of the screen, ready for a fresh start. The clock is compensated for the paused time and keeps running.
- It has one charge per round. Once it has saved you, the next fall is a normal failure.
- It comes with a golden shockwave and orbs wrapping around the object. The return takes 0.4–0.8 seconds, and it waits up to 2 seconds for things to settle.
- It can’t trigger again for 1.5 seconds after a rescue (which doesn’t matter much, since it’s single-use anyway).

Stop3 — 80 coins
When you reach 3 seconds before the target time, it triggers by itself (no tap needed) and completely freezes the hand, the object and the weather. Only the clock and the score keep going, and you clear just like that.
- It triggers at
target − 3 s— 3.8 seconds in at level 1, 8.3 seconds at level 100 and 11 seconds at level 1000. - You get a frosted screen, a white flash and ice shards, and the fall check is paused. The last 3 seconds are guaranteed safe.
- But if you fall before it triggers, it does nothing. The battle is the first “target − 3 s”. The longer the round, the smaller its relative effect (3 out of 6.8 seconds at level 1, but 3 out of 14 at level 1000).

CLEAN — 70 coins

When the round starts, the weather simply never begins. It effectively blocks wind, snow and rain (lightning included) all at once. The code also contains a clear-sky backdrop with two clouds drifting slowly, but it wasn’t clearly visible in our screenshots against the night sky — CLEAN’s value isn’t a flashy effect, it’s that the weather never comes.
- It only makes sense from level 11 up. Below that there’s no weather anyway.
- It’s most valuable at high levels where storms are frequent.
- It doesn’t block special modes. Even in a CLEAN round, the screen can go dark or the controls can flip.
Wall — 60 coins
A thick, crackling electric barrier rises on only one side of the screen, left or right (random). When the object touches that edge of the screen, it bounces back the other way.
- It’s reflected at twice the incoming speed, plus a tilt kick of 180° per second in the opposite direction. There’s a 0.4-second cooldown before it can hit again, and the fall check pauses for 0.3 seconds right after a bounce.
- The check uses the object’s position, not the hand’s. It saves you from falling toward the wall, but falling toward the side without a wall is still a failure.
- So check which side the wall is on, and pay extra attention to tilts toward the other side. Wall is an item that erases mistakes on one side only.


Speed — 60 coins

It sets the hand’s move speed to a target of 16. Rather than multiplying each hand’s own speed by the same factor, it brings every hand to the same speed — a real speed of 6.4 per second.
- Child Finger (4.8) becomes 1.3× faster, Man Finger (2.4) about 2.7×, and Stone Finger (1.2) more than 5×. Edge to edge takes about 0.9 seconds.
- The snow slowdown still applies on top. Afterimages trail the hand only while it’s moving.
- It helps most in rounds with a slow hand. On the flip side, being that fast means flailing around adds a lot of inertia, so short, chopped taps matter even more.
Turtle — 50 coins
For one round it holds the object’s sideways speed to 1.5 per second or less and its rotation speed to 80° per second or less. Think of it as a brake on how fast things can fall. Hand speed is unchanged.
- On screen you get purple ripples, a purple border and a purple aura around the object.
- The item’s description text in the code claims it removes the sway entirely, but the actual code works by setting a cap. It’s a brake, not invincibility — think of it as help worth exactly its bargain price.
- Level 10 and below — there’s no weather, so CLEAN is a waste. Revive or Stop3 are the safe picks.
- High levels with frequent lightning and storms — CLEAN gives the broadest protection. If special modes worry you more, Revive is the safer bet.
- Got a slow hand? Take Speed. If the round feels shaky right from the start, take Turtle.
- Every Retry consumes another item, so keep an eye on your stock when you’re making repeated attempts.
H Coins and the bonus coin round
The game has just one currency: H Coins. You spend them on items (50–100 coins), and there are three ways to earn them.
| How to earn | Amount | Notes |
|---|---|---|
| Bonus coin round | 1 coin = 2 | A 10-second coin shower every 10 levels |
| Today’s missions | 1 mission = 10 | +100 bonus for completing all nine |
| Watch Ad · +100 | 100 | The top-up button on the ITEM tab |
A bonus round every 10 levels
Clear level 10, 20, 30… and press NEXT, and instead of going straight to the next level, a bonus round opens first. In that case the item picker is pushed back until after the bonus (the items aren’t meant for the bonus round).




- Layout — the usual scene, the HUD and the bottom bar all disappear, and only a freshly drawn hand (no object) appears. Controls are the same: hold the left or right half. The hand is random here too, so fast Child Finger has the edge and slow Stone Finger is at a disadvantage (speeds use the same 0.4 conversion as usual).
- Coins — they pour down from above every 0.05–0.14 seconds. Bigger coins that look closer fall faster (fall speed 4.5–7, ×0.82–1.22 by depth), and each one differs in size, spin and brightness.
- Catching — any coin that comes within 0.45 of the fingertip is collected on contact (big coins have a slightly larger radius). Each catch pops up a N Coins counter.
- Timer — the time left is shown at the top centre, and from 4 seconds left a red border and vibration hurry you along.
- Reward — coins caught × 2 H Coins, plus coins caught × 100 points added straight to your total score. The result screen’s H Coins x N is the coins you earned this time (60 for 30 coins). Press START to go through the item picker and on to the next level.
- Zero coins plays a fail sound; one or more gets fireworks and a victory jingle.

- Coins that drop past fingertip height are lost. Go for the lowest coin first, chasing it with short, chopped taps.
- Rather than rushing to one edge, staying central and sweeping wide to both sides collects more. Coins only fall within the inner 90% of the screen width.
- Each coin is also worth 100 points, so it’s a big round for your score too. 30 coins means 3,000 points — several times level 1’s base score.
Unlocks, titles and daily missions
The ACHIEVE tab — your rank and unlocks

- MY RANK — shows your current trophy and the next one, along with the progress hint +1 step = every 10 levels. You go up one step for every 10 best levels.
- RANK LIST — fifteen trophies laid out four per row (ROOKIE → … → ETERNAL). The ones you haven’t earned yet are dimmed out.
- UNLOCK — shows the thirty-eight object slots in unlock order. Locked slots are grey with a LEVEL N tag.
- When you earn a new title, a TITLE UNLOCKED pop-up appears for 5 seconds after the clear.
Today’s missions — nine of them

The MISSION tab in the bottom bar posts nine medals every day. They’re shown as picture medals instead of text. Completed medals turn gold; the rest stay silver.
- Clear your first level today (LEVEL 1 CLEAR)
- Play 5 rounds today (clears and fails both count)
- Clear a level after reaching at least a 1-step Perfect Combo
- Clear a level after reaching at least a 5-step Perfect Combo
- Play 10 rounds today
- Clear 3 in a row
- Climb 10 or more levels today
- Clear 5 in a row
- Clear 3 rounds that had weather
- Each mission you complete pays 10 coins, and completing all nine pays +100 coins. Falling resets the “in a row” counter to 0.
- There are two claim buttons, Claim and Watch Ad · x2, and the missions refresh at midnight. When you have something completed, a red number appears on the MISSION icon in the bottom bar.
Clear, game over and continuing

Clear
- LEVEL N Clear! and your Final Score appear in the middle of the screen, with two buttons below: BRAG IT! (share) and NEXT. The bottom bar reappears at this point too.
- Press [NEXT] to go through the item picker and on to the next level. If the level you just beat was a multiple of 10, the bonus round comes first.
- Every clear auto-saves your level and total score, and your best level and best score are kept forever (a new game doesn’t erase them).
- When you’re online, a ranking line appears under your score — inside the top 50% you get You’re in the top N% and N pts to reach top M%; between 51 and 80% you get Ranking rise incoming!; and beyond 81%, N pts to next rank. The screenshots in this article were taken without a server connection, so it doesn’t appear here.
- BRAG IT! sends the text “Level N Cleared! Can you beat my record?” plus an image to the share sheet.
Game over
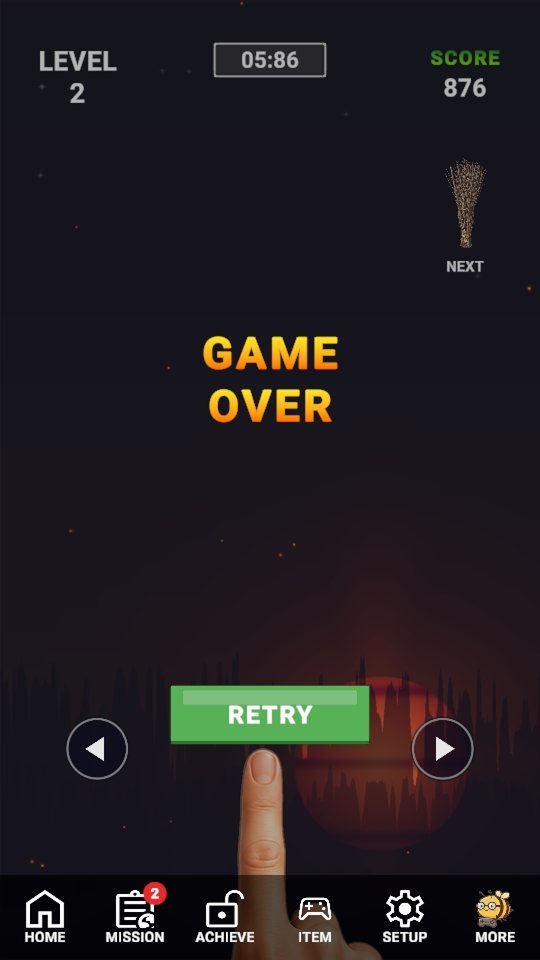
- 0.8 seconds after passing 75°, GAME OVER and a RETRY button appear. Pressing it restarts the same level — the object and hand are drawn again, but the level stays the same.
- When you press Retry, the failed round’s score goes back to that round’s starting score. The item picker opens right before the retry as well.
- There’s no paid or ad-based continue. The only way to undo a failure is the Revive item.
Continuing
When you reopen the app, the first screen is the continue screen. It shows the level after the last one you cleared, along with the score saved at that point; press START to go through the item picker and pick up from that level. Right after a fresh install, it shows LEVEL 1 · SCORE : 0.
Six things for first-time players
- Send the hand toward the lean. If the object leans right, hold the right half; if it leans left, hold the left half — and let go once you feel the hand is right under it.
- Use short, chopped taps. The inertia of a moving hand pushes the object the other way. Long holds make it easy to overshoot and tip it over the opposite side.
- Standing straight is where the points are. Just 0.8 seconds within ±5° earns 100 points, then 200, 300… — many times more than the base score.
- Red screen edges mean 26°. No time to enjoy the show — get your hand under the leaning side right away.
- Weather and special modes start at level 11. There are no warnings, so watch for the moment the screen changes. Keeping your hand near the middle is the safe play.
- Plan your items and coins. Collect coins in the bonus round every 10 levels, earn more from today’s missions, and keep a Revive or Stop3 in reserve. Items disappear 24 hours after you buy them.
Pro tips
- How it looks at the very end sets your base score. The base score multiplies the centre bonus “right now” by the whole duration, so it pays to have the object standing straight over the fingertip in the final second.
- Points from a round you didn’t clear vanish on Retry. Even if you racked up big combo points, only a clear protects them — so don’t gamble recklessly.
- With Stop3, the battle is the first “target − 3 s”. Falling before it triggers makes it useless. The higher the level and the longer the round, the longer that first stretch.
- Wall protects only one side. Fall toward the side without the wall and it’s still a failure.
- Special modes don’t announce themselves, so watch the first second. If the hand moves backwards, it’s Inverted Controls; if the object suddenly jolts, it’s Tumble or Wind Gust. For modes that only obscure the screen, trust the object’s tilt and hold on with short taps.
- Unlocks only require arrival. Just reaching level 5 opens Gini Finger and Metal Finger, and level 10 opens Robot and Stone.
FingerMaster supports 10 languages: English, Korean, Japanese, Chinese, German, French, Russian, Spanish, Portuguese and Turkish. Like the other games in the Master series, it’s built to be played one-handed, in quick bursts.
One finger, one balance.
What will you stand up today?

Play FingerMaster now
Playing it is much faster than reading about it.
Find the other Master Series games all in one place at hanilab.app.

More from this game
 FingerMaster Round Live Commentary Script: The 7 Seconds of Level 1
 Where does your FingerMaster score go after a fall? Retry, New Game and mercy rounds Q&A
 FingerMaster hazards with no warning: 9 of them, from lightning and ghost to earthquake and strobe
 FingerMaster weather and special modes — measuring the hazards that come with no warning
🌌 Universe stories
 Roddy Universe, Part 2 — Fallen Down, Only One Step Back at the Roadside
 Roddy Universe, Part 1 — One Beat Before Crossing, the Empty Road Between the Cars
 Bombi Universe, Part 2 — Behind You: The Reaper That Walks Through Walls
Try other games
 FindMaster
 LottoMaster
 TakMaster


