

BlockMaster Complete Guide — Controls, Targets, 12 Balls, 15 Materials and Special Blocks

Pull, release, bring it down.
In three shots
A tower of blocks on a pedestal. A slingshot below it. Pull the ball back, let go, and it flies at the tower. The goal is simple: knock enough of the tower off the pedestal within three shots. But towers are built from wood, stone, ice, rubber and clay, and there are twelve balls to choose from. Which ball, and where to hit — that is BlockMaster.

This is the complete BlockMaster guide. Controls and the screen layout, the target and stars, all 12 balls and 15 materials, special blocks, wind and stages, coins and “One more shot”, the bonus round and daily missions — everything in the game, in order. Every number was checked against the actual game code, and every photo and animation was captured from the real game.
- The rules — three shots and a target
- Controls — pull and release
- The screen
- Choosing balls — pick two, one is free
- All 12 balls
- 15 materials and matchups
- Special blocks and tower styles
- Wind, weather and 11 stages
- Stars, coins and score
- Failing, and “One more shot”
- Bonus round, shop and daily missions
- Five tips for your first shots
The rules — three shots and a target

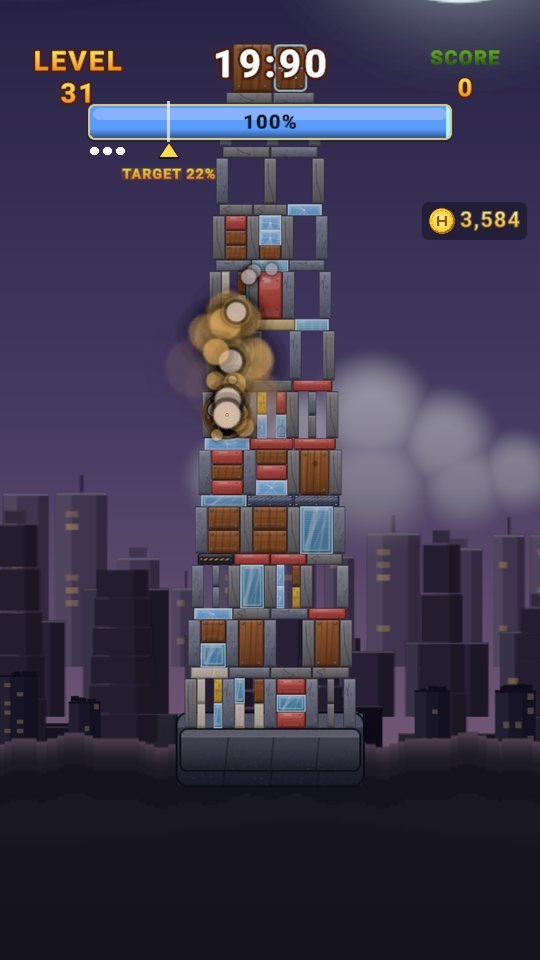
Each level is one tower. Levels never end, and as you climb, towers get taller (starting at 6 floors, up to 100), farther away, and built from more kinds of material.
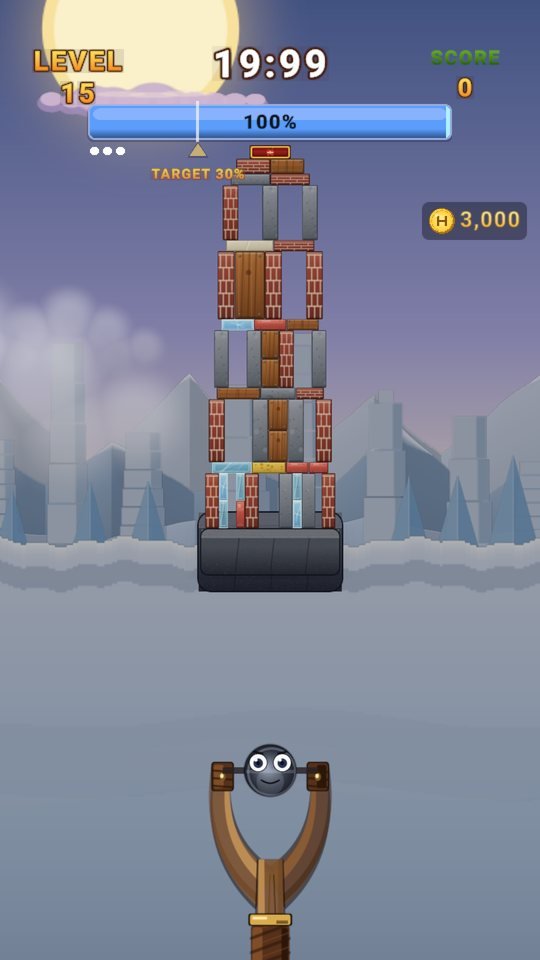
You get three balls per level. Every shot lowers the share of blocks still standing on the pedestal, and once that share drops below the target, you clear the level. The bar at the top of the screen is that “remaining” share, and the small triangle on the bar is the target.
Use all three shots without reaching the target and you fail. A failed level is rebuilt as the exact same tower, so you can take another crack at the same puzzle.
Every tower gets its own target
The target is not a fixed number — the game solves the tower in advance and sets it from that. The baseline rises from 60% to 92% knocked down between level 1 and level 40; it is then trimmed to what is actually achievable on that tower and rounded to steps of 5% (towers that could not be pre-solved use the table value, 65% → 82%). The first five levels get a floor so a single shot can’t end them: 75% for levels 1–2 and 80% for levels 3–5. The screen shows the “remaining” side, so level 1 reads TARGET 25% (25% or fewer blocks left).
Fail three times in a row and the game eases off: the target drops 6 percentage points per step (up to three steps) and you get 4 extra seconds to aim per step.
Controls — pull and release


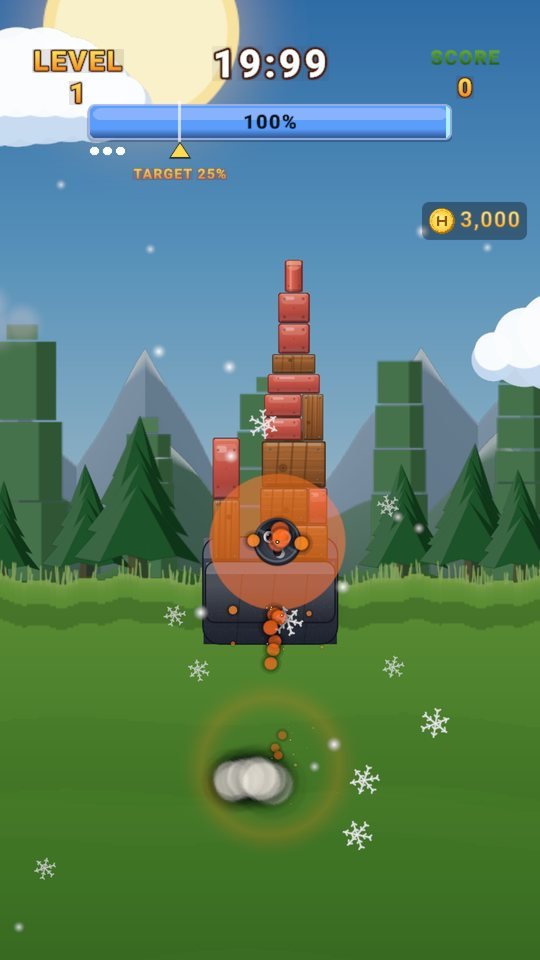
- Pull — touch the lower part of the screen (below 46% of its height) and drag. The ball flies opposite to the direction you pull, and the further you pull, the harder it goes. The angle ranges from 20° to 160°, and you need to pull at least 10% to fire. Pulling all the way gives you finer aim.
- Release — lift your finger to fire.
- Look up — drag the upper part of the screen and the camera pans up toward the top of the tower.
- 20 seconds to aim — when the clock at the top runs out, the ball fires automatically exactly as aimed. The clock only runs while you are aiming.
Level 1 shows Drag down and release to fire, and level 3 shows Break the base and the top comes down along with a weak-point marker.

The screen

- Top center — remaining bar: starts at 100%. The triangle on the bar is the TARGET. While you’re short it goes blue → yellow; once you pass the target it turns green, lime and gold (1, 2 and 3 stars). The screen here shows one shot bringing it down to 21%, past the 25% target — the bar turns green, 2 shots spared +60 appears under it, and the result reads LEVEL 1 Clear!.
- Three dots above the bar — shots left.
- Top — aim clock, level and score.
- Right — H coins, the scope and the wind flag.
- Bottom — the slingshot and two rows of ball cards.
If your ball doesn’t work on a block, No effect pops up where it hit; if it only barely works, you get Weak!. Treat it as a hint for your next pick.
Choosing balls — pick two, one is free
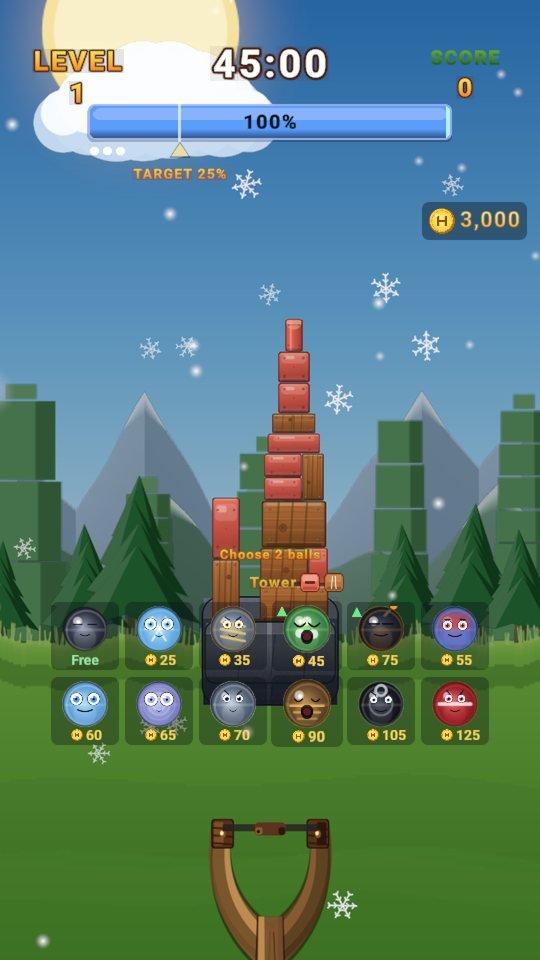

- At the start of a level you see Choose 2 balls. Pick two of the balls you own, and the always-free Steel ball joins as the third.
- A ball is used up only when you fire it. Picking it without shooting costs nothing. You can hold up to 3 of each type.
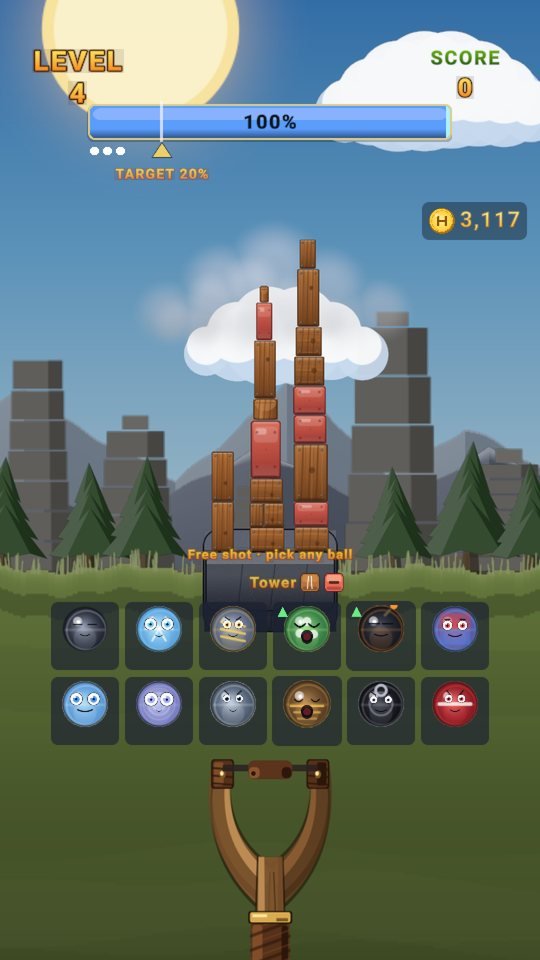
- Before every shot you see Choose a ball to fire. The Tower row above the ball cards shows which materials this tower is made of.
- Tap an empty card to buy that ball with coins on the spot. Locked cards show the level they unlock at (Lv N).
All 12 balls
The descriptions are the in-game text, word for word. “Strong against” is the material each ball beats best in the game’s matchup table.
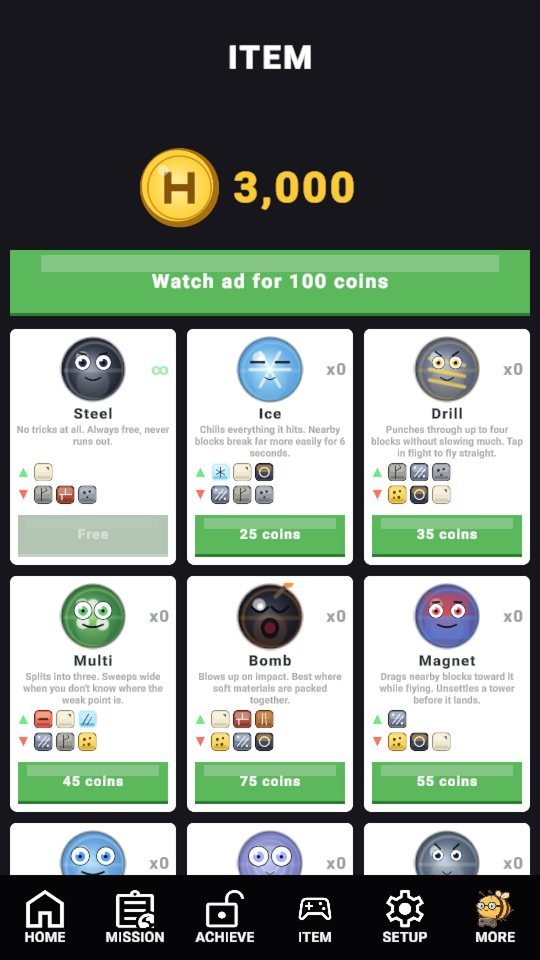
| Ball | Price | Unlock | In-game description | Strong against |
|---|---|---|---|---|
 Steel | Free | 1 | No tricks at all. Always free, never runs out. | — |
 Ice | 25 | 3 | Chills everything it hits. Nearby blocks break far more easily for 6 seconds. | Ice · Rubber |
 Drill | 35 | 6 | Punches through up to four blocks without slowing much. | Concrete |
 Multi | 45 | 10 | Splits into three. Sweeps wide when you don’t know where the weak point is. | Plastic |
| Bomb | 75 | 14 | Blows up on impact. Best where soft materials are packed together. | Wood · Bomb blocks |
 Magnet | 55 | 19 | Drags nearby blocks toward it while flying. Unsettles a tower before it lands. | Iron |
| Sonic | 60 | 21 | Shakes wide instead of striking. The only answer to sand, and it shatters tempered glass. | Sand · Tempered glass |
 Ghost | 65 | 24 | Slips through the first two blocks unharmed and strikes deep inside the tower. | Glass |
| Blade | 70 | 27 | Cuts a thin line. Clay is soft, not hard – only a blade gets through it. | Clay |
 Quake | 90 | 30 | Lifts the whole pedestal at once. For towers with a solid base. | Stone |
 Wrecker | 105 | 36 | Very heavy and never bounces. Ploughs through and pushes one way. | Brick |
 Laser | 125 | 42 | Burns a straight line through everything in its path. | Paper · Rubber |





The Steel ball gets weaker
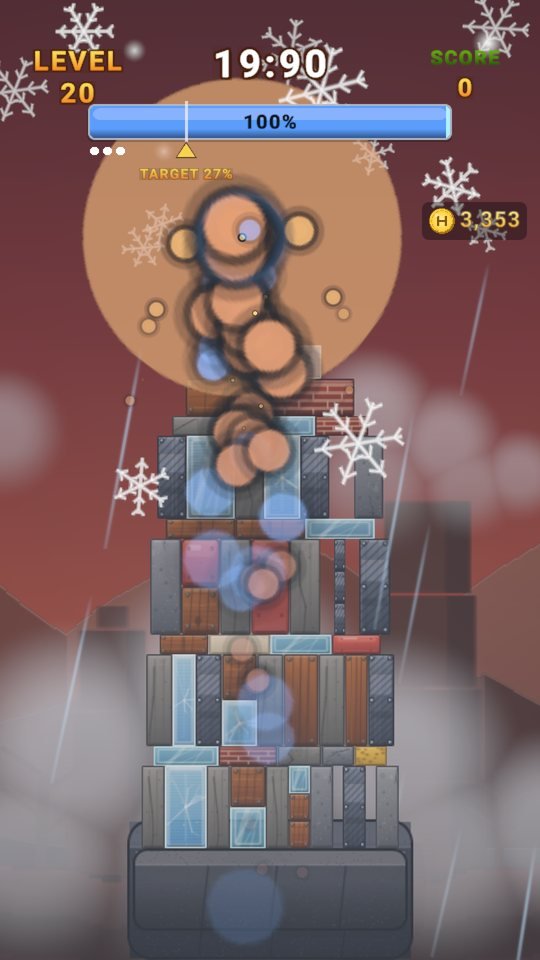
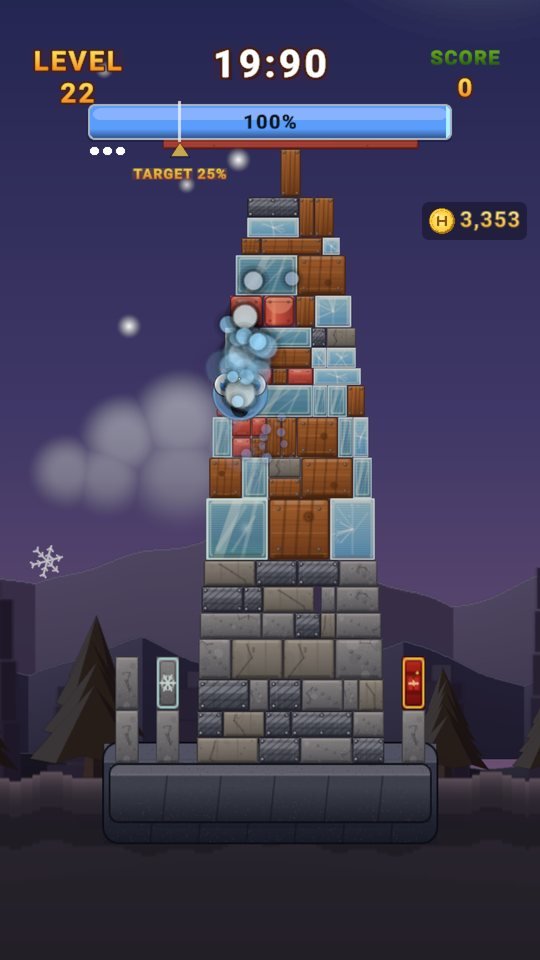
The free Steel ball loses power as you level up: 100% on levels 1–5, 90% on 6–9, 72% on 10–14, 55% on 15–20, and 40% from level 21 on. Each time it drops you see Steel ball weakened · Power N%, and its card shows Power N%. Level 6 tells you The steel ball can’t break brick or stone, and level 8 Hard blocks? Try the Drill ball — from here on, the game is about buying balls that match the materials.
15 materials and matchups
 Wood
 Plastic
 Brick
 Glass
 Paper
 Stone
 Ice
 Sponge
 Concrete
 Iron
 Rubber
 Bomb
Add sand, clay and tempered glass to these twelve and you have all 15.
| Levels | New materials mixed in |
|---|---|
| 1–5 | Wood and plastic only |
| 6–10 | Brick · Glass · Paper · Stone |
| –16 | Ice · Sponge |
| 17–26 | Concrete · Iron |
| 27–36 | Rubber · Sand · Tempered glass |
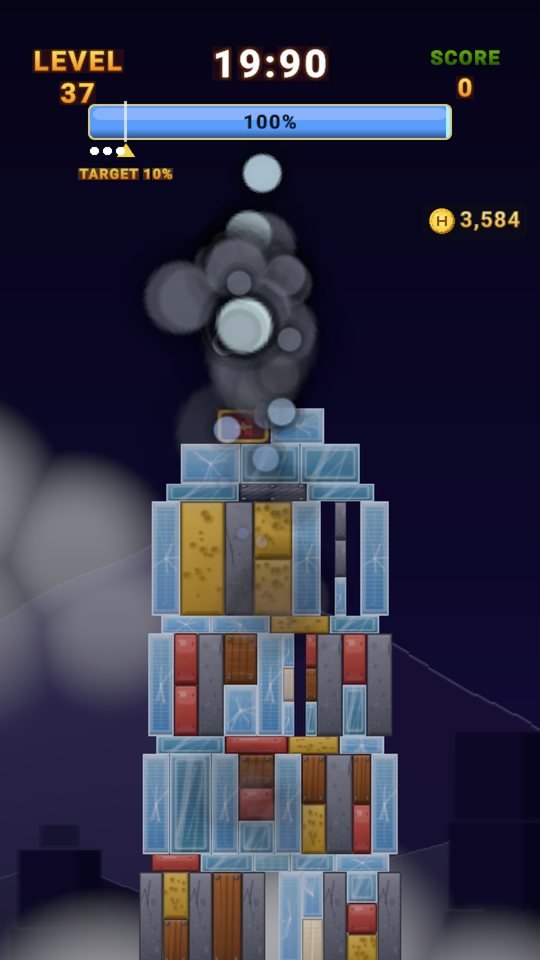
| 37+ | Clay |
Every material has a ball that works best on it (the right-hand column of the table in Chapter 5). Three are worth memorizing:
- Sponge — no ball does more than half its usual damage. In practice it won’t break. Don’t try to break sponge: hit below or beside it.
- Sand — the Sonic ball is “the only answer”.
- Clay — it doesn’t break because it’s soft, not because it’s hard. Only the cutting Blade ball works.
Special blocks and tower styles
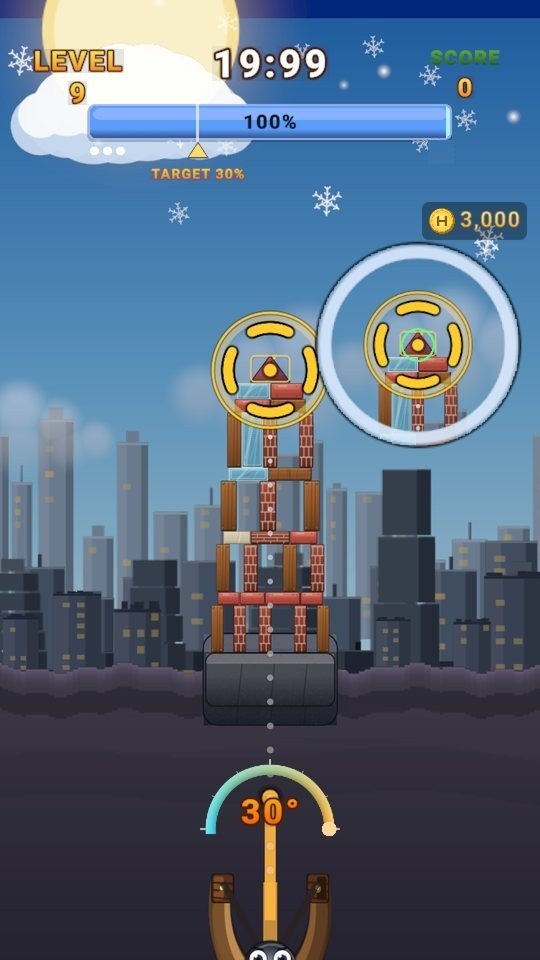
From level 7, special blocks start appearing inside towers. Break one and its device goes off. Not all of them are a “one-hit win”, though — hitting the freezer or the iron weight on its own does nothing. Their job is to block the easy one-shot route.
| Levels | New block | What it does |
|---|---|---|
| 7+ | TNT | Blows up bigger than the Bomb ball (radius 3.6) |
| 7+ | Spring | Doesn’t break anything — it pushes the blocks around it away (3.0) |
| 12+ | Iron weight | Hitting it does nothing — it works by its weight when it falls. Remove whatever holds it up |
| 20+ | Freezer | Freezes its surroundings (3.2) — freeze first, then hit |
| 28+ | Domino | Spreads far sideways (6.4) — the only device that works horizontally |
| 36+ | Sandbag | Makes the floor around it slippery (4.0) |
| 46+ | Magnet core | Yanks out nearby metal (4.2) |

9 tower styles
Every tower is built fresh, in one of nine styles: temple, arcade, fort, pagoda, spire, hall, aqueduct, chimney and lattice tower. From level 17 a theme is added — masonry, steel frame, glass, timber and so on — and from level 30 cushioned, quarry and modern join them. The higher you go, the fewer “right answers” there are: up to level 5 there are more than 8 ways to solve a tower, but from level 31 that narrows to one or two, and the angle window shrinks too (though never below 1.5°).
Wind, weather and 11 stages

Wind
The flag on the right shows Wind N.N m/s. Wind pushes the ball.
- Levels 1–4 — calm
- Levels 5–19 — gusts (the strength rises and falls), up to 2–3.5 m/s. Wind pushes the ball – read the flag and aim off
- Levels 20–34 — the direction changes. Wind can change direction – check the flag before you shoot
- Level 35+ — up to 6 m/s
Rain and freeze
On levels with rain or snow, the tower behaves differently — Rain – the tower is slick. Push, don’t break, Freeze – the tower is brittle.
11 stages
The stages are meadow, forest, desert, glacier, city, ruins, cliff, construction site, volcano, factory and space. You won’t see the same stage twice until you’ve been through all eleven. Time moves 2.2 hours per level, starting at 8 a.m. and running through sunset, night and dawn. Space is always at night, and the volcano never has daytime.



Stars, coins and score

Stars — how far past the target, how many shots saved
Reach the target for ★, knock down 10 percentage points more than the target for ★★, and 20 points more for ★★★. Stars are also capped by shots left over: clear with two or more shots to spare and you can get up to ★★★, with one to spare up to ★★, and using all three gives a single ★. Clearing with a shot earned from an ad or coins always gives one ★.
Coins — the better the clear, the more you get
A cleared level pays 50 + 50 × how far past the target + 30 per shot left over in H coins. Unused shots are shown separately next to the balls you didn’t fire, as 2 shots spared +60. A failed level pays nothing.
Score
Blocks knocked down × 12, multiplied by how far past the target you went and by the chain multiplier; then +250 for ★★, +700 for ★★★, and 20 points per second of aim time left. The result screen also shows BEST CHAIN xN — the number of groups that came down together.
Failing, and “One more shot”

- If three shots aren’t enough, you get GAME OVER along with N% short of the goal.
- [AD] One more shot — watch an ad for a fourth shot.
- [H] One more shot — the price depends on the level, from 120 up to 350 H coins (120 at level 1, 240 at level 30, 350 from level 58).
- Take the extra shot and you see Free shot · pick any ball — you can pick any of the twelve balls, whether you own it or not, and it isn’t used up. A level cleared this way gives no spare-shot bonus and only one star.
- RETRY — start over on the same tower.
Bonus round, shop and daily missions


- Bonus Round — 10 seconds, every five levels. (Tap the falling blocks) — 1 coin per block, 5 coins per ball. When it ends, choose Claim or Watch ad for 2x.
- Shop — the ITEM page on the bottom bar. There are no separate items; it sells balls only. Watch ad for 100 coins works up to 10 times a day.
- TODAY’s MISSION — nine missions every day, 20 coins each (doubled with an ad).
Five tips for your first shots
- Hit low. Hit the top and only the top falls; cut the base and everything above comes down with it.
- Check the “Tower” row. One ball that matches the material beats three Steel shots.
- A spare shot is money. 30 coins for every shot left over — and it’s what ★★★ requires.
- Read the wind flag right before you shoot. From level 20 the direction changes.
- Work around sponge. Don’t try to break what won’t break — push it off the pedestal.
Three shots.
How many floors will you bring down today?

Play BlockMaster now
Playing it is much faster than reading about it.
Find the other Master Series games all in one place at hanilab.app.
More from this game
 BlockMaster Ball Shop Script: The Steel Ball Is Free, the Laser Takes Three Rounds
 BlockMaster Distance — From 10 m to 52 m, How to Shoot a Tower That Keeps Moving Away
 BlockMaster Scope Colors — Green, Yellow, Orange, Red: Reading the Verdict Before You Fire
 BlockMaster Weak Point — Aim Low, Not High: The Physics of a Collapsing Tower
🌌 Universe stories
 Roddy Universe, Part 2 — Fallen Down, Only One Step Back at the Roadside
 Roddy Universe, Part 1 — One Beat Before Crossing, the Empty Road Between the Cars
 Bombi Universe, Part 2 — Behind You: The Reaper That Walks Through Walls
Try other games
 FanMaster
 BurstMaster
 WingMaster

